Table of Contents
Scan To Slot Via Repository Usage Map
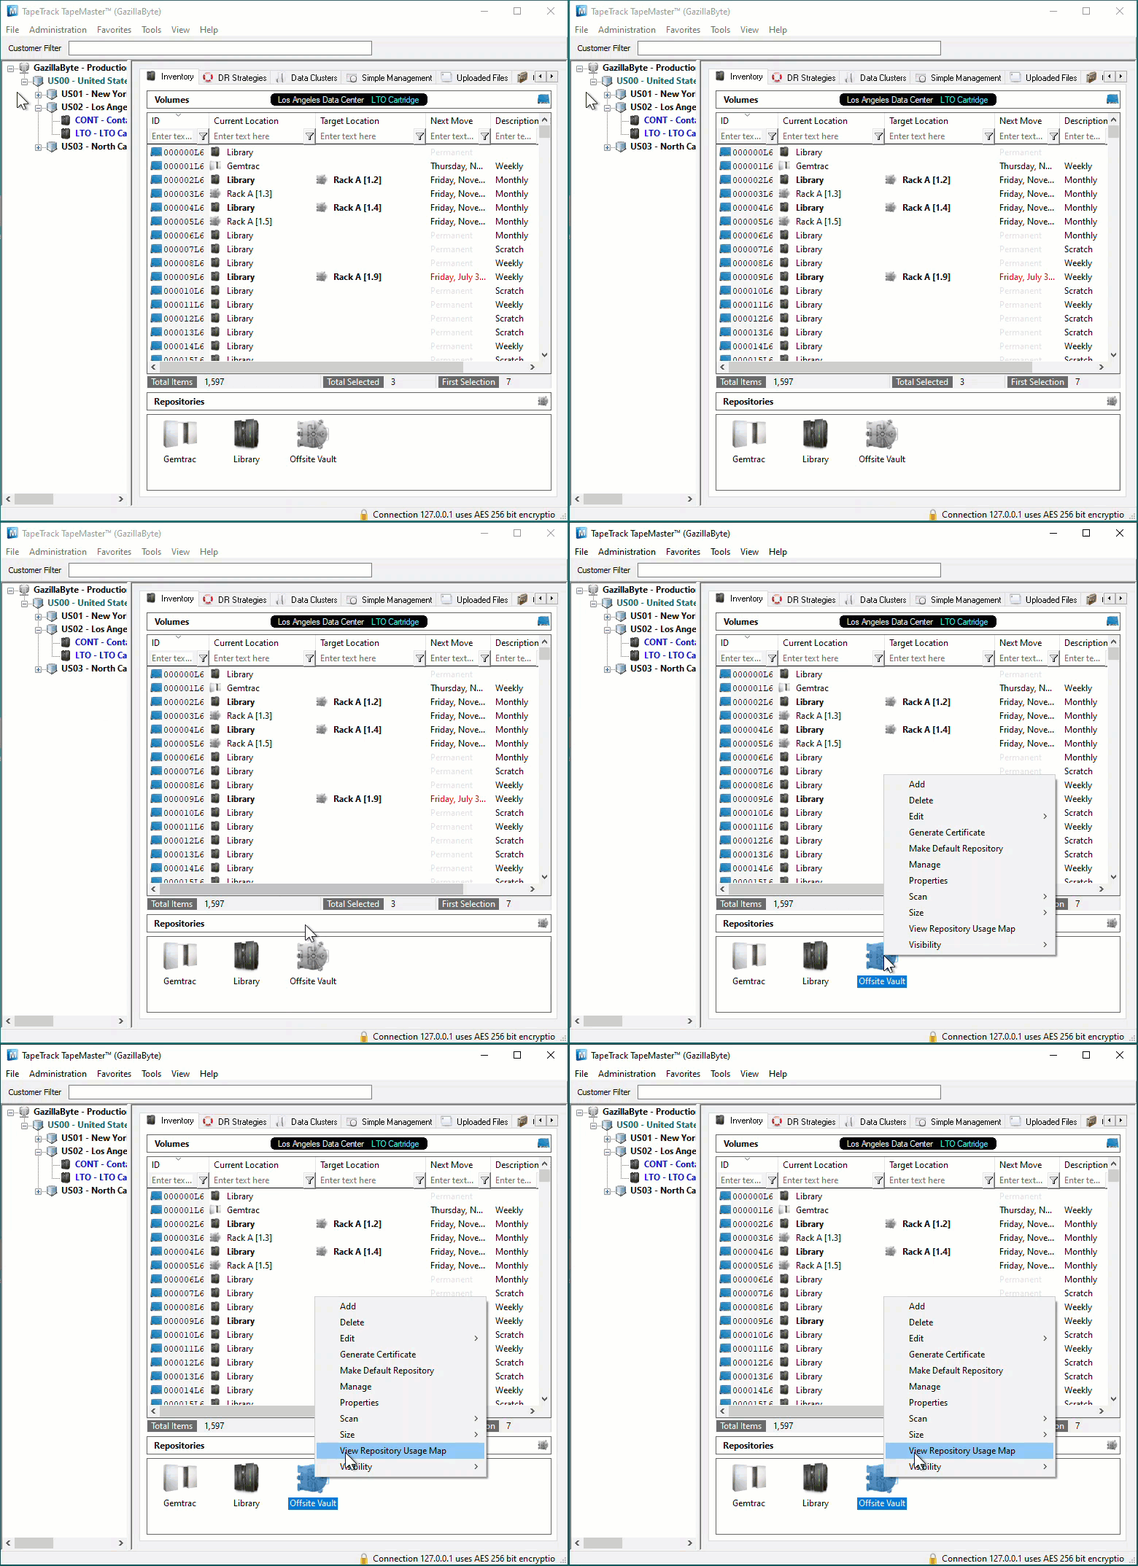
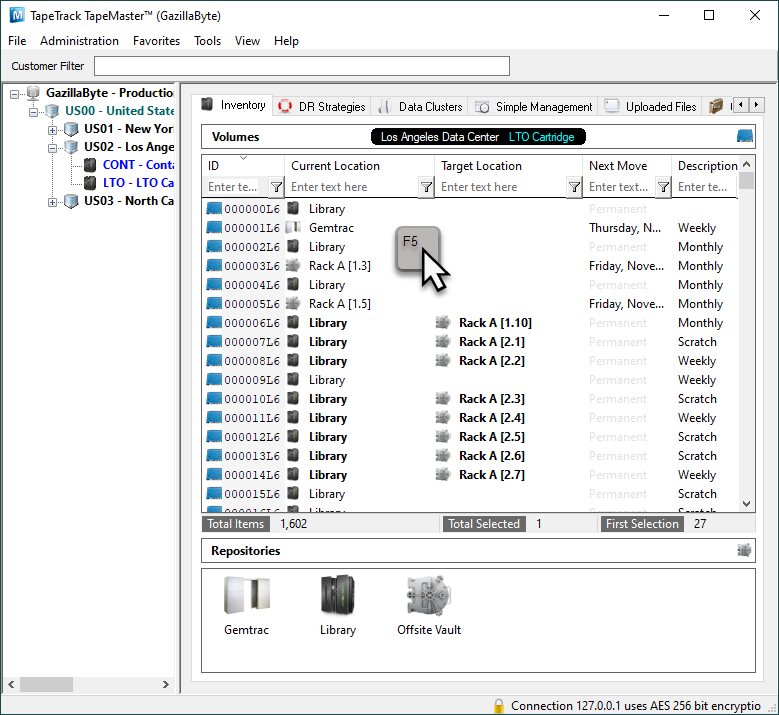
From the Inventory window of your required Customer and Media Type right click the Repository you want to Slot the Volumes in and select View Repository Usage Map.
Slot Selection
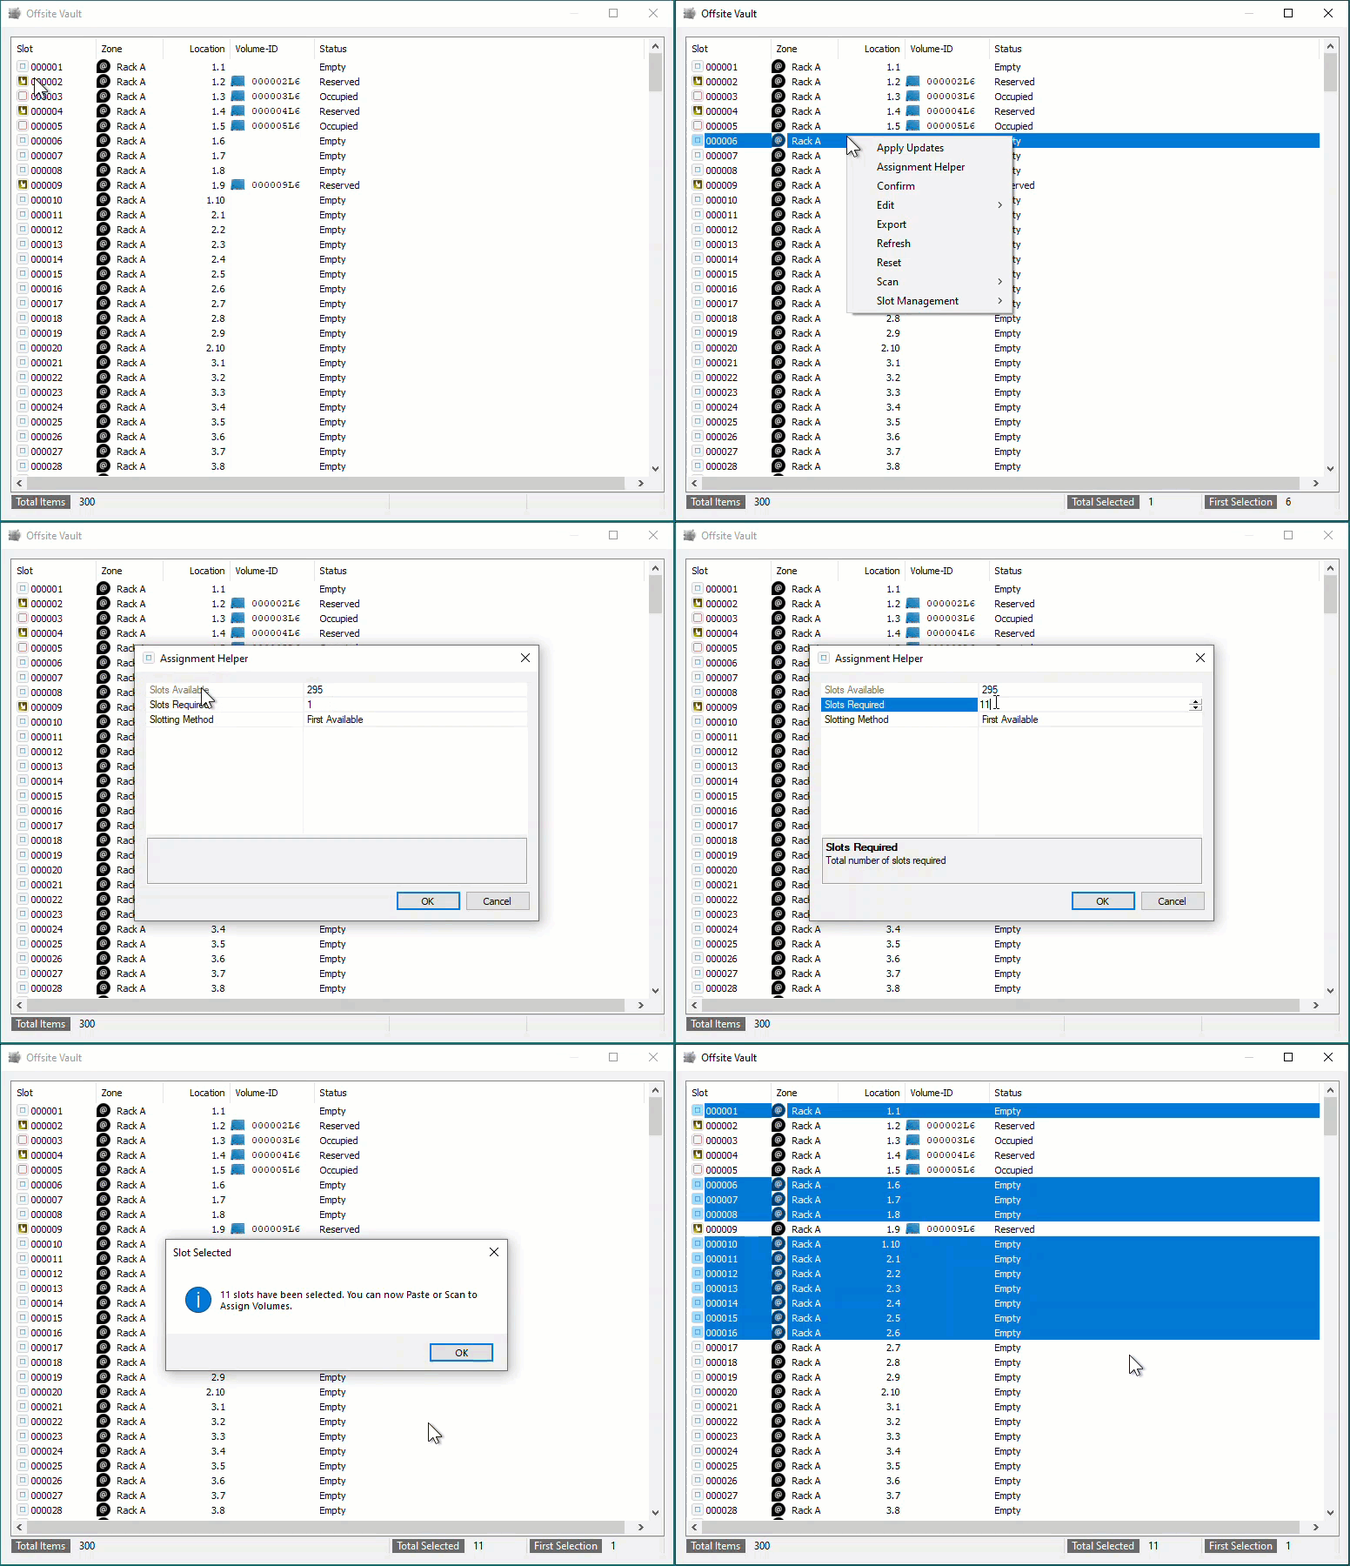
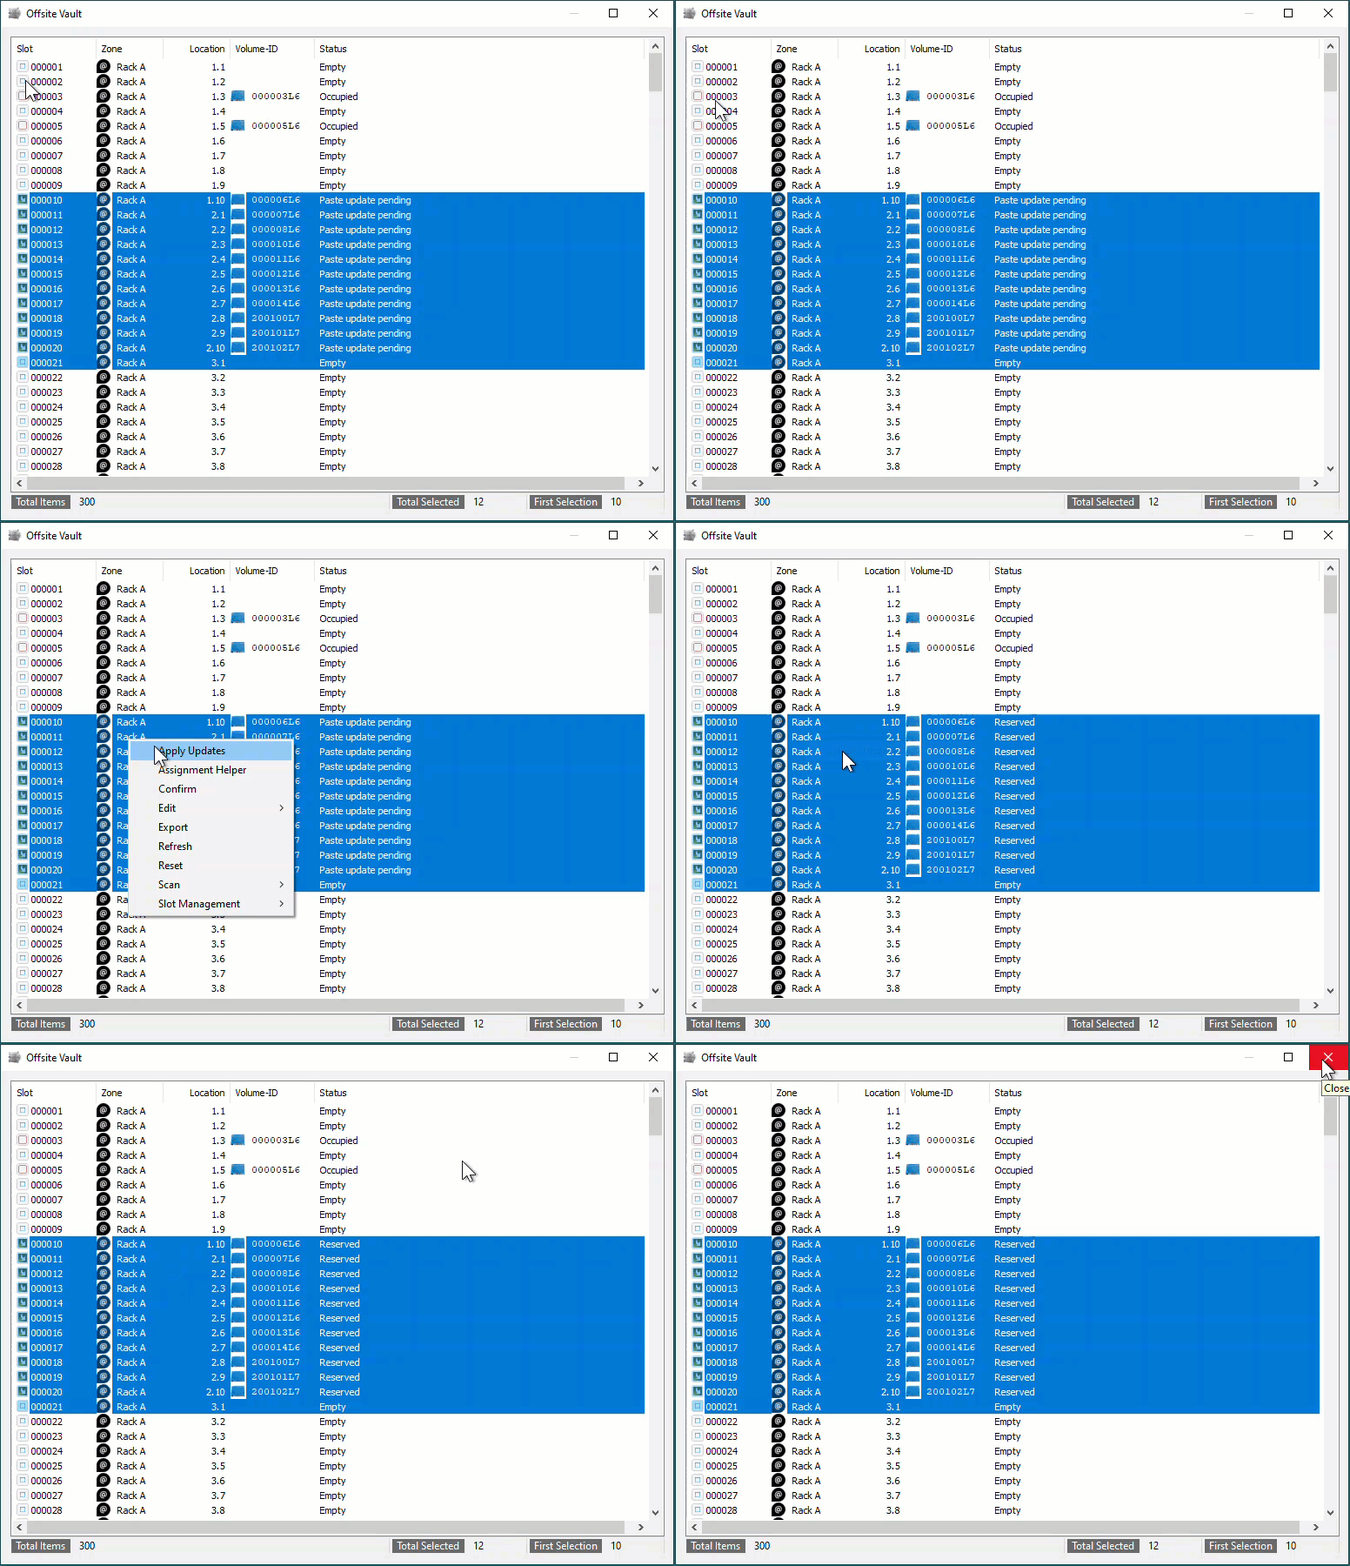
The Slot Allocation window displays Slot numbers, Zones, Slot Location, Volume-ID if Slot is allocated and Slot status - Empty, Reserved (Allocated, Volume in a move to Slot) and Occupied (Volume in Slot).
From the Slot Allocation window you can either manually select the Slots required or use the Assignment Helper function
To manually select the required Slots, Shift+Click to select a range of Empty Slots or Ctrl+Click to select non adjacent multiple Empty Slots .
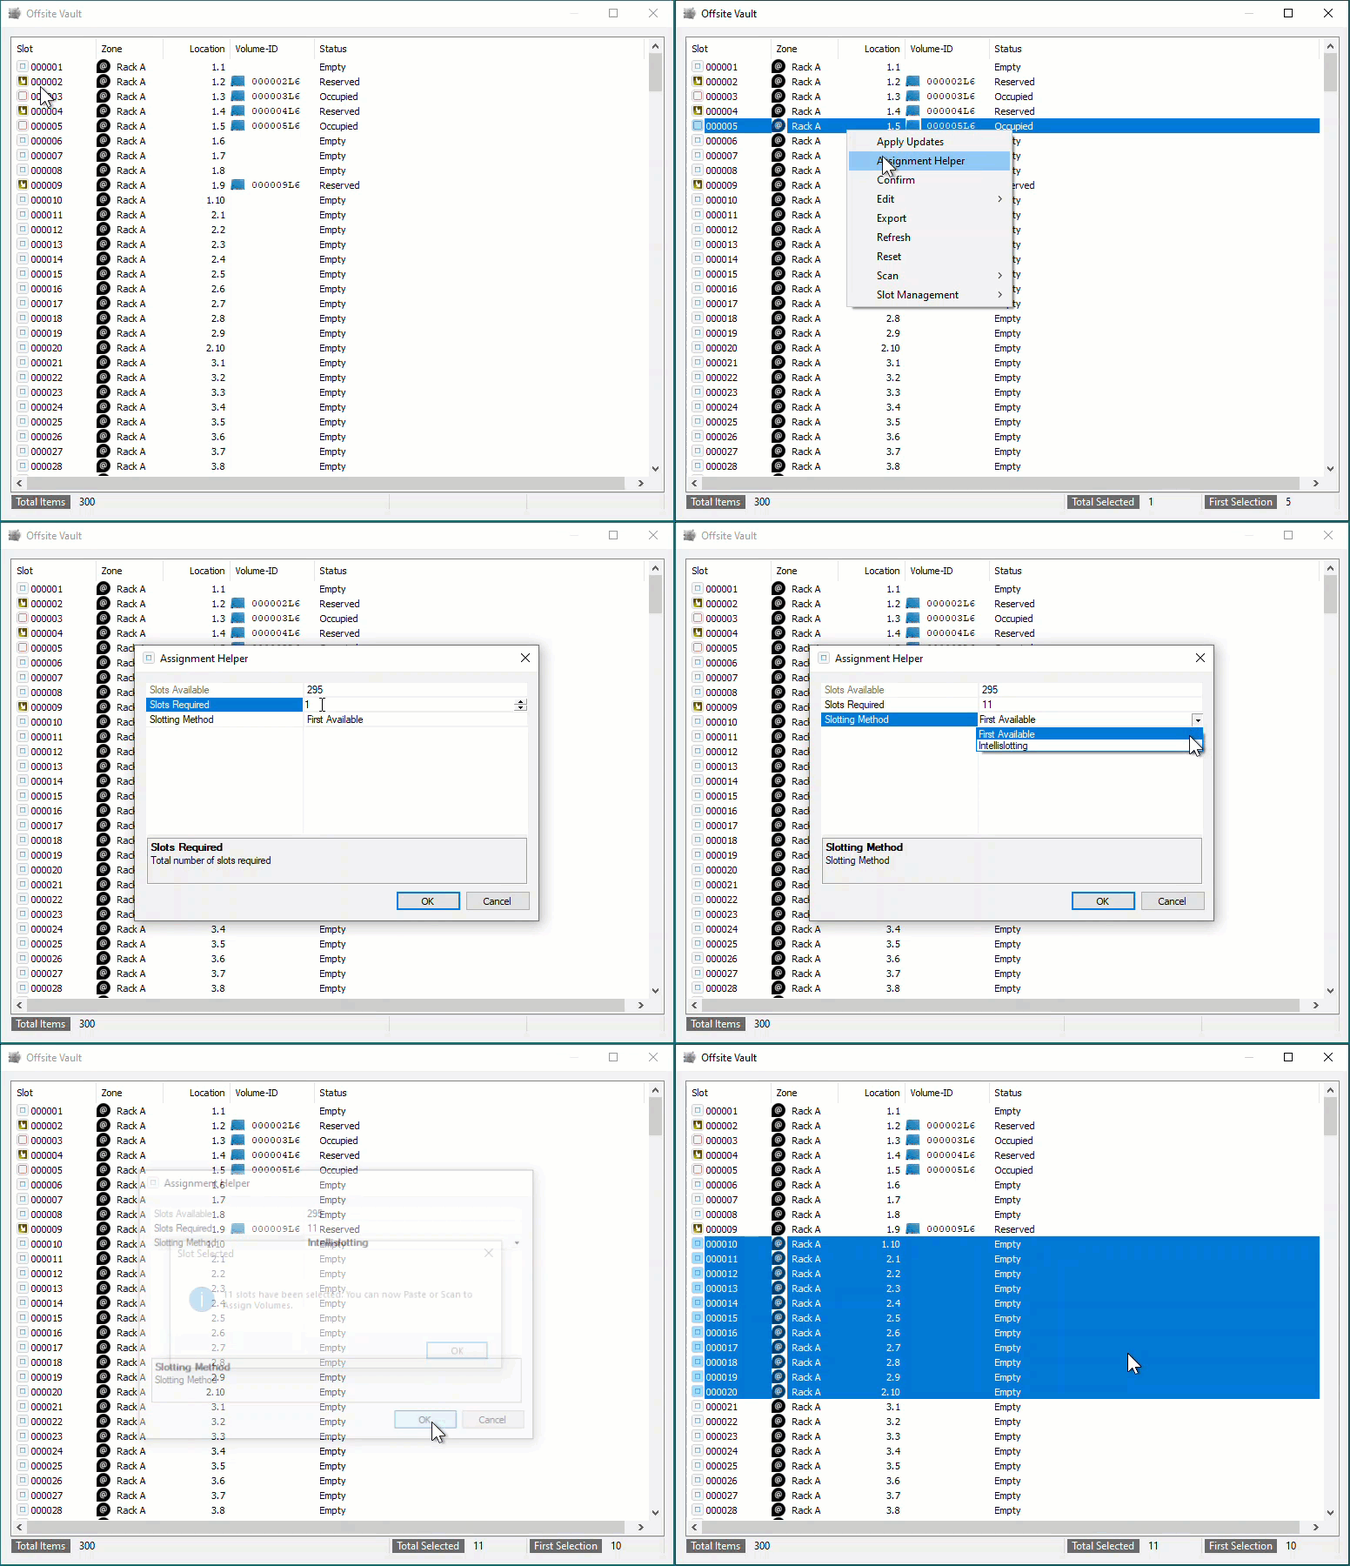
To use the Assignment Helper to allocate the vacant Slots for you, right click in the Slot window and select Assignment Helper.
In the field Slots Required set the number of Slots required to match the number of Volumes to be Slotted. Set the Slotting Method to suit the required outcome.
First Available will start with the first empty Slot available and then the next empty Slot until the required number are selected.
Intellislot will first attempt to find a range of Slots large enough to fit the Volumes in sequential Slots and, if a range can't be found, will then select other empty Slots to accommodate the required numbers.
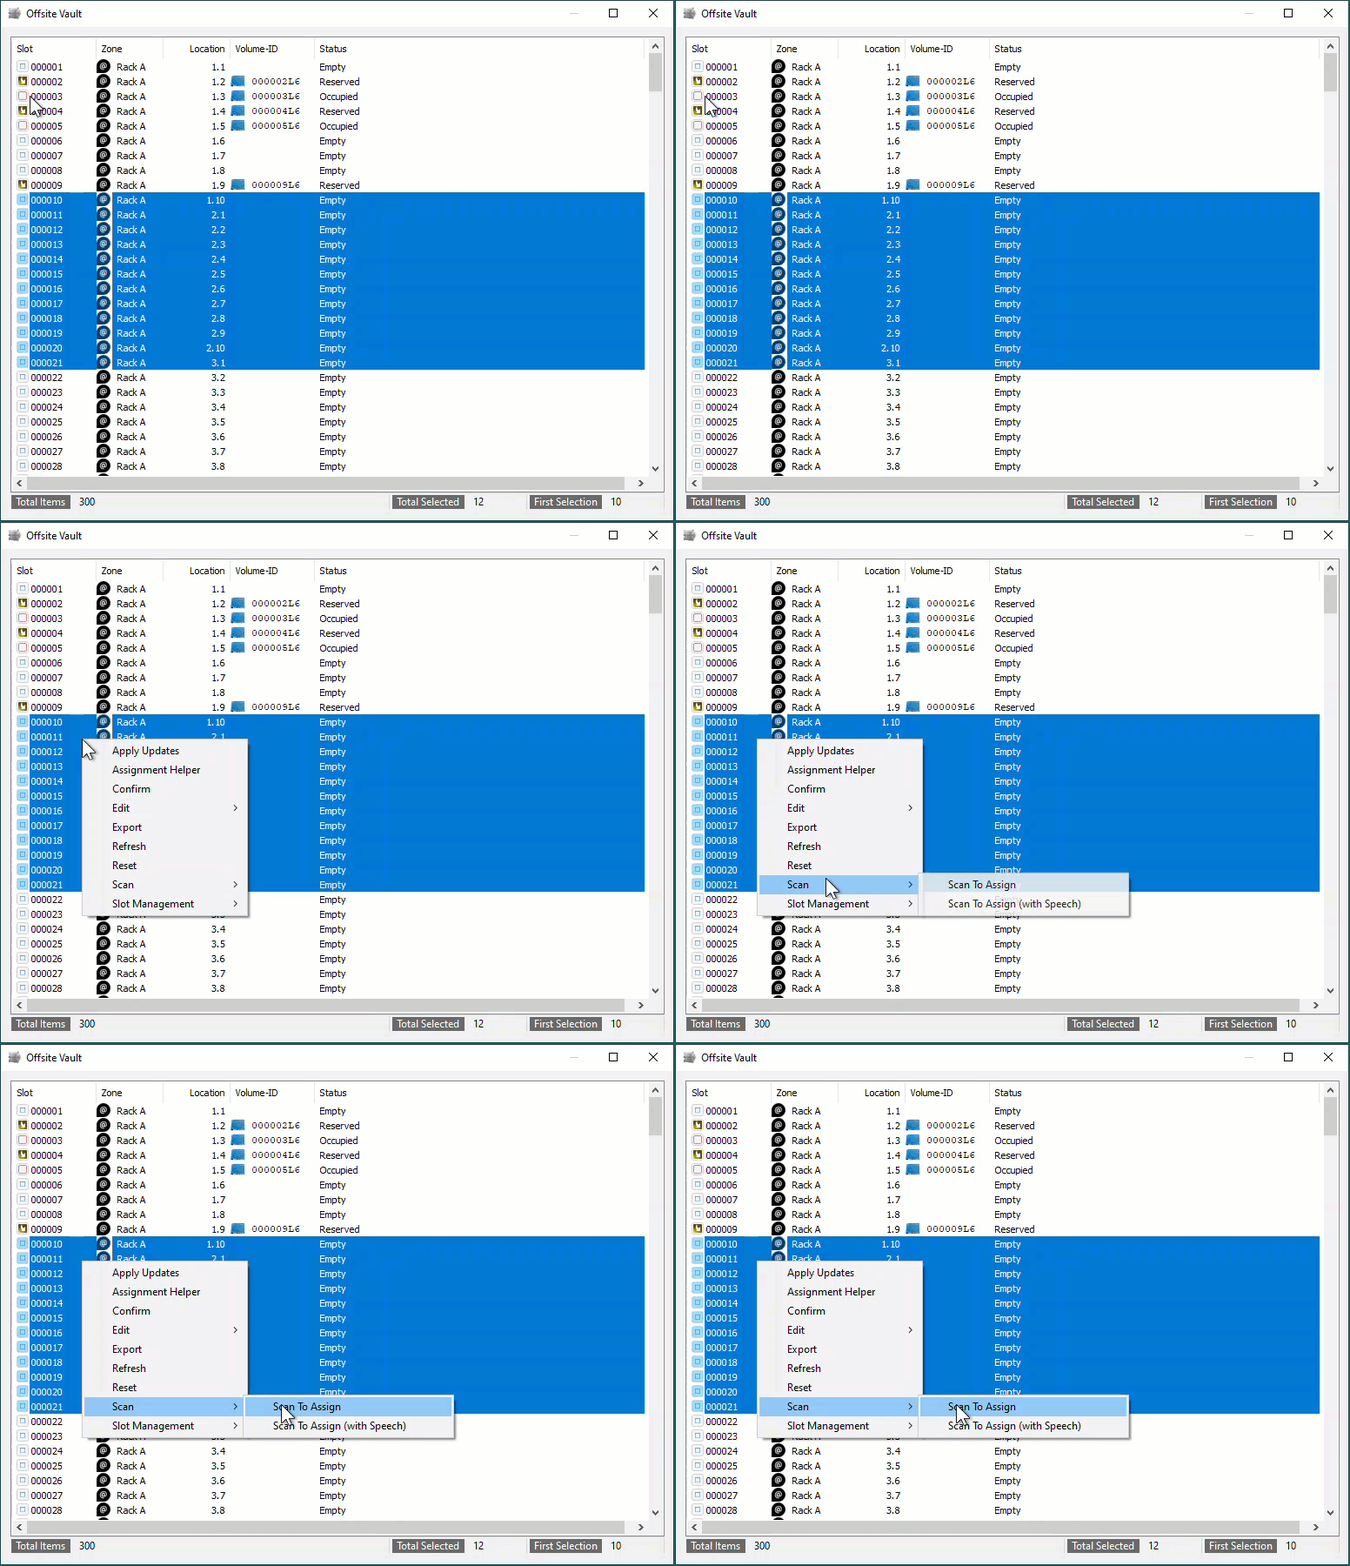
Once you have the Empty Slots selected, right click on the highlighted Slots and select Scan > Scan to Assign to open the Scan window.
Scanning Volumes
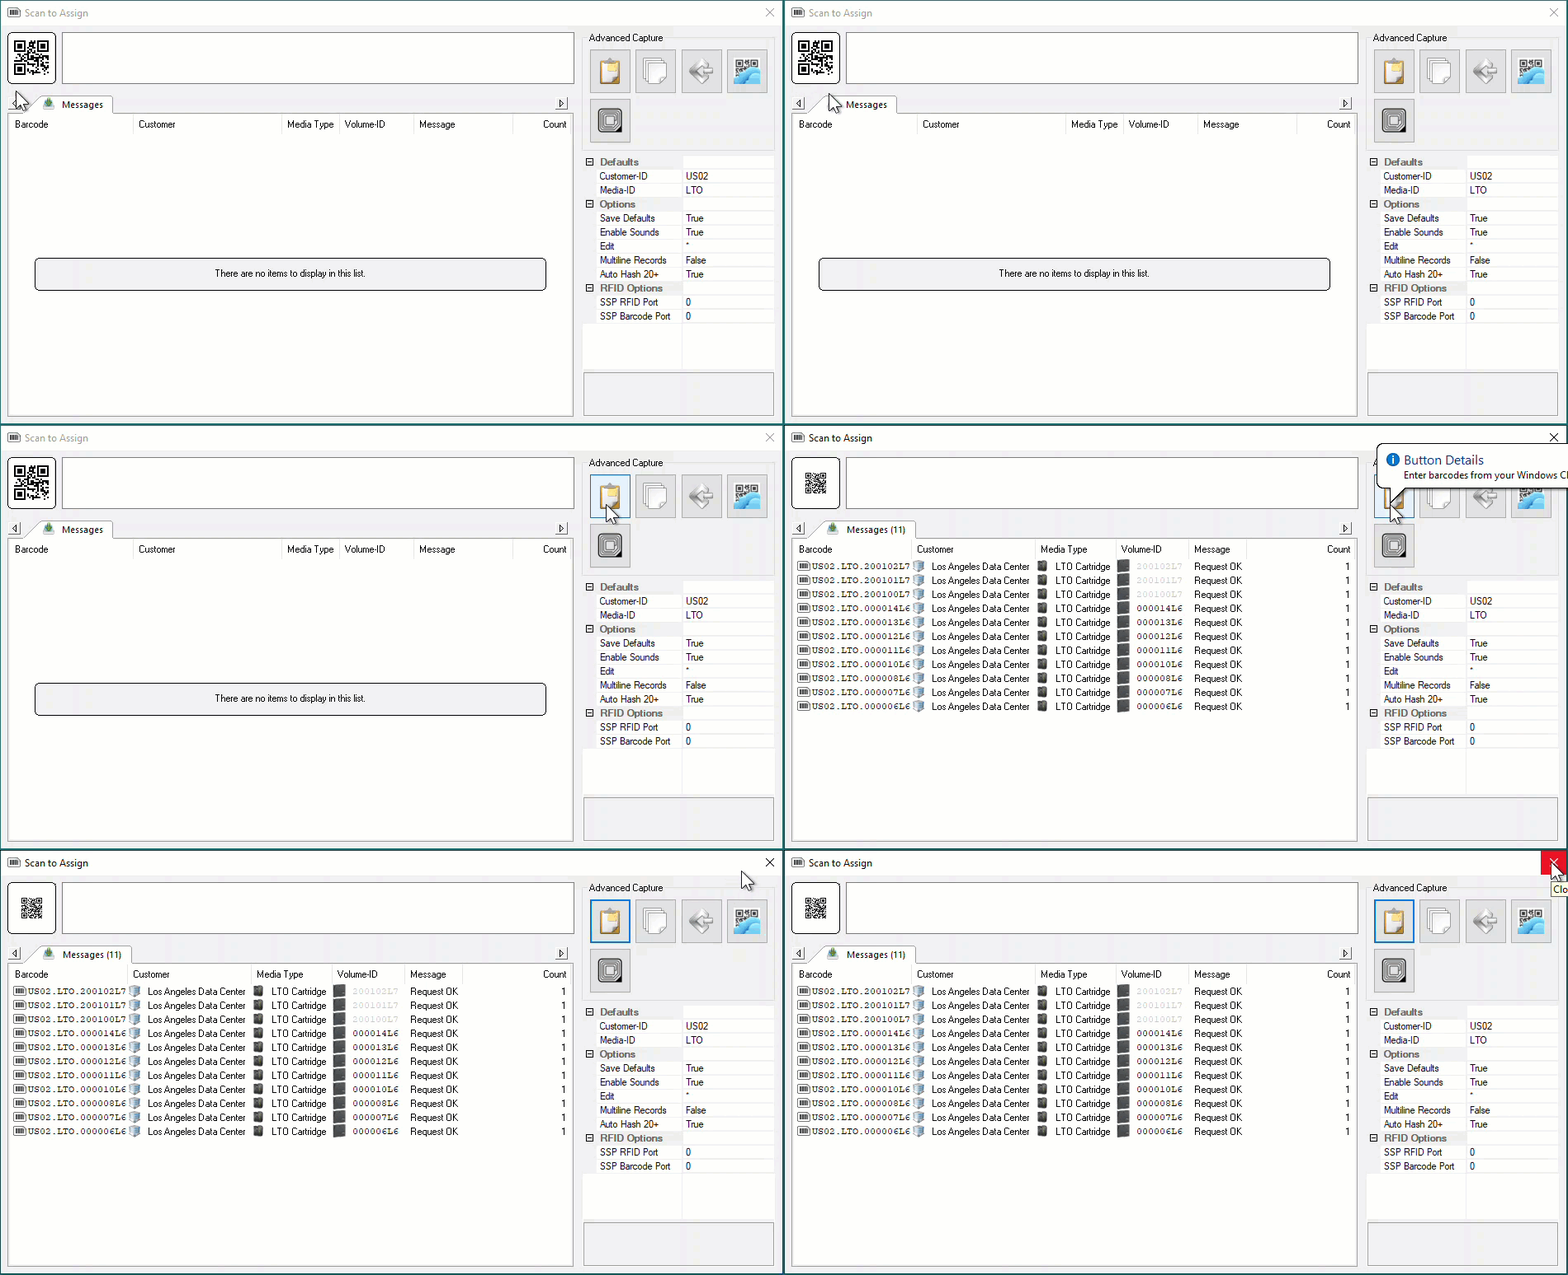
In the Scan window, scan the Volumes, using your preferred scanning method (Keyboard, Scanner, Clipboard, Input File). In this example we will use Volume-ID's copied to Windows Clipboard. When finished scanning, click the X at the top right to close the Scan window.
If you selected the exact number of Slots required, or if you under selected, you will receive a popup stating No Remaining Slots to inform you have no more vacant Slots selected. If you need more Slots close the Scan window, select more Slots and then right click and select Scan > Scan to Assign to re-open the Scan window.
Scanned Volumes will show with a black font for current Inventory and greyed out font if they are new Volume-ID's (ie. don't currently exist in TapeTrack. New Volume-ID's will be added to your default Repository and placed into a move to the Repository, Zone and selected Slot. Volumes in another Repository will be placed in a move from their Current location to the Repository, Zone and selected Slot. Volumes in the selected Repository for Slotting will be left in the Current location but will be placed in a move to the Zone and selected Slot.
Confirm Slot Allocation
In the Slot Allocation window you will now see the Volume-ID's against the assigned Slot numbers with a status of Paste Update Pending. To commit the data, right click on the highlighted Slots and select Apply Updates to confirm the new Slot allocations. The status of the Volumes will now display Reserved.
Close the Slot Allocation window by clicking the X at the top right.
