Table of Contents
Adding New Volumes In Lite
Adding new Volumes to TapeTrack using Lite can be achieved using one of two methods depending on the outcome required.
Prerequisites
To add new Volumes you will need to have, at the minimum, read/write/alter access associated with your User-ID.
If you don't know if you have alter access rights you can check with your TapeTrack Administrator or continue with the process to add the new Volumes and check the results. If you do have alter rights, the Volumes will be added successfully, if you don't you will receive an error stating Security does not allow this operation.
If you find you don't have alter rights, you will need to contact your TapeTrack administrator to either upgrade your access credentials or have them add the new Volumes for you.
If you would like assistance in providing the required information to your TapeTrack administrator (or Vaulting Service) please contact us via the Helpdesk.
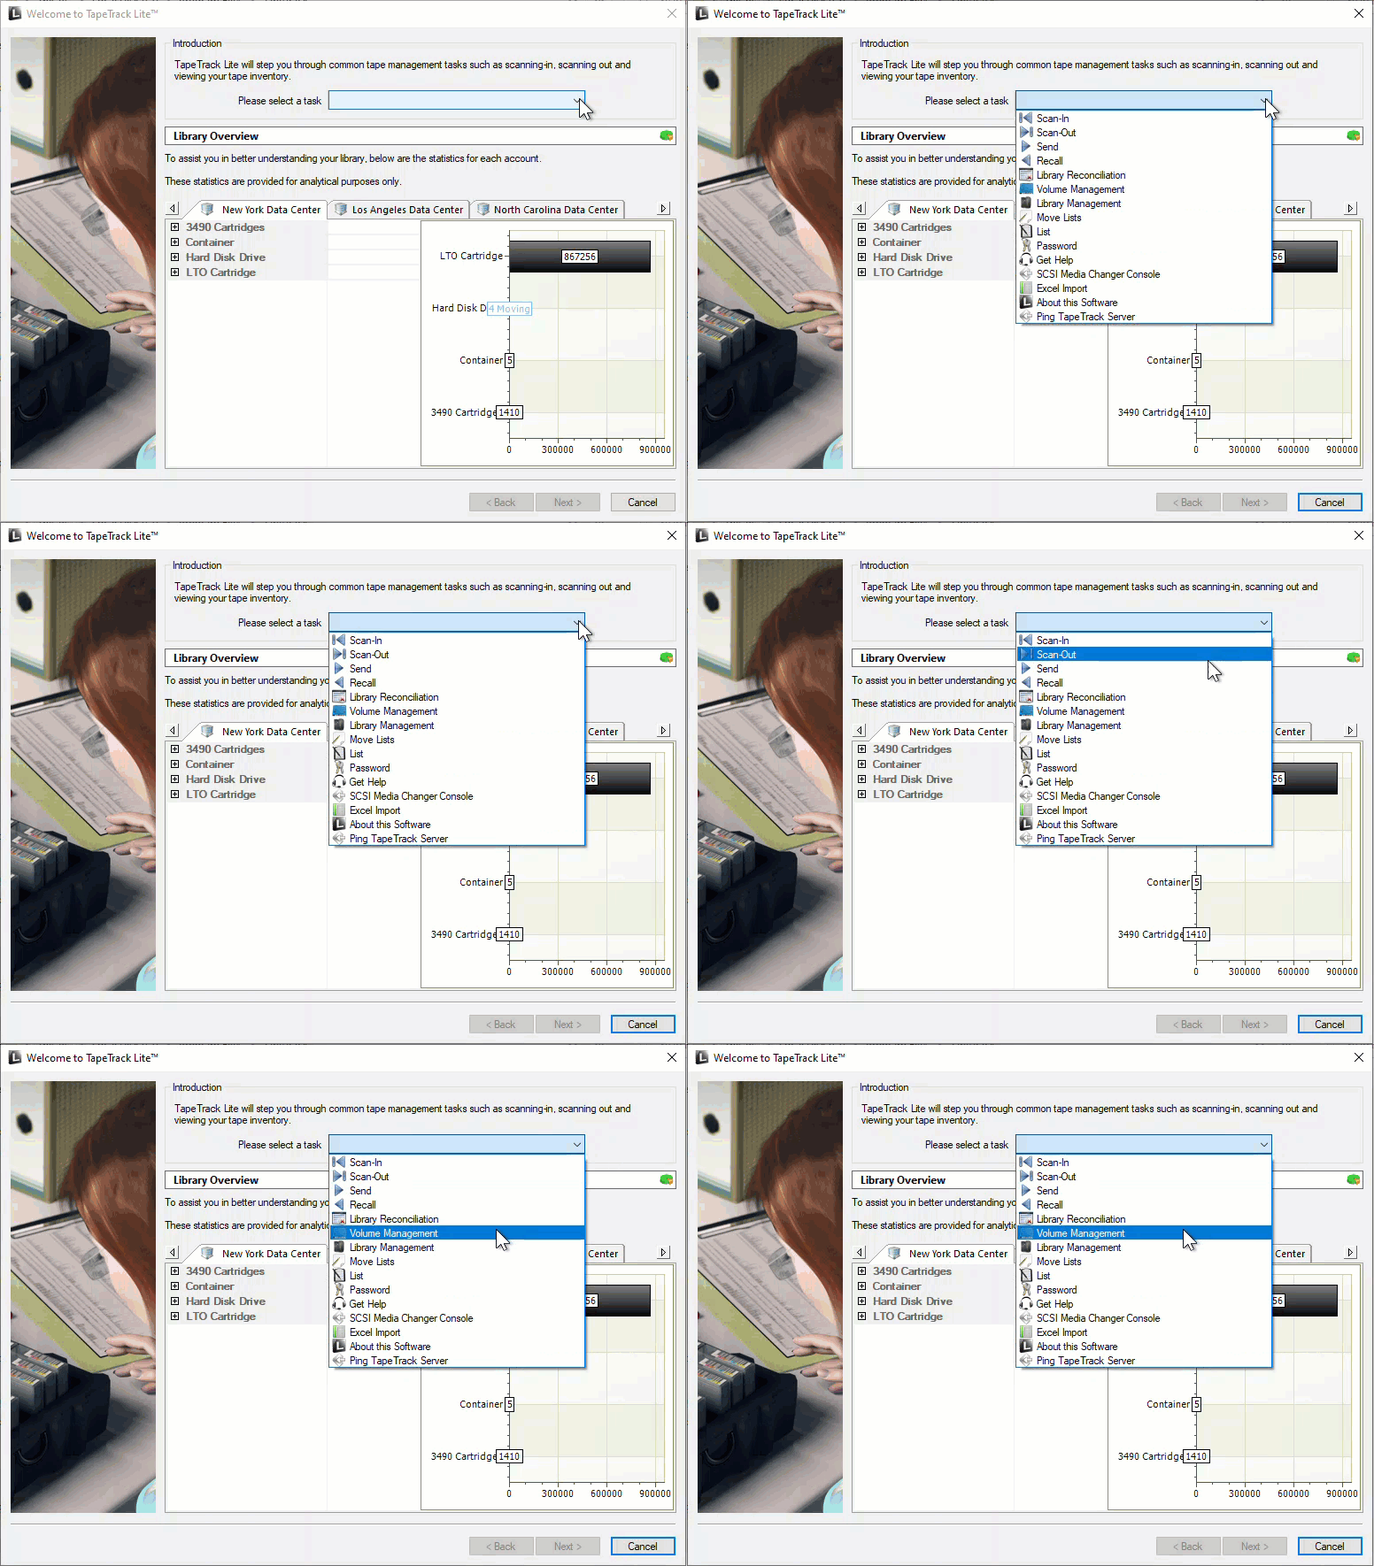
Adding New Volumes In Lite In Volume Management
Options
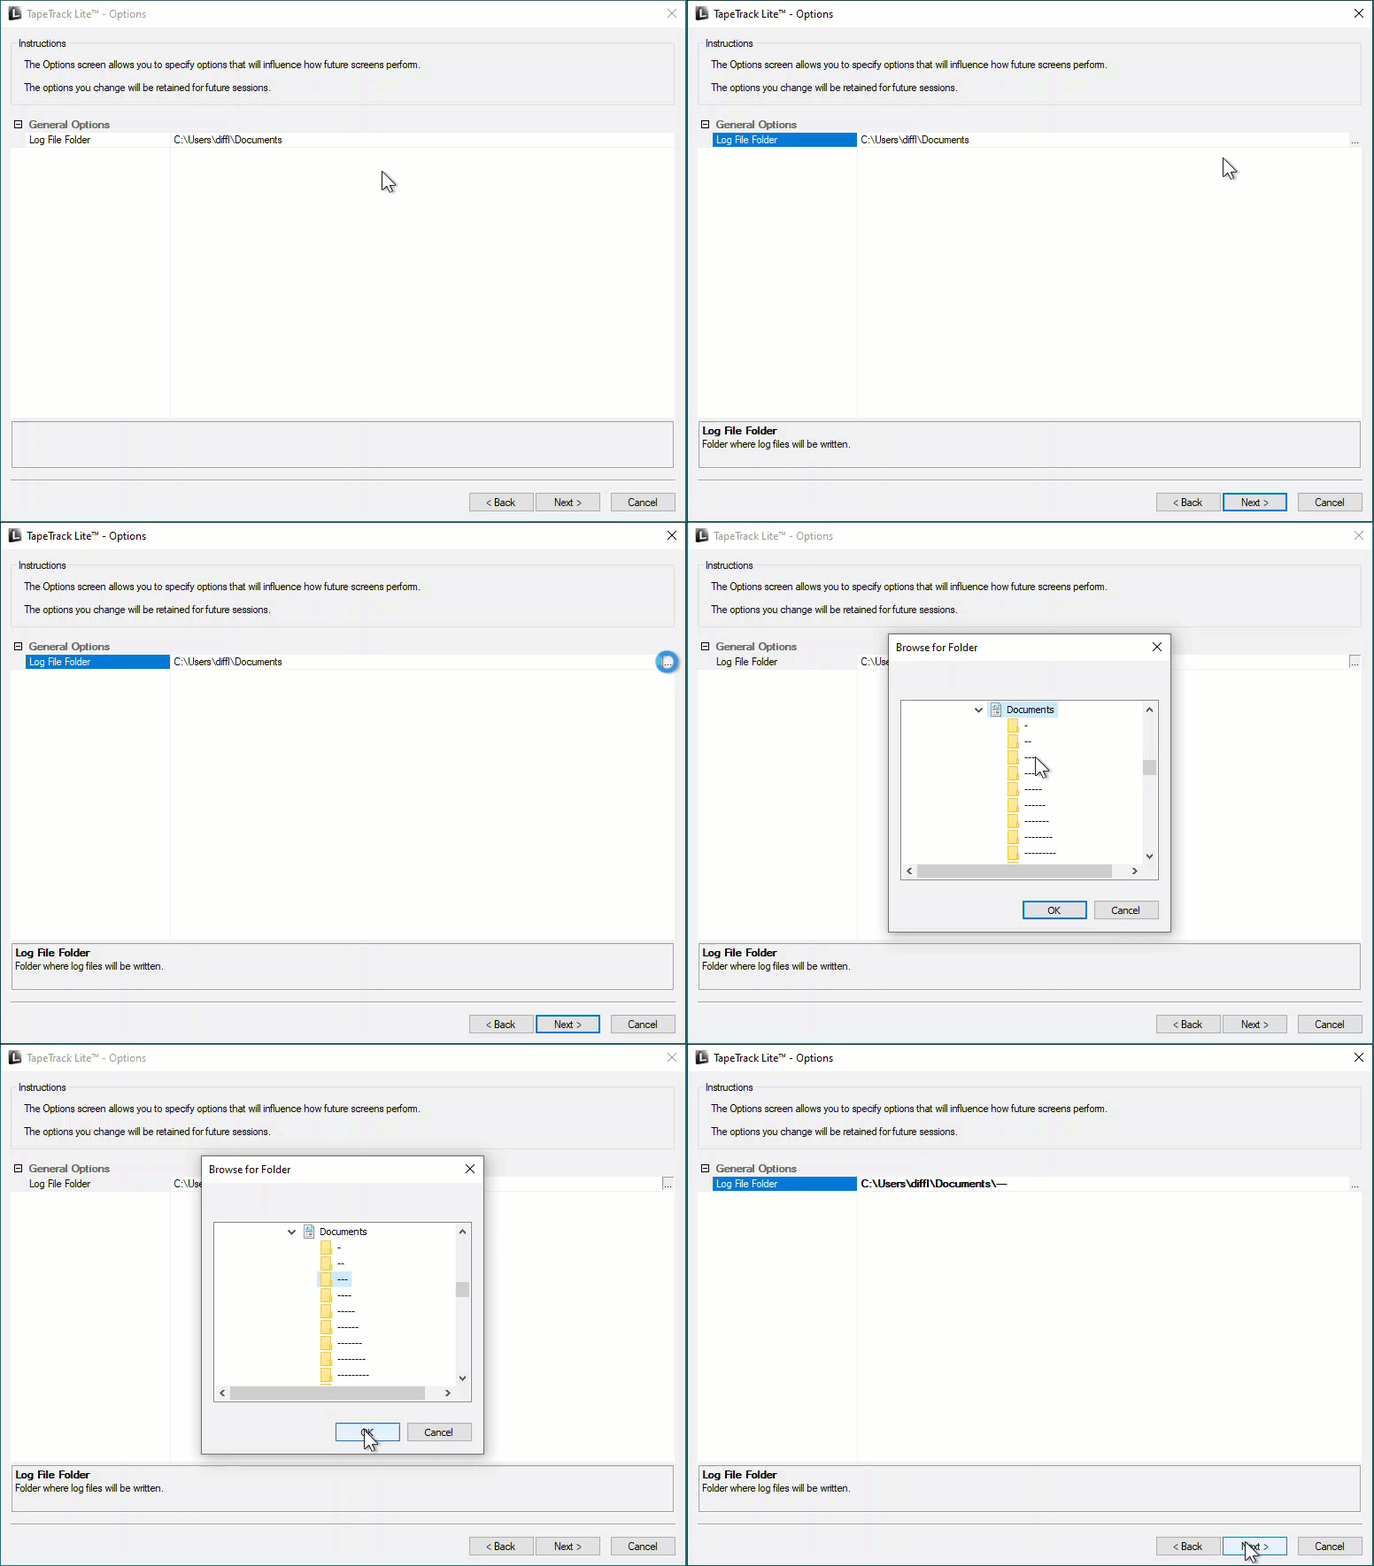
This will open the Options window. If required you can set the location for the log files to be written to by, or leave the default.
To change the location the log file is written to:
- Click in the field where the current write location is to display the ellipsis button (
…) to the right. - Click on the ellipsis button to display the
Browse for Folderwindow. - Select the required folder to write the log file to.
- Click
OKto close the window.
Click Next to continue.
Selecting a Customer
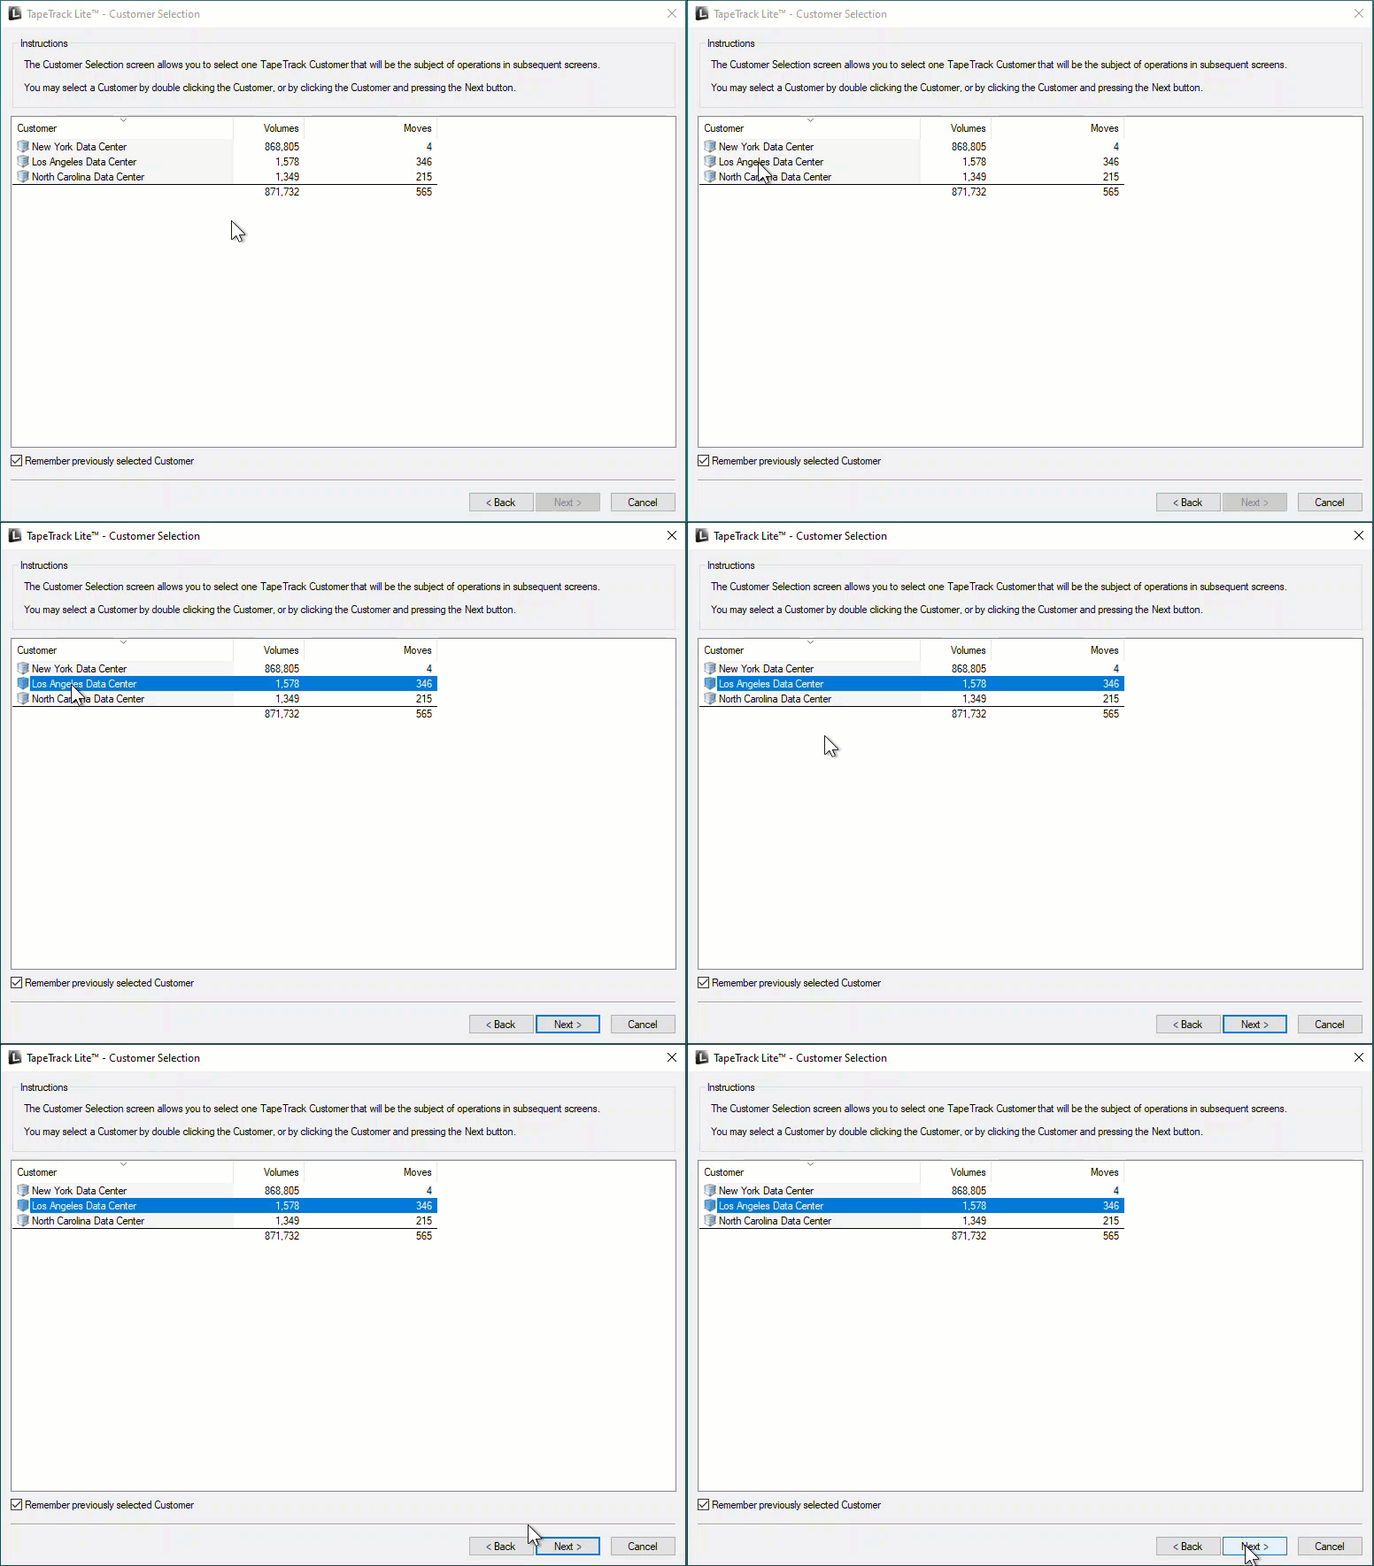
From the Customer Selection window select a Customer that the new Volume/s are to be added to by double-clicking a Customer or selecting a Customer and clicking Next.
Selecting Media Type
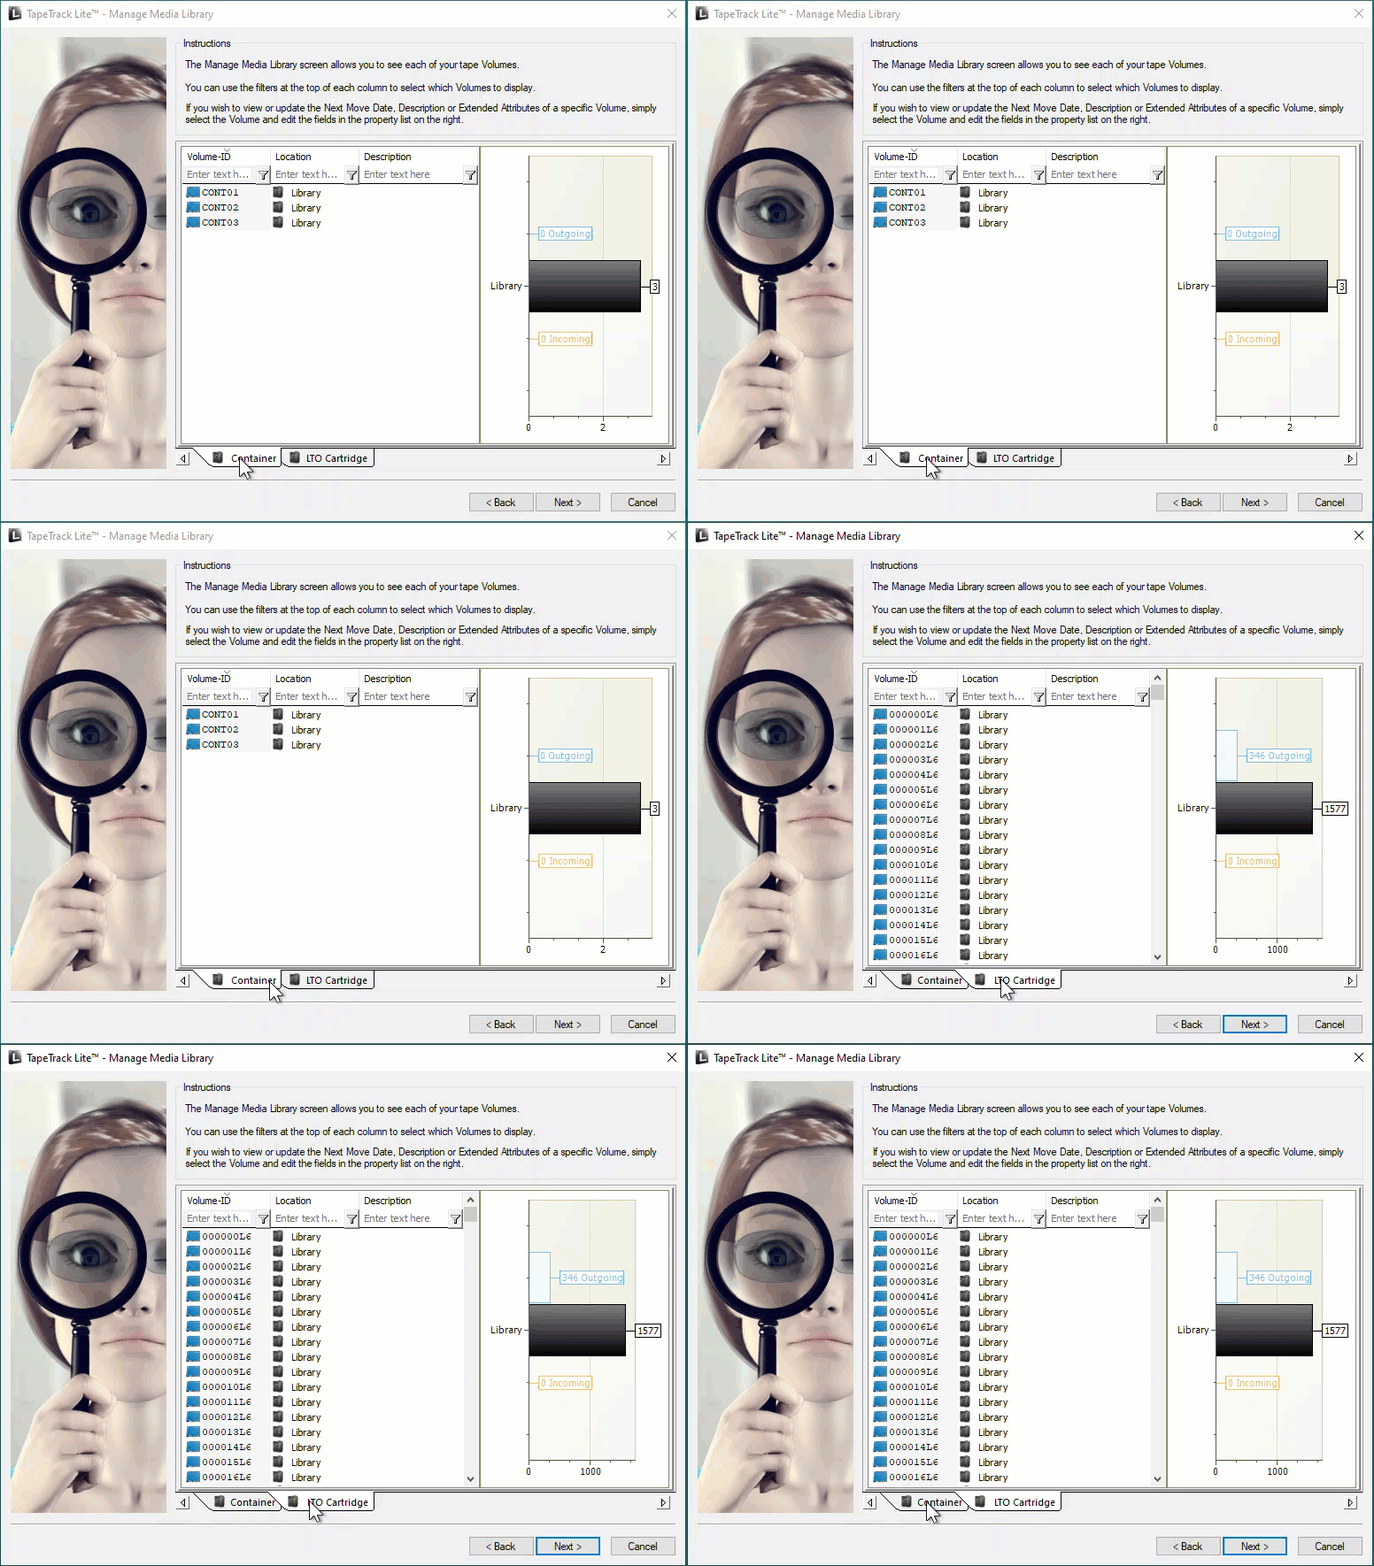
If you have more than one Media Type, select the required Media Type from the tabs at the bottom of the Manage Media Library window.
Open Scan Window
Right click anywhere in the window where the Volumes are listed to open the menu options.
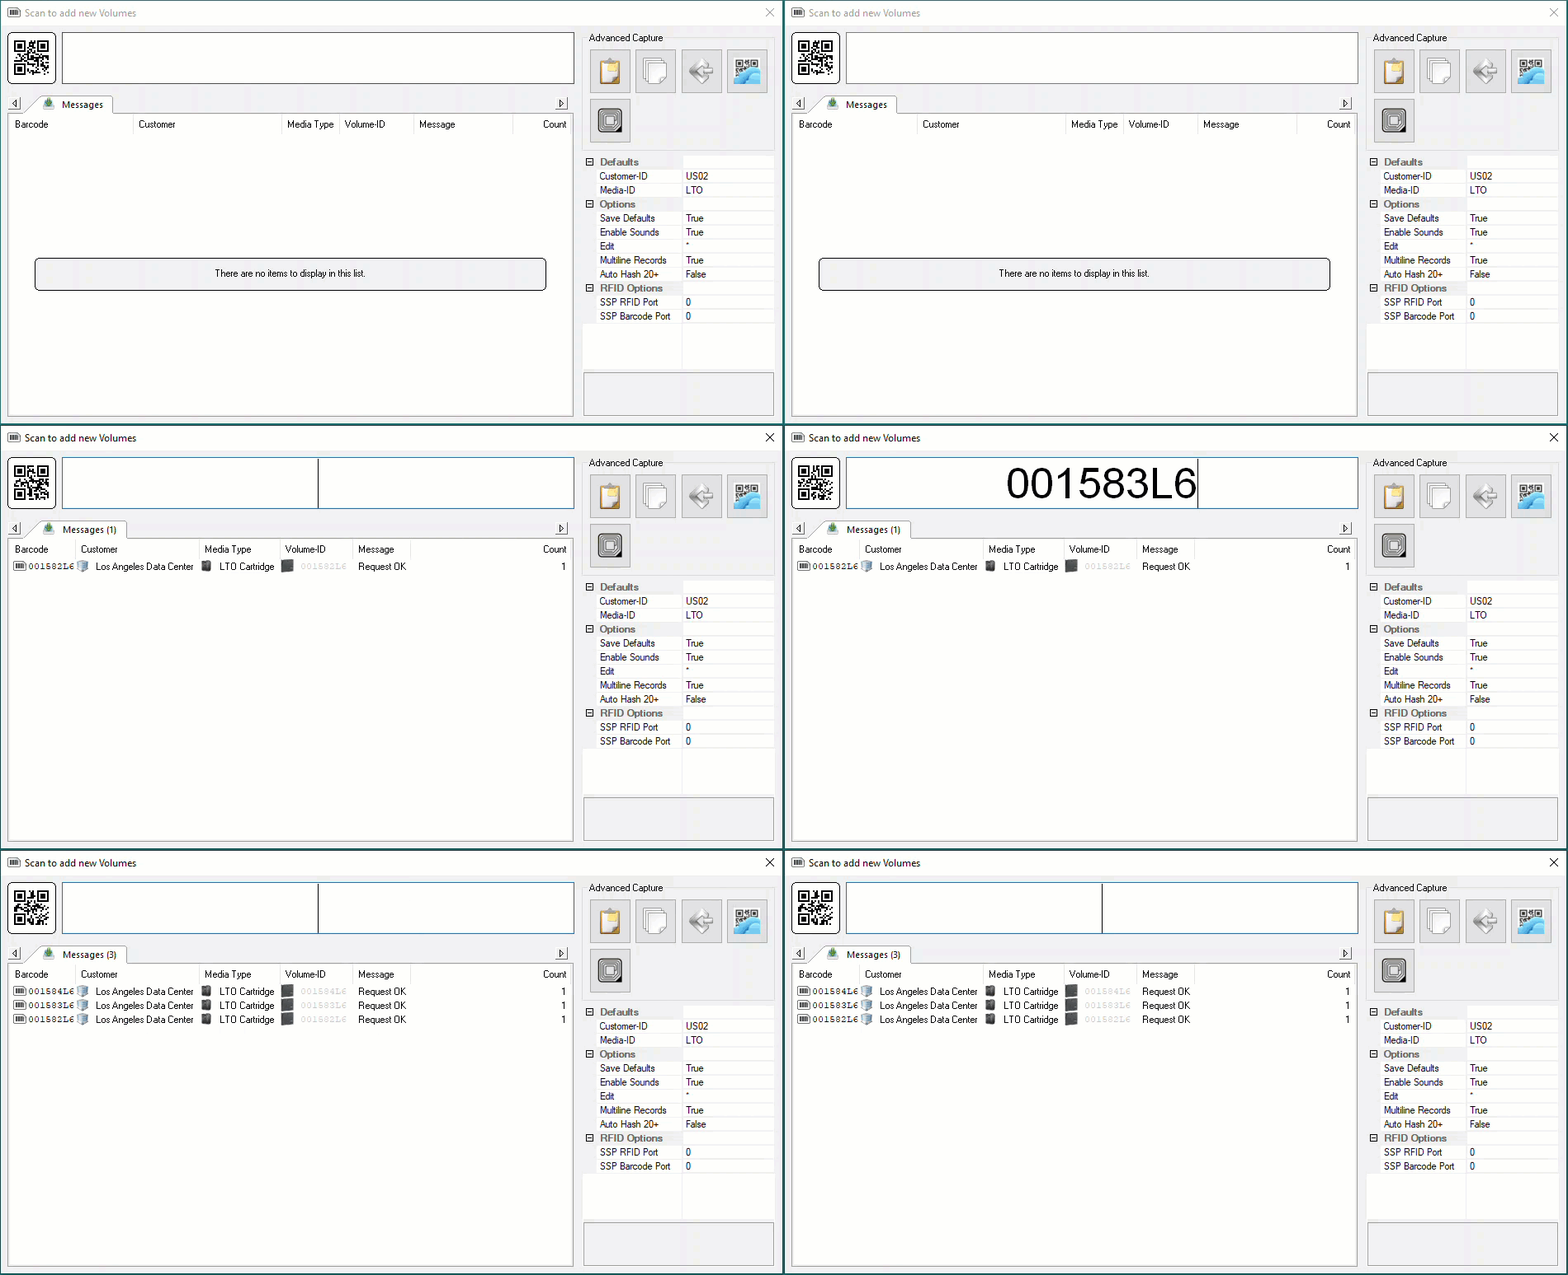
Select Scan > To Add to open the Scan In window.
Scan-In Volumes
Scan in your new Volumes into the Scan-In window using your preferred scanning method
When all new Volumes have been scanned close the Scan-in window by clicking X in the top right corner.
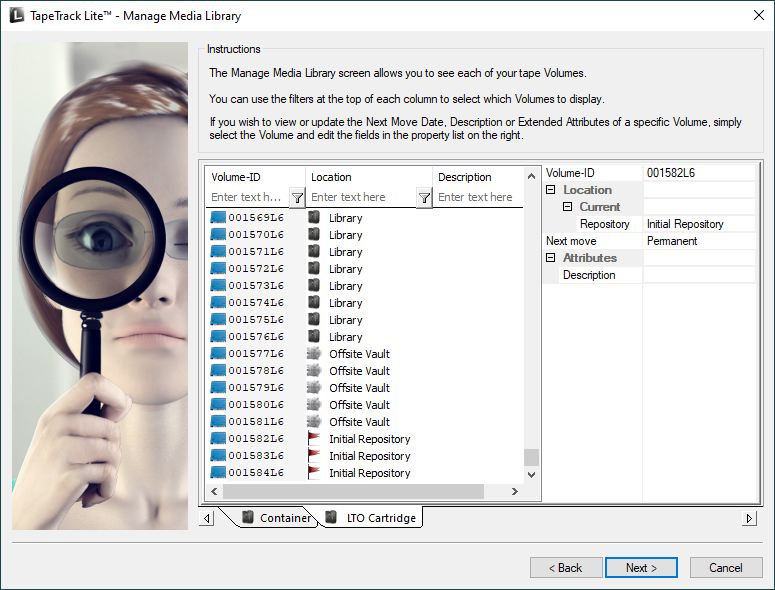
Your new Volumes will now show in the Volume List.
If you have a default Repository (set in TapeMaster) the new Volumes will be assigned to that Repository. If no default Repository has been set the new Volumes will be assigned to the Initial Repository.
To move the Volumes , after completing the Volume Management process, see Move Volumes.
Adding Description And Next Move Date
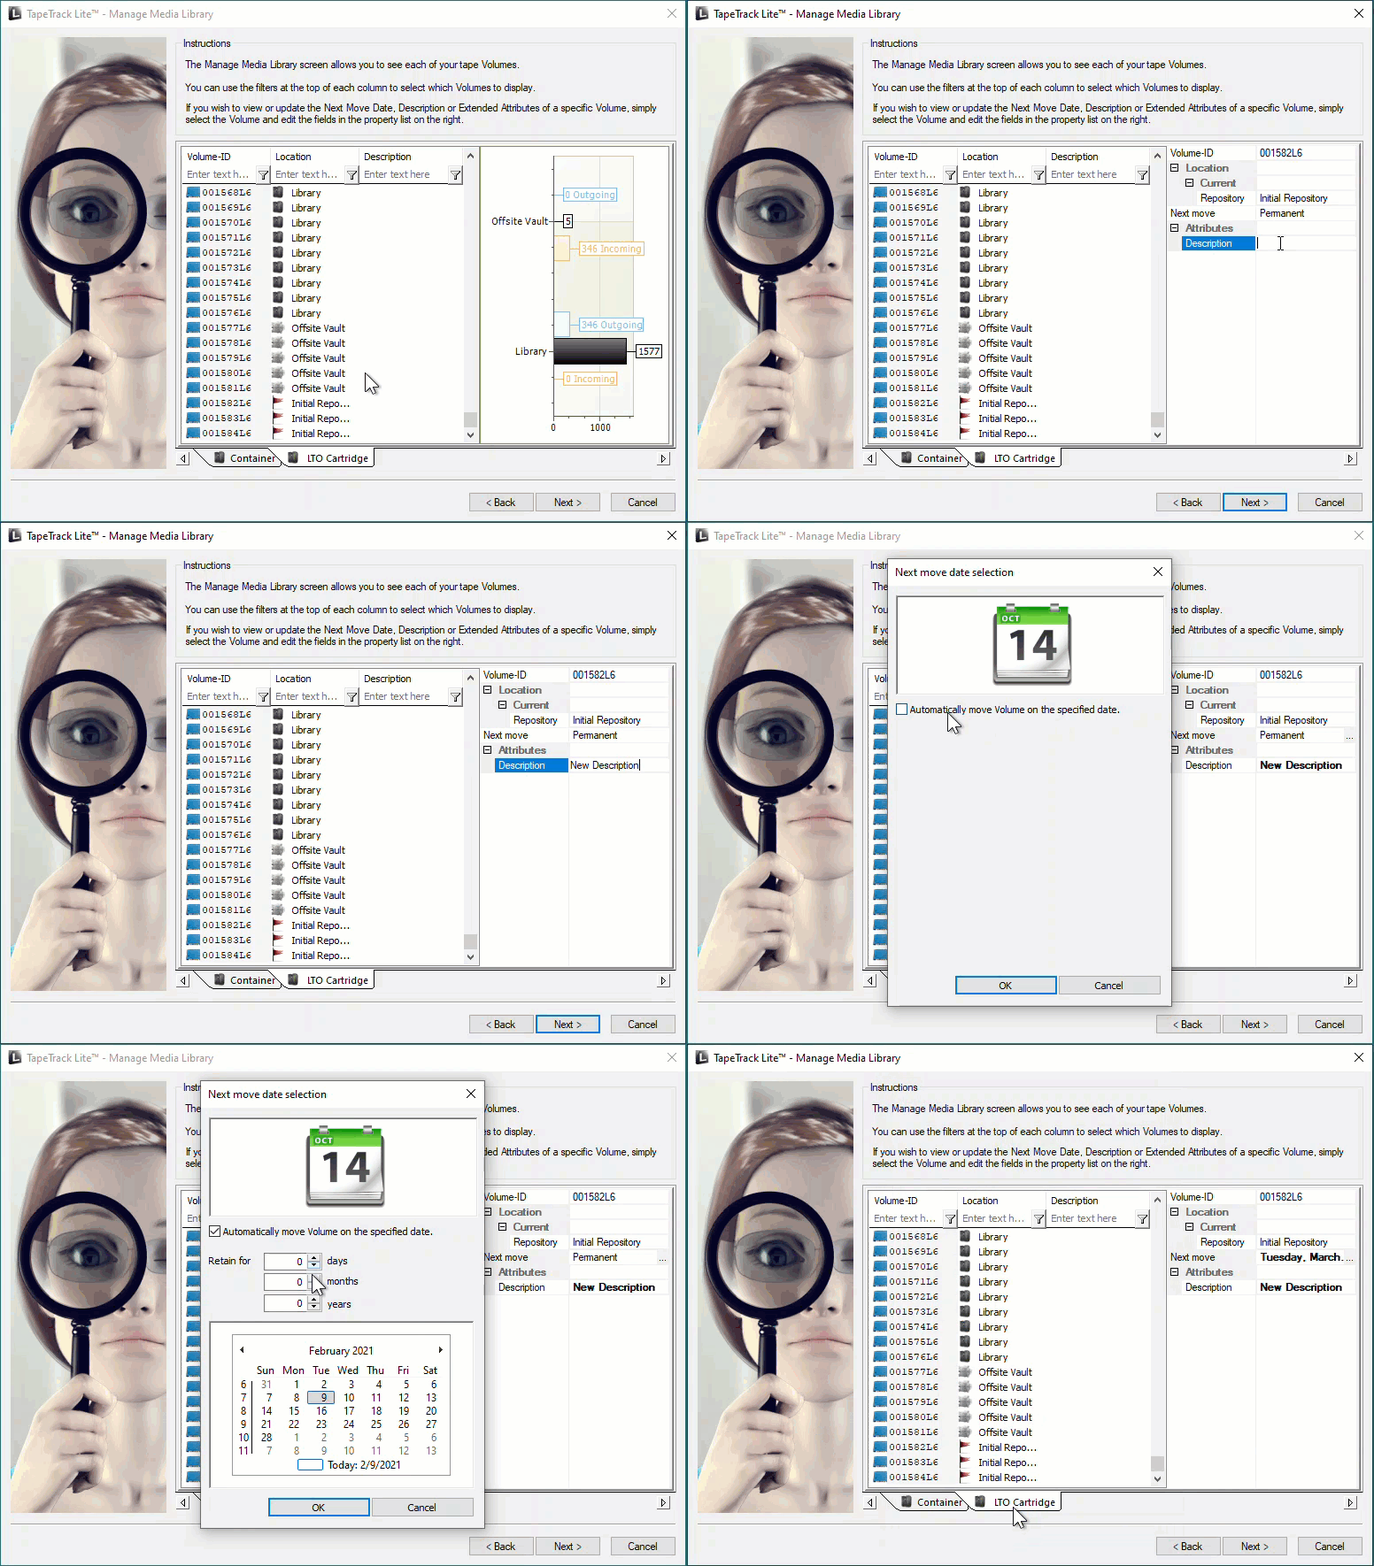
Through the Volume Management process, you can add a Description and Next Move Date to the new Volumes, and other Volumes through the right-hand side of the window.
To add a Description select a Volume by clicking on the Volume-ID on the left side of the window.
Click in the field to the right of the Description field and insert the required description.
To add a Next Move Date, select the Volume (as with the description) and
- Click in the field to the right of the
Next Movefield to display the ellipses button. - Click on the ellipses button to open the
Next Move Date Selectionwindow. - Select the
Automatically move Volume on the specified datecheckbox to display the date options. - Select the number of days, months and/or years until the Next Move Date required, or select a specific date from the calendar
- Click
OKto close the date selection window.
Select any other Volumes you want to set a Move Date or Description for and set the required values.
Click Next to exit the Volume Management process.
Complete
This will bring up the Complete window, from here you can:
- Click
View Log Fileto view the log. - Click
Print Log Fileto print out the log file for further reference. - Click
About this Softwareto view product and support (email, phone & website) information. - Click
Backto return to start menu and select another task. - Click
Finish,CancelorXto exit TapeTrack Lite.
