Table of Contents
Printing Unqualified Barcode Labels
Printing Unqualified Barcodes with TapeTrack Barcode Printer is accomplished by either copy/pasting the Barcodes or loading the Barcodes via a text file into the Barcode Printer.
Loading Barcodes Via Copy/Paste
Copy The Barcodes To The Clipboard
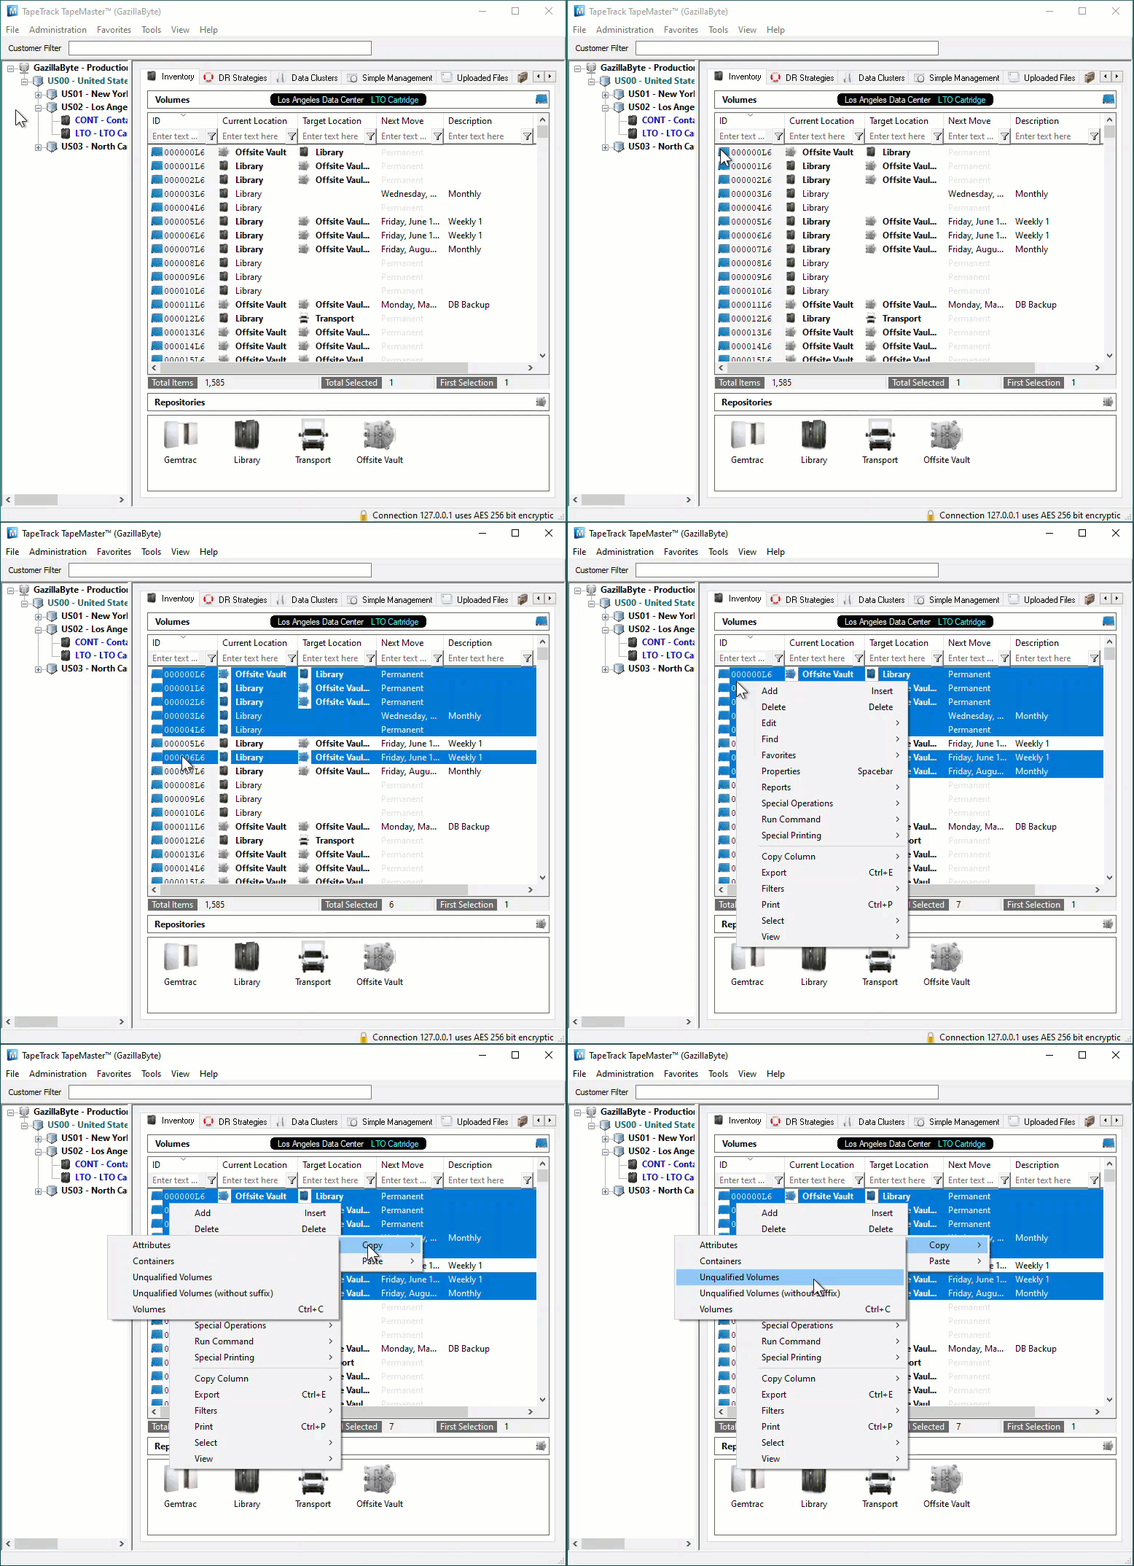
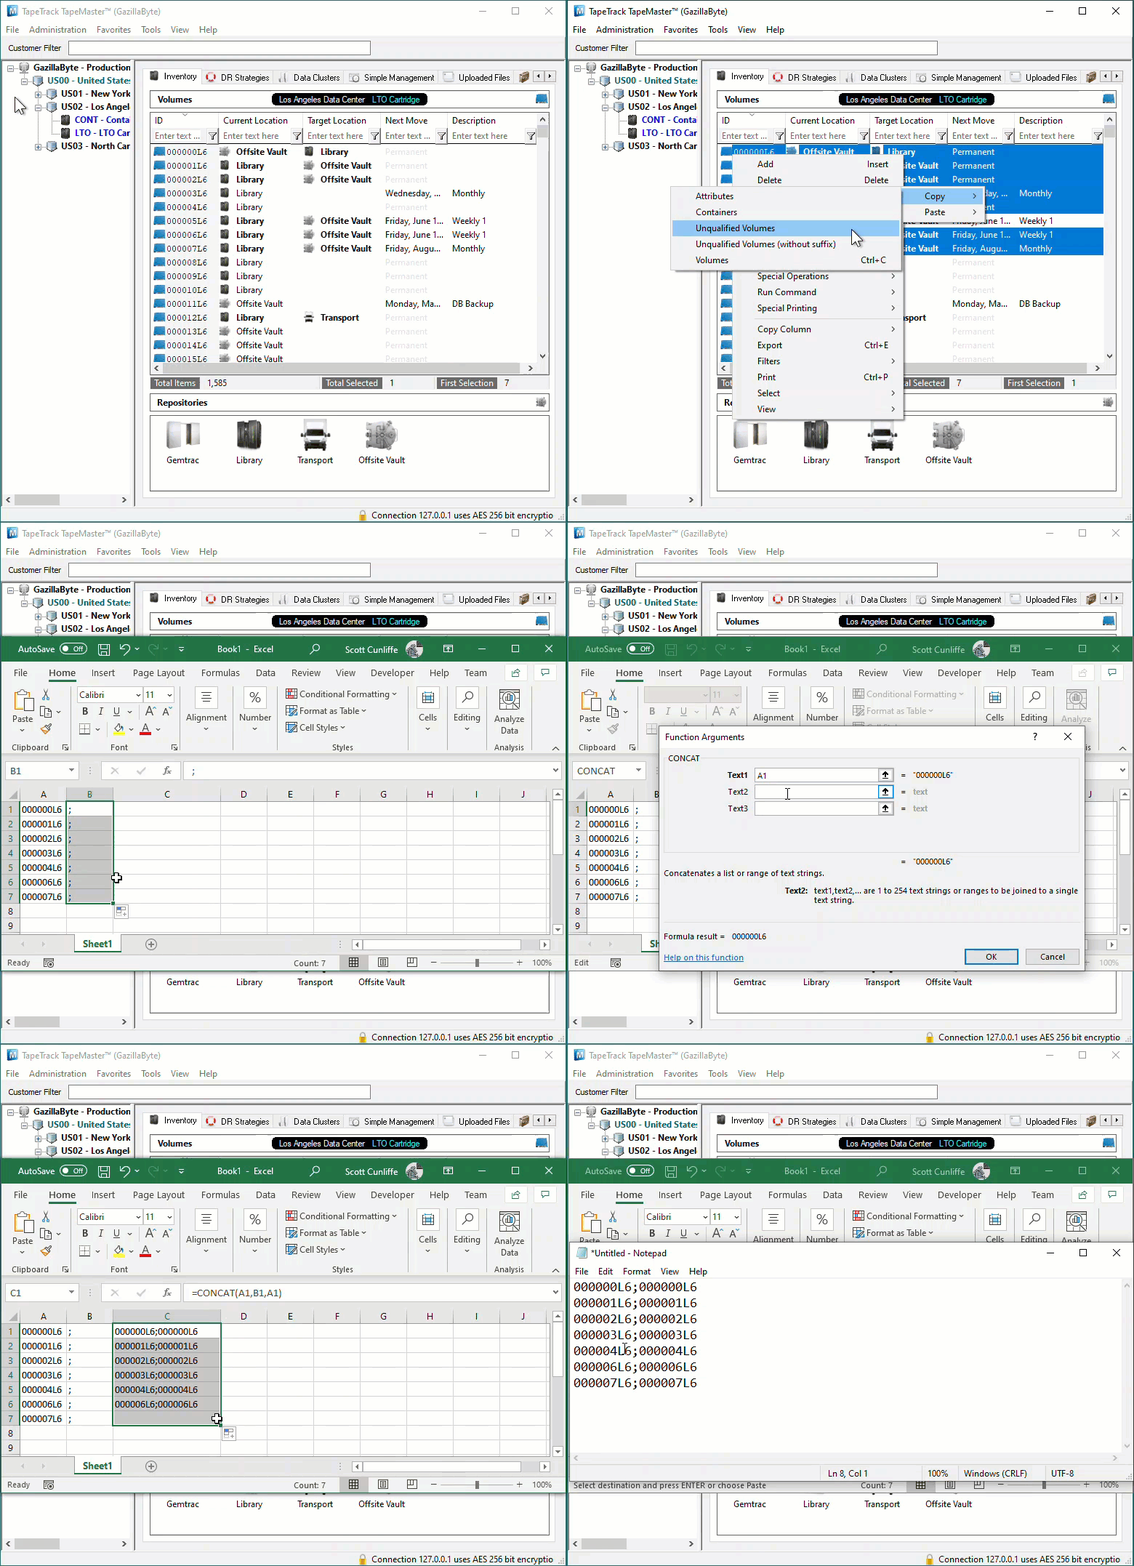
Load the required Barcodes to your Windows Clipboard, this can be accomplished simply copying the Barcode values from a text file, email or, if the Volumes are already present in TapeTrack, copied directly via TapeMaster by selecting the required Volumes, right clicking them and selecting Edit → Copy → Unqualified Volumes.
Opening The Barcode Printer
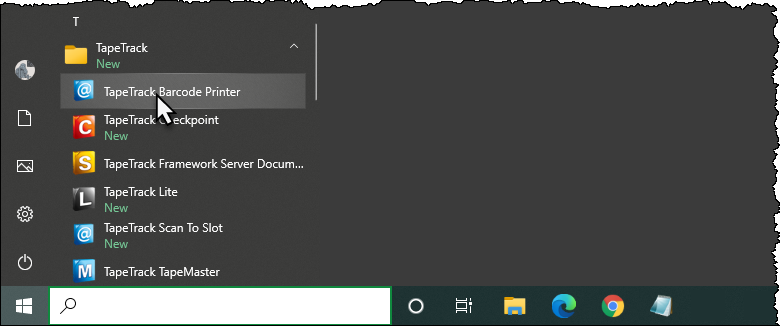
Open the Barcode Printer via the Windows Start Menu at TapeTrack → Barcode Printer
Alternatively, navigate in File Explorer to the TapeTrack TapeMaster installation directory and run the executable TMSSBarcodePrinter.exe.
Pasting The Barcodes In The Barcode Printer
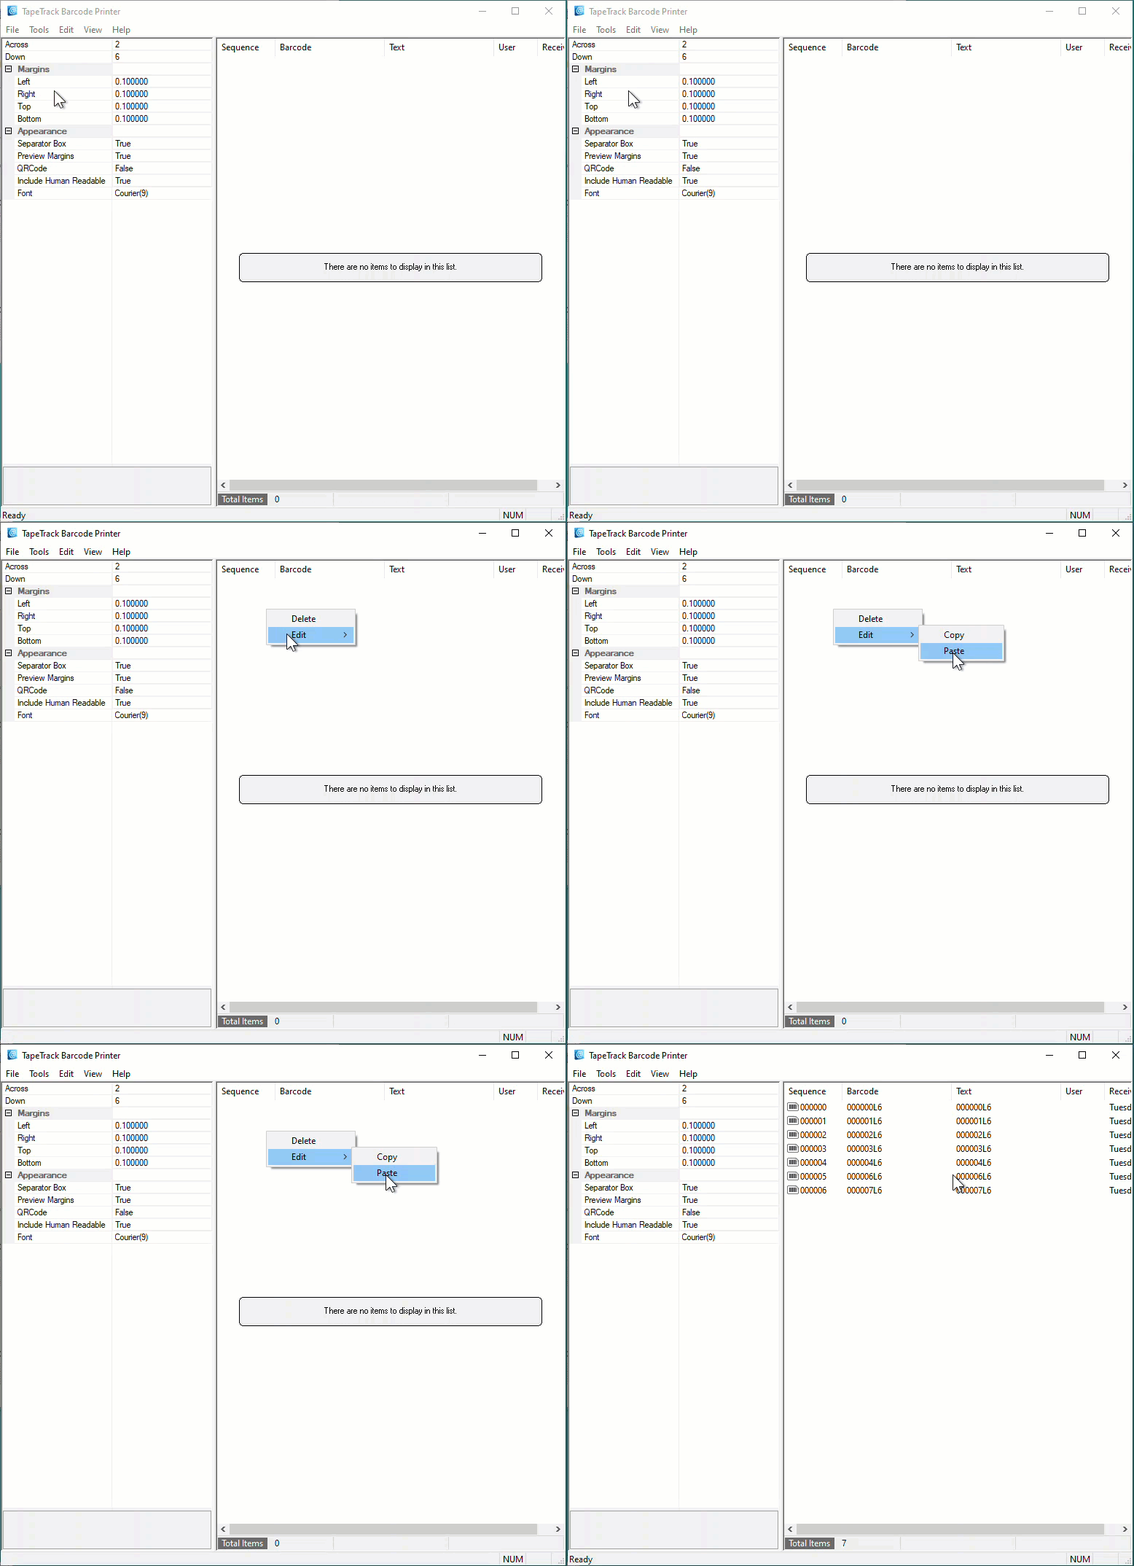
In the right window of the Barcode Printer, right click and select Edit → Paste to add the Barcodes.
Loading Barcodes With A Text File
Creating The Barcode Text File
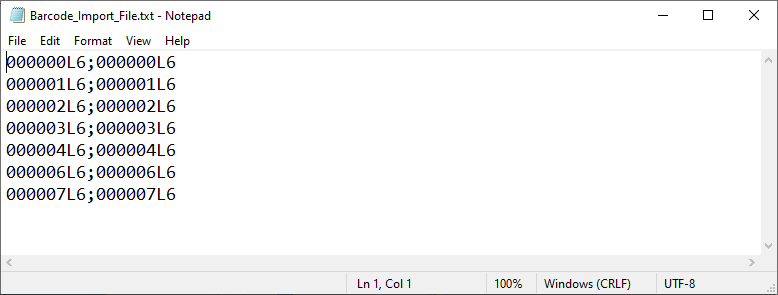
Information in the text file has the format of barcode;Human_readable_barcode, one Barcode per line.
The Barcode Text File can be created several different ways, which method is best used depends on the quantity of Barcode labels required.
If only a couple of labels are required, the easiest method is to use a text editor like Notepad to manually type the labels required.
If a large number of Barcode Labels using Excel to create the required values for the text file:
- Selecting the Volumes in TapeMaster and copying values to your clipboard by right clicking the highlighted Volumes and selecting
Edit→Copy→Unqualified Volumes. - Open Excel and paste Volume-ID's into an Excel spreadsheet column A
- Add
;to column B and drag cell to auto fill the cells next to column A values - Use cell formulas to concatenate the cell values to one column using formula
=CONCAT(A1,B1,A1)to create theBarcode;Barcodeformat. - Copy the concatenated column and paste into a Notepad file, saving under a known name and location.
Opening The Barcode Printer
Open the Barcode Printer via the Windows Start Menu at TapeTrack → Barcode Printer
Alternatively, navigate in File Explorer to the TapeTrack TapeMaster installation directory and run the executable TMSSBarcodePrinter.exe.
Loading Barcodes From Text File
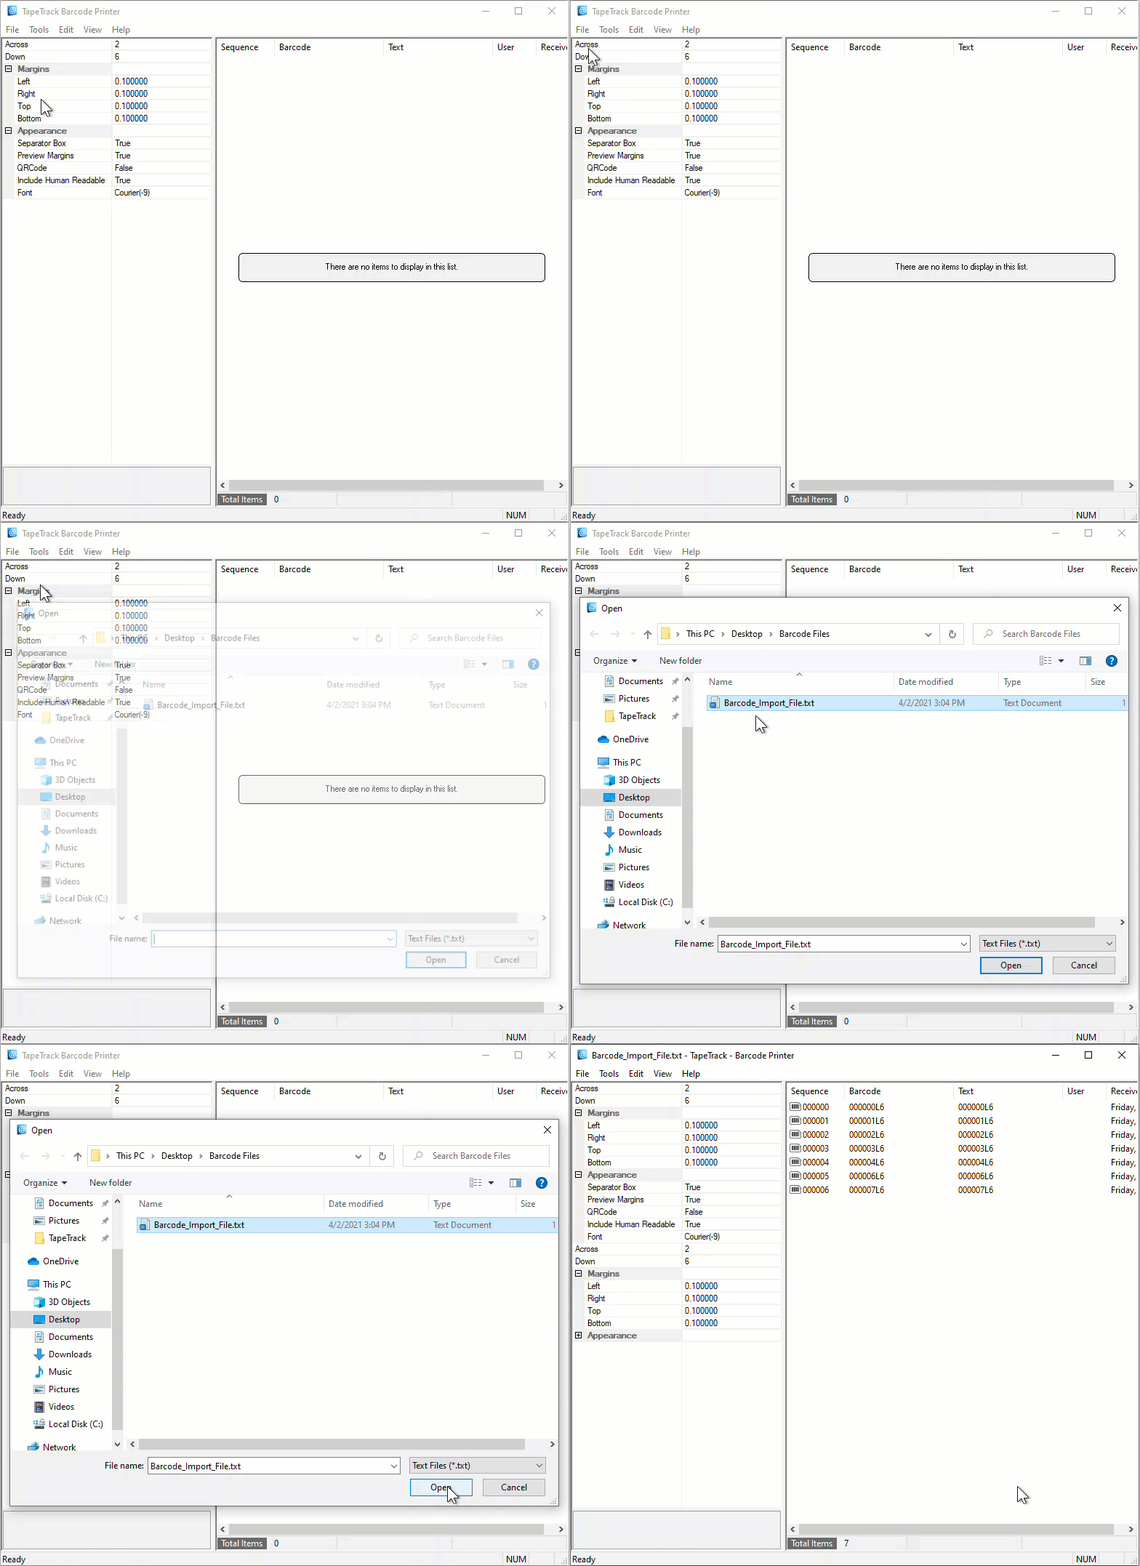
From the Main Menu select File → Open
Navigate to and select the Barcode Text File. Click Open to load the file.
Printing The Barcodes
Editing Print Layout
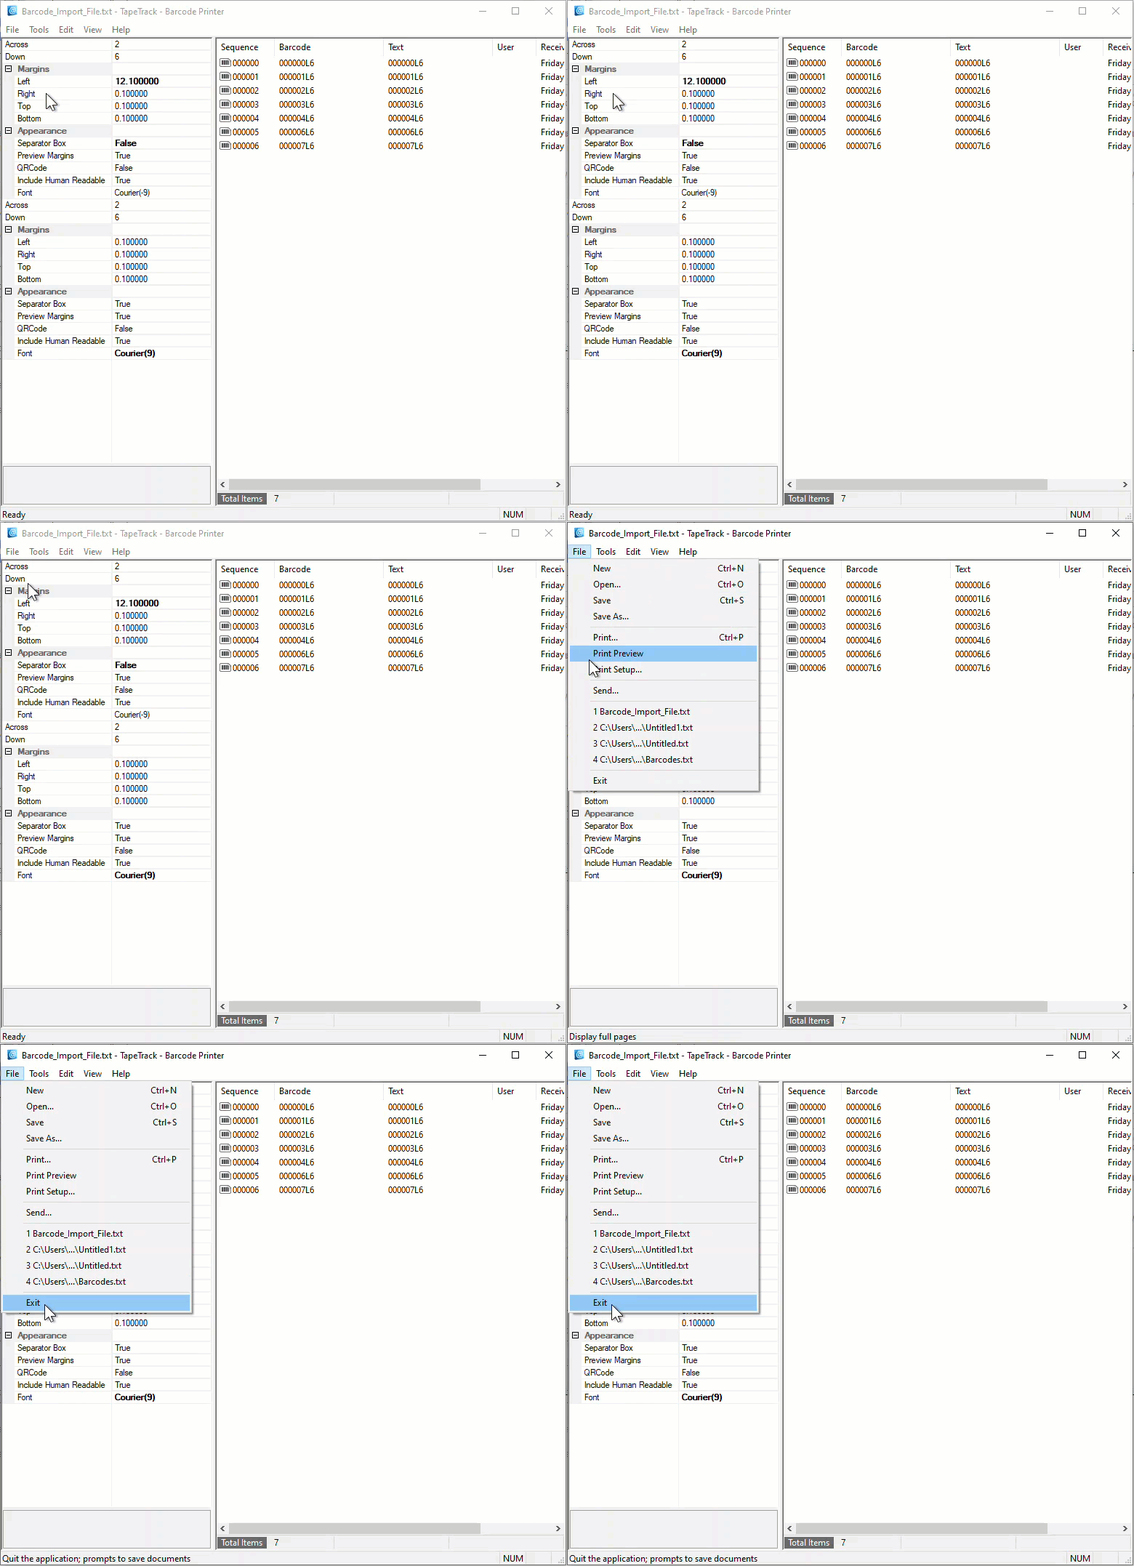
Use the left window pane on the Barcode Printer to edit the print layout options to suit your requirements.
Across: Number of Barcodes to print across the page.Down: The number of Barcodes to print down the page.Margins: Margins to be placed around the BarcodesLeft: Left margin paddingRight: Right margin paddingTop: Top margin paddingBottom: Bottom margin padding
Appearance:Separator Box: Adds a grey border around each Barcode to aid in separating individual Barcodes when manually cutting them out.Preview Margins: Adds a preview of print boundaries to aid in confirming Barcode will print within a specified area.QR Code: Adds a QR code to the Barcode label.Include Human Readable: Adds text representation of Barcode to make it readable by Humans.Font: Sets font for Human Readable content, does not alter scannable Barcode.
Preview Print Layout
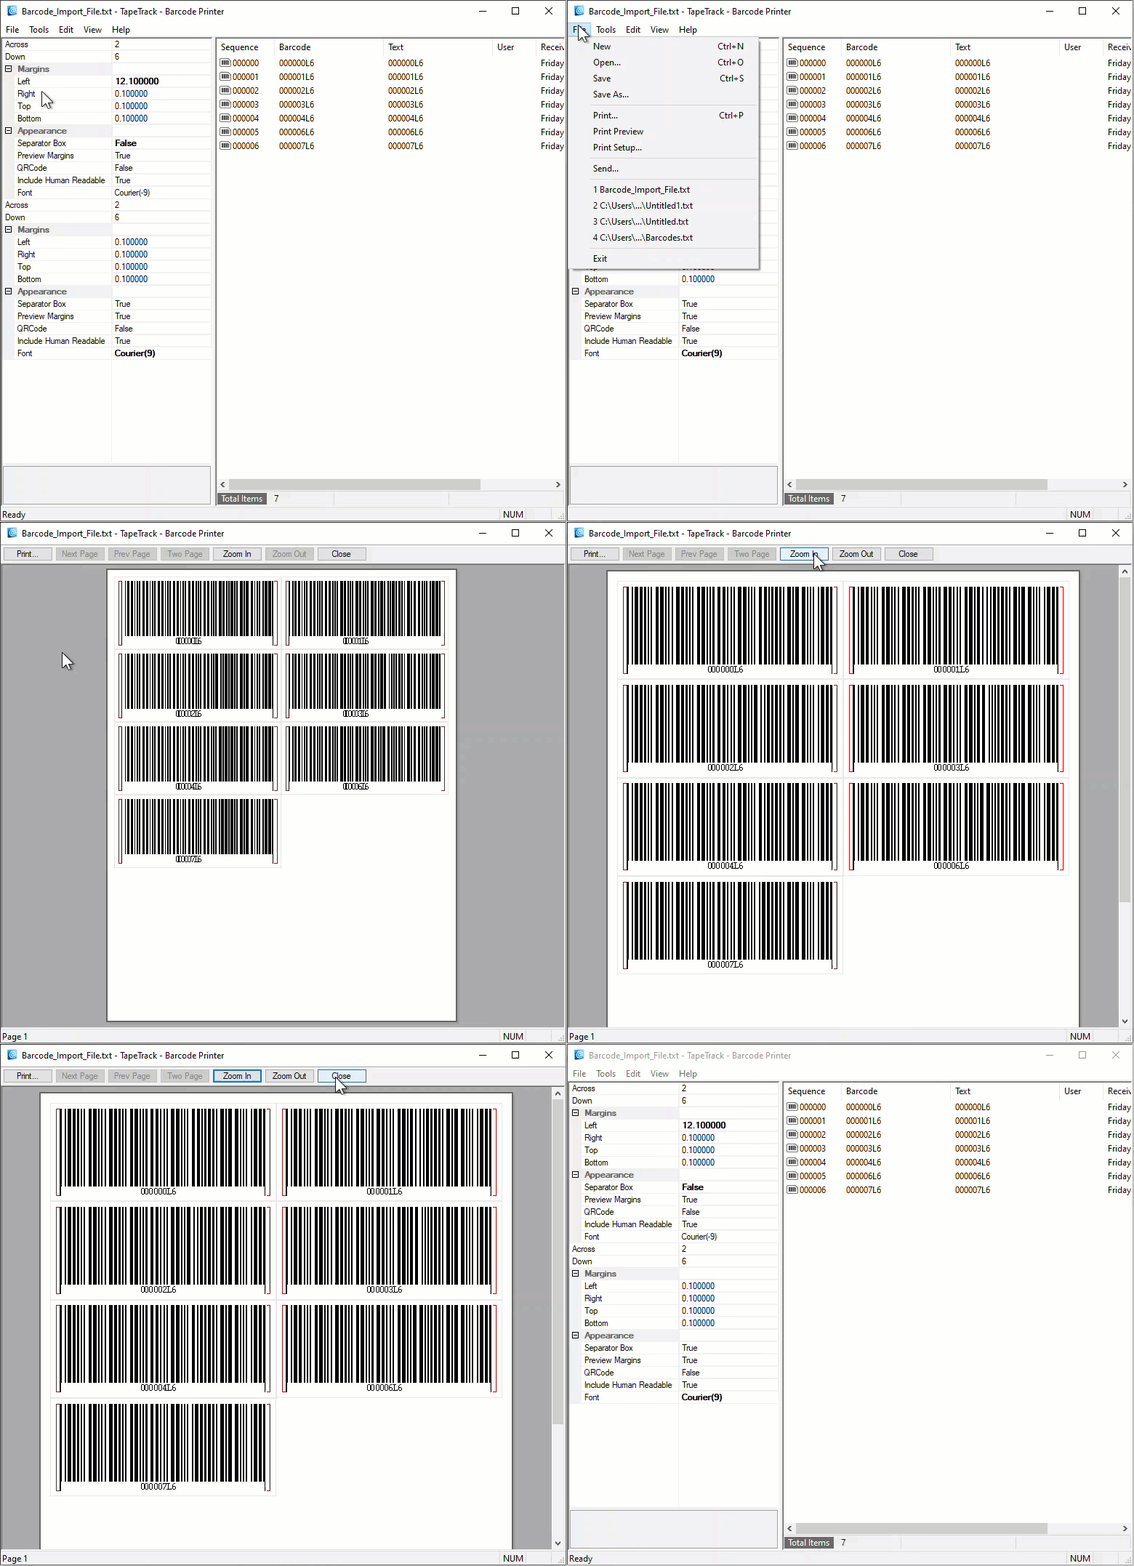
From the Main Menu, select File → Print Preview
From the preview screen, you can click Zoom to enlarge the Barcodes, Print if your happy with the layout, or Close to return back to the Barcode Printer to make further adjustments.
Print Labels
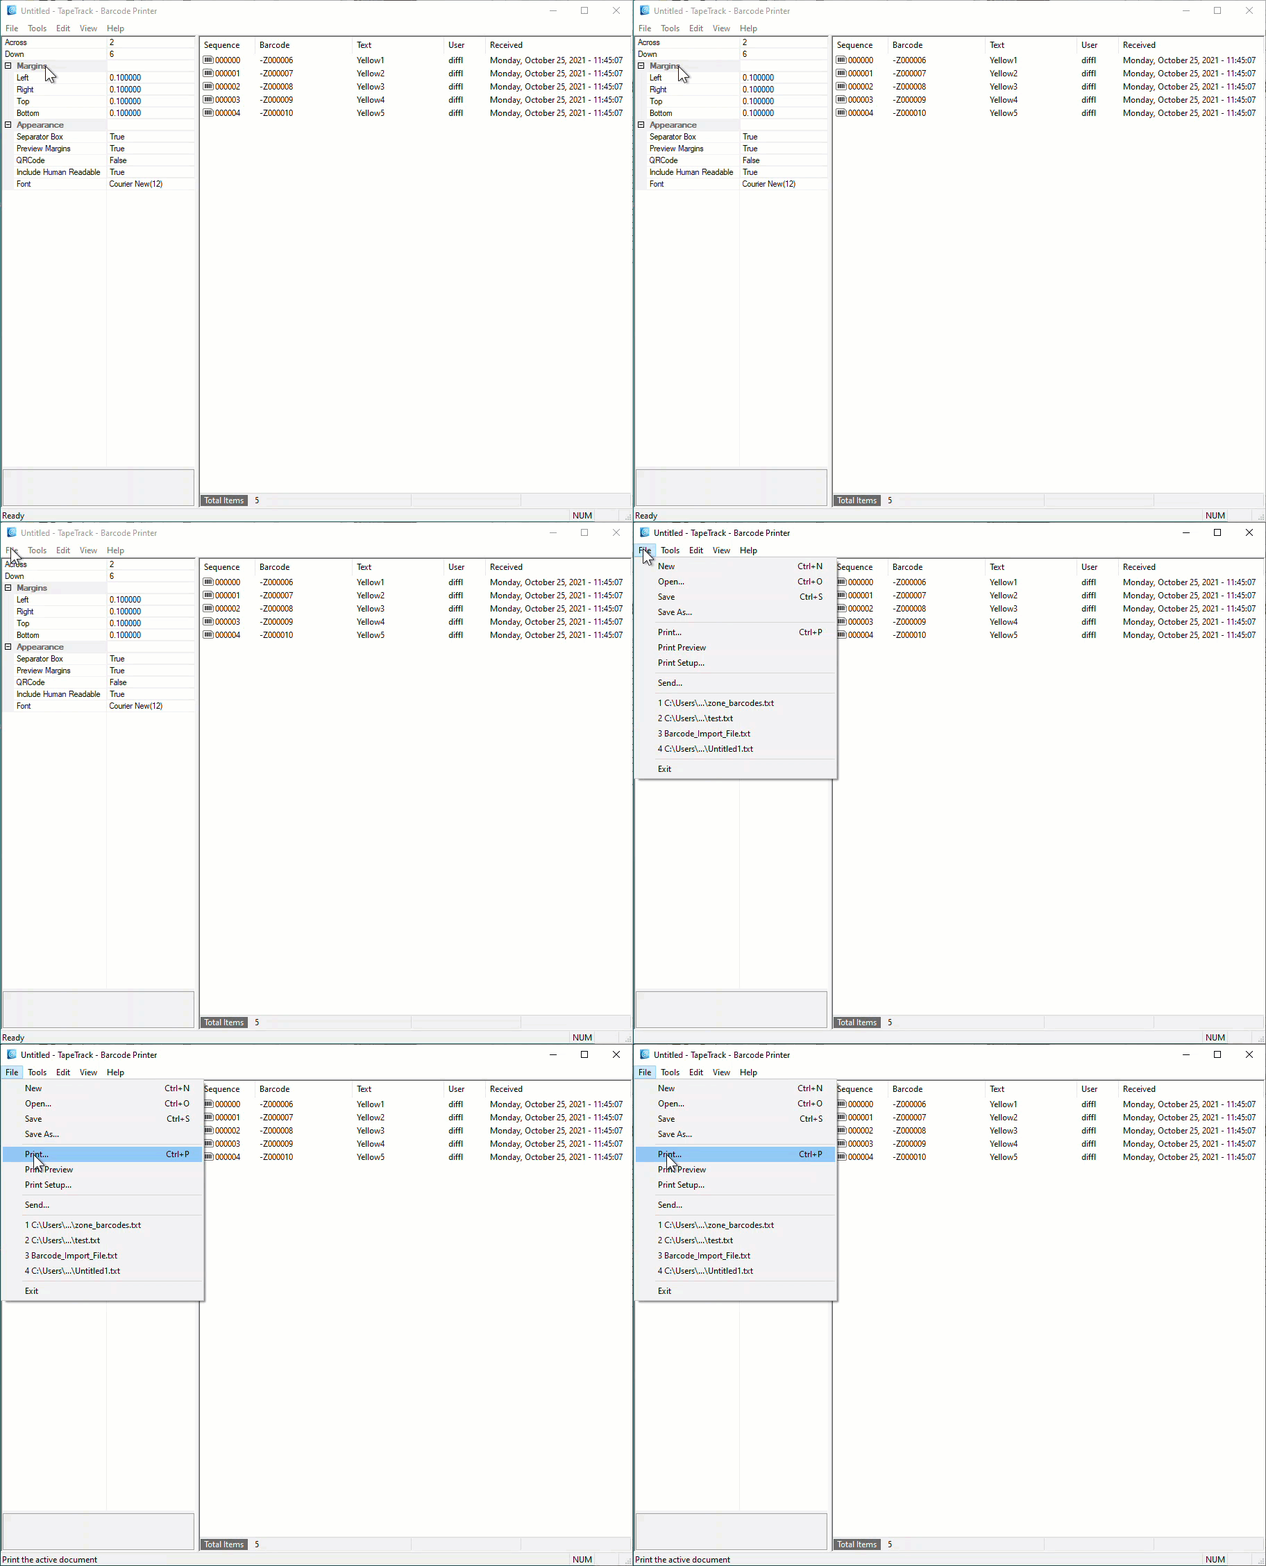
To print the labels, from the Main Menu select File → Print to open the Print dialog, select your desired printer and click OK.

