Table of Contents
Preparing Racking And Volumes For Slotting
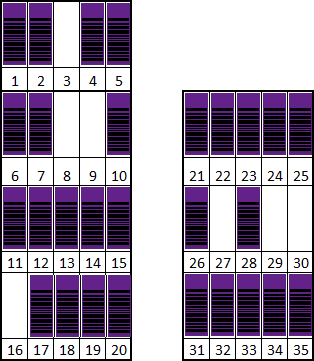
While your Volumes are stored in Gemtrac racks, or similar, to remove the differences in racking capacity and layout the following methods are displayed as if your entire racking was laid out in one linear line.
Sample racking layout, rack_1 25 Slot, 5 Slots per shelf. Rack_2 20 Slot, 5 Slots per shelf.
Racking laid out in linear format to eliminate specific racking layouts and display in a more generic format.
Method 1 - Last Volumes To First Empty Slots
The fastest method to compact the Volumes in the racking slots is to move Volumes from end of Slots to fill gaps, or highest Slot numbers to Lowest Slot number gaps until all gaps are filled.
After moving Volumes.
In this example the Volumes can be compacted within 5 moves, obviously the larger your racking and the more Volumes and gaps present the more moves will be required. It does, however, give you a comparison point for the method you choose to use.
The Volumes are then scanned to file in order, starting at Slot 1 and repeating until the last one is scanned.
Compare the number of entries in the scanned file to ensure all Volumes were scanned, and scanned only once. Any errors in the scan file will create Slot assignment errors in TapeMaster. For example, when scanning the Volumes, if you skipped scanning the Volume in Slot 4, the Volume in Slot 5 will be assigned to Slot 4, Volume in Slot 6 will be assigned to Slot 5 and so on.
This file is then loaded into TapeMaster with the first entry being assigned to Slot one, the second entry to Slot 2 etc.
Method 2 - Shuffle Volumes To Empty Slots
If the order of the Volumes is important to maintain, move the Volumes one at a time to sequentially fill in the voids, using the original image as an example move Volume in Slot 4 to Slot 3, Volume in Slot 5 into Slot 4 and continue until all empty Slots have been filled. While this will keep the order the Volumes are in it will entail a lot more labour and time to complete.
After moving Volumes.
In this example the Volumes can be compacted within 25 moves, obviously the larger your racking and the more Volumes and gaps present the more moves will be required
The Volumes are then scanned to file in order, starting at Slot 1 and repeating until the last one is scanned.
This file is then loaded into TapeMaster with the first entry being assigned to Slot one, the second entry to Slot 2 etc.
Method 3 - Record Each Volume-ID And Slot Allocation
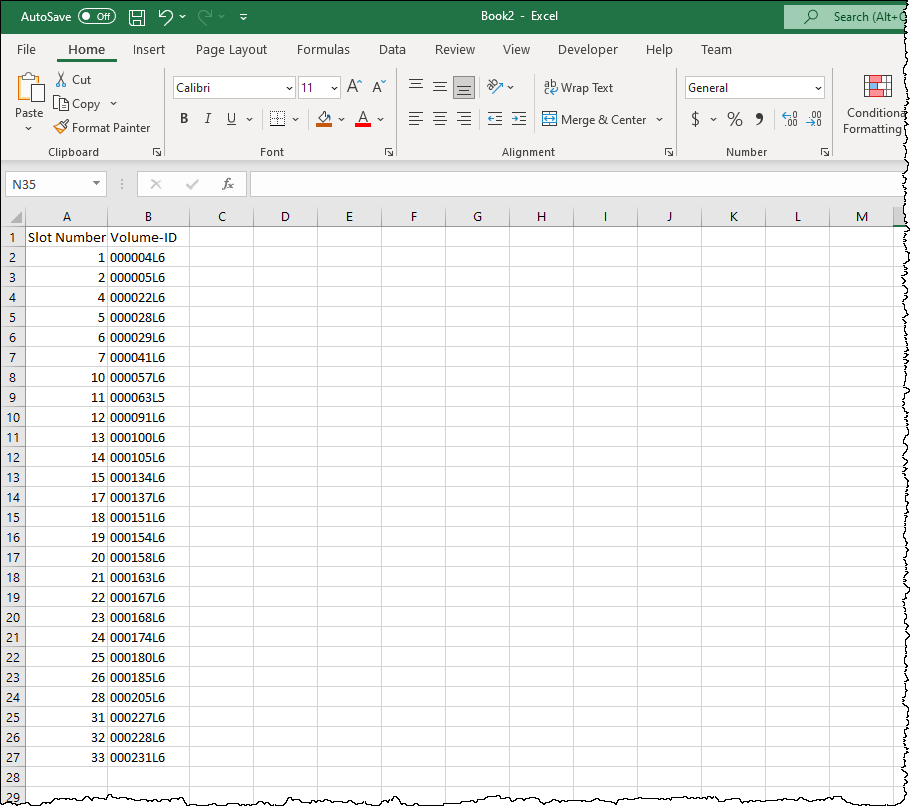
Volumes are left in their current Slots and each Volume-ID is recorded in a Excel spreadsheet, or similar, for importation into TapeMaster. To do this you need a thorough understanding of Virtual and Physical Slotting principles and put the required labour into recording each Volume-ID and its corresponding Slot number.
This method relies on you having a Zone layout that is configured in a correct manner so that each Zone, shelf and Slots are in a logical order that can be setup in TapeTrack and the data imported.
Sample excel file


