Table of Contents
Scan-Out
The Scan-Out process is used to record the Volumes are leaving the current location or Repository.
Scanning-Out Volumes allows you to ensure that only the correct Volumes are being placed on the transport vehicle as well as adding an historical entry in the database to record the chain of custody of the scanned Volumes.
Scan-Out Process
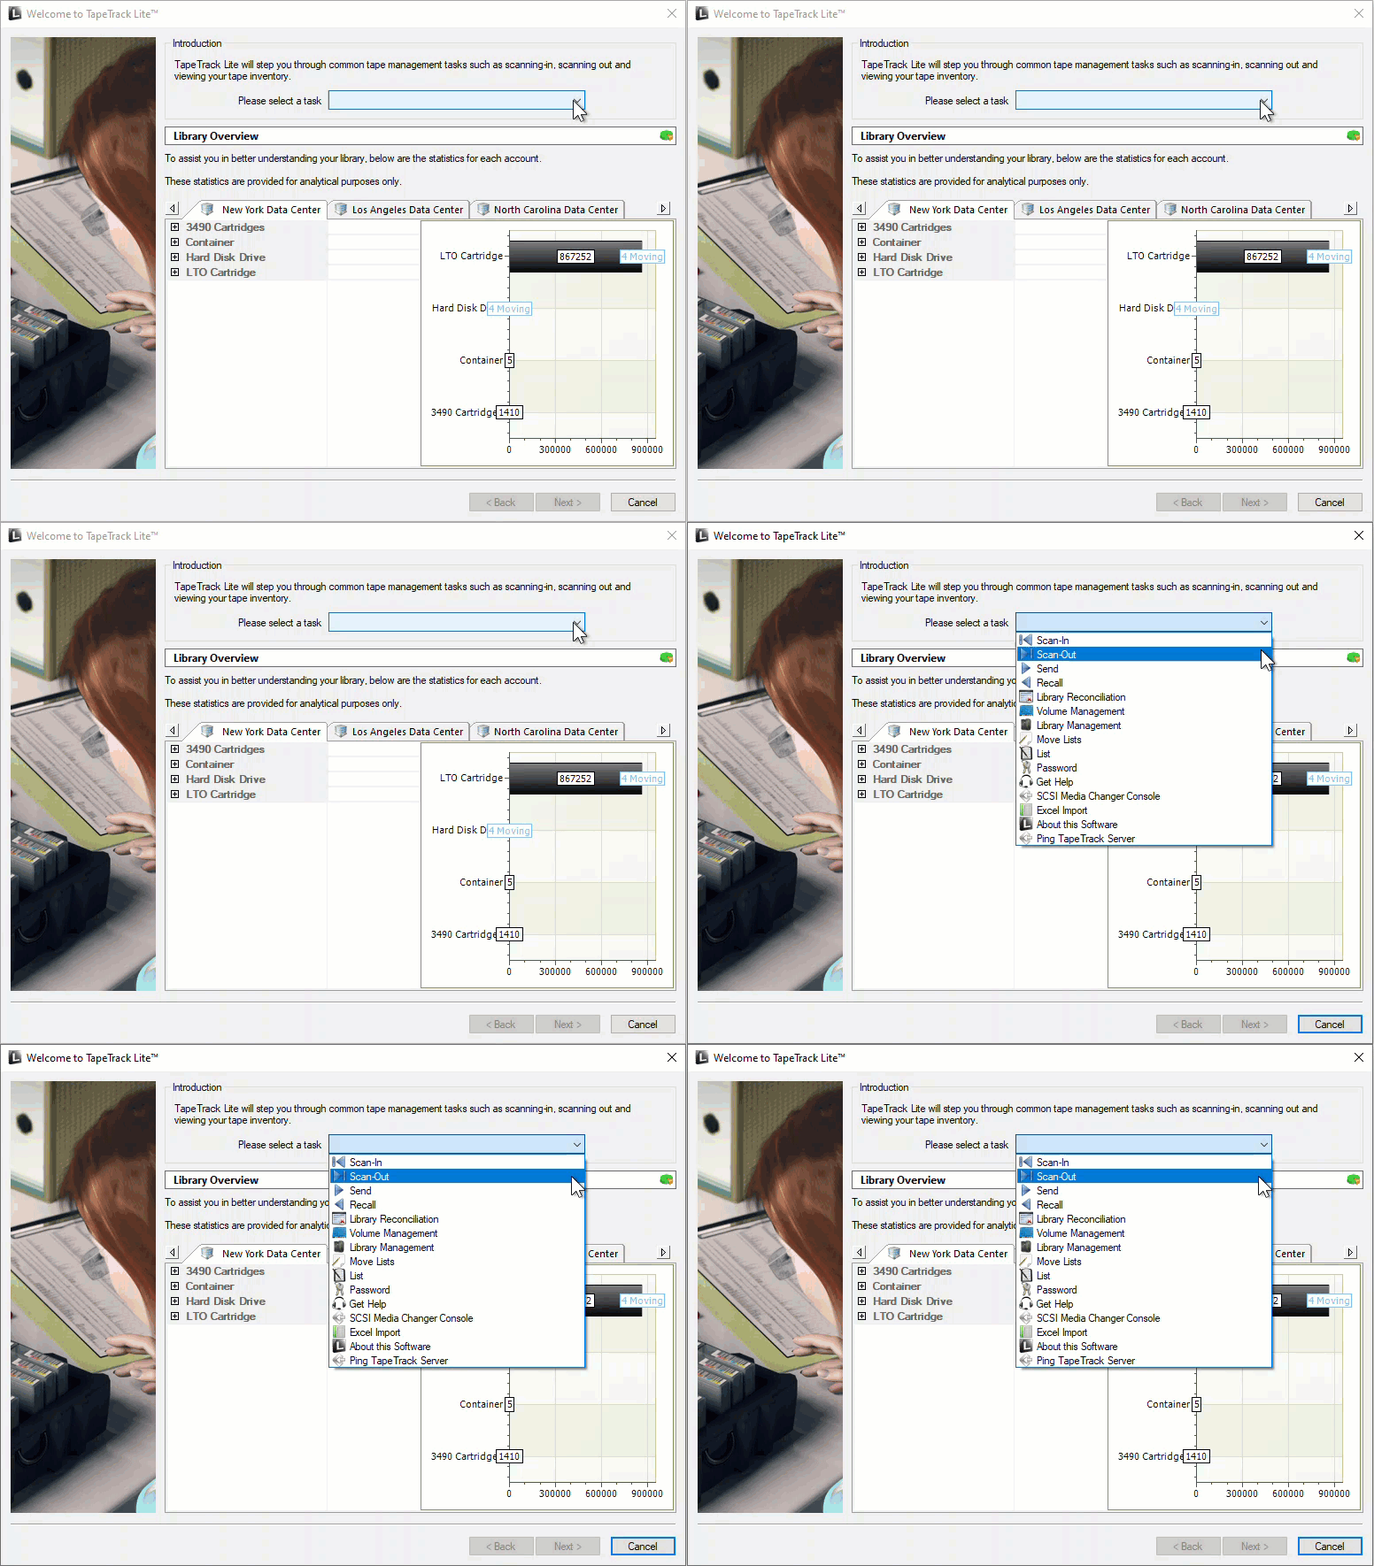
Selecting Scan-Out
Options
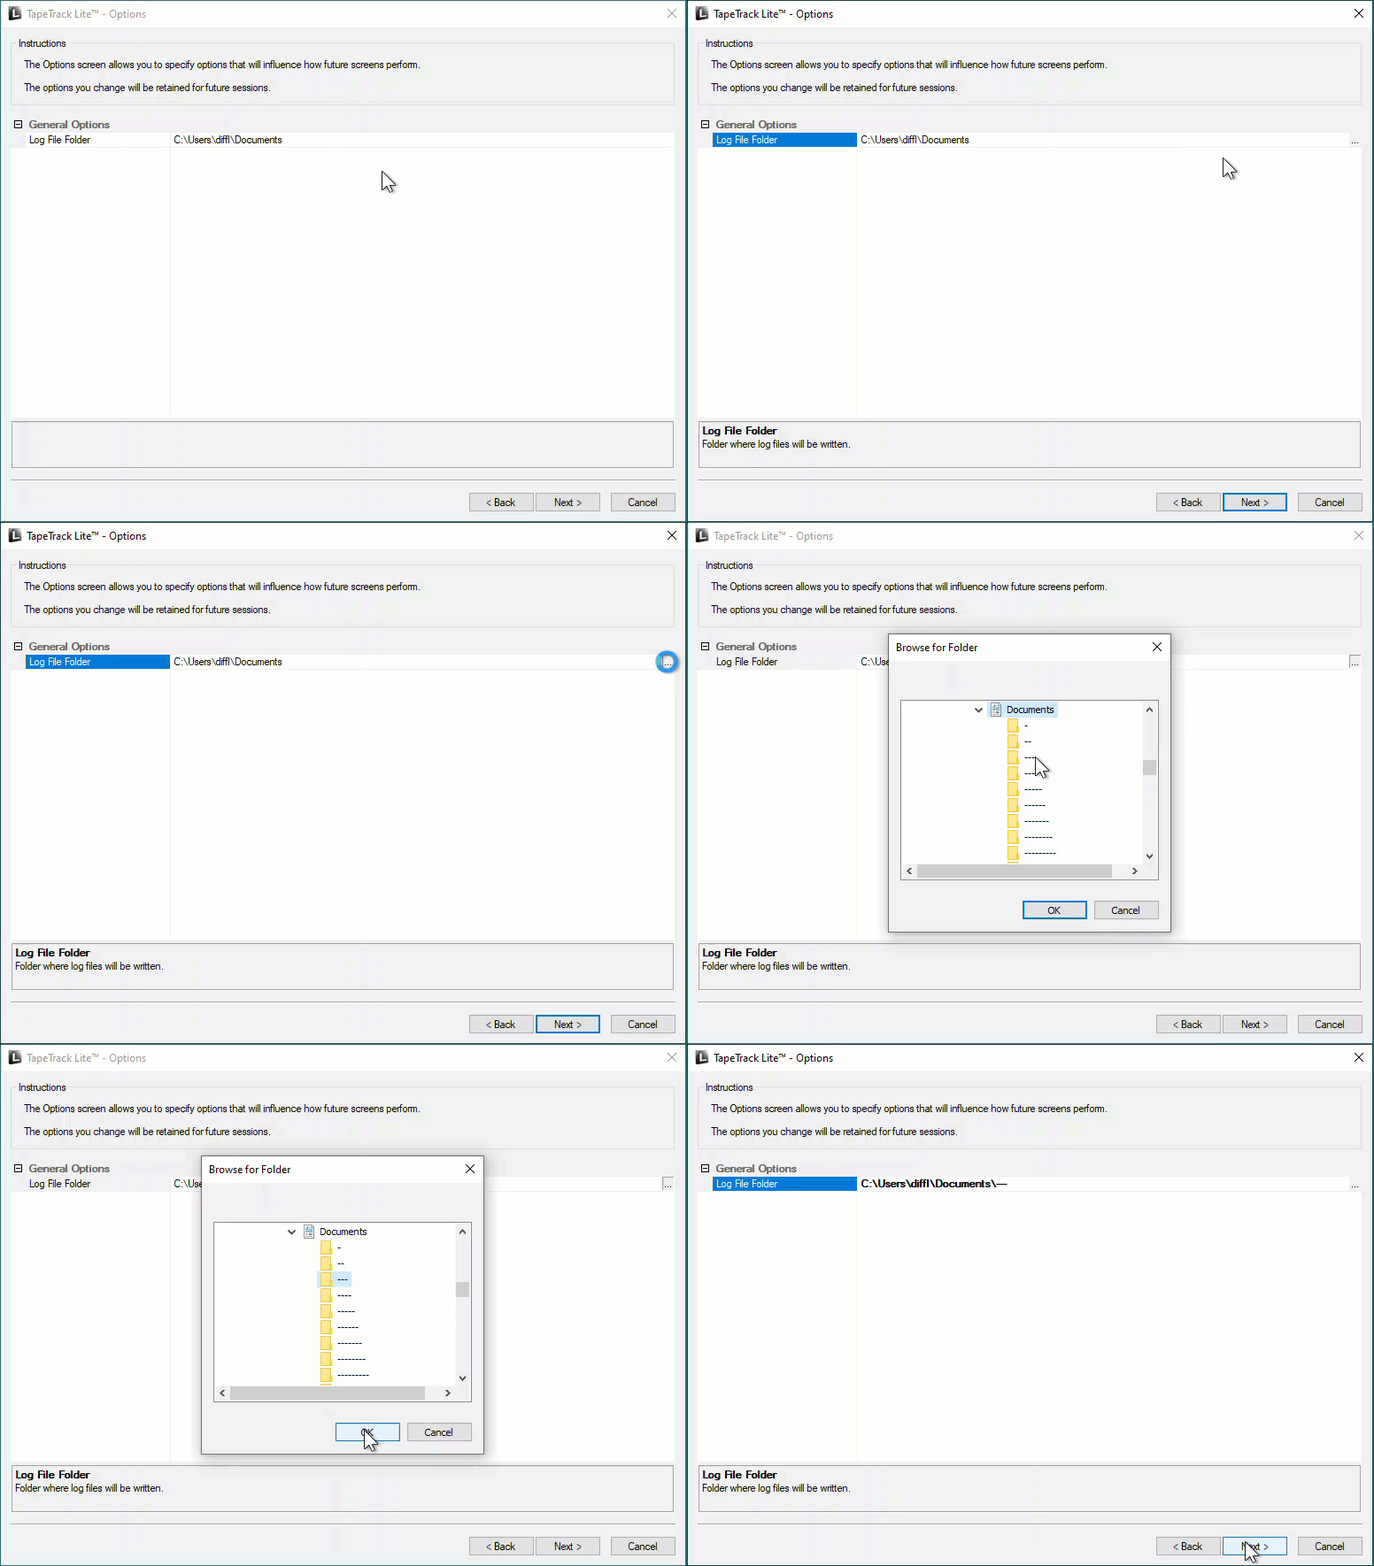
This will open the Options window. If required you can set the location for the log files to be written to, or leave the default.
To change the default directory, click in the field to the right of the Log File Folder and click on the (…) button and select directory.
Click Next to continue.
Customer Selection
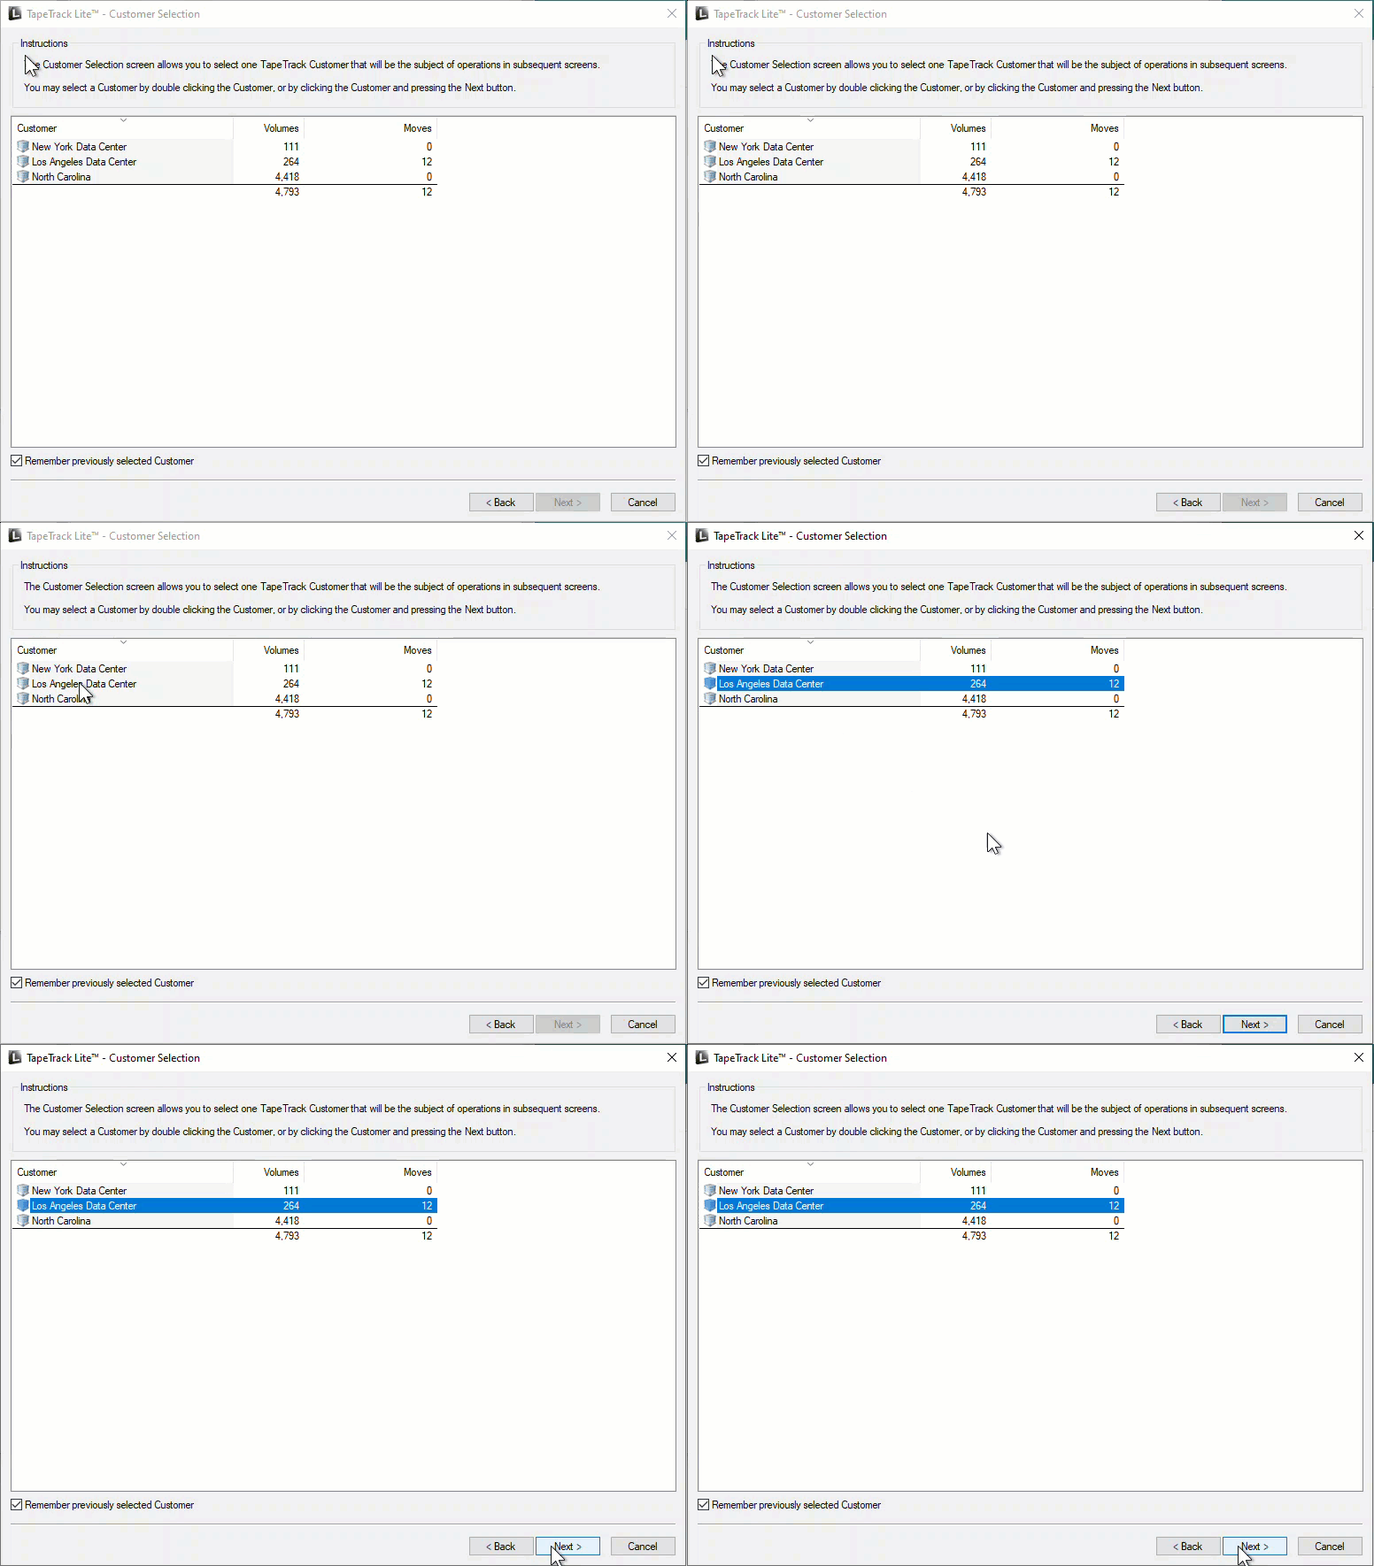
Select the account or Customer that you want to manage Volumes for by double-clicking the Customer-ID or left-clicking the Customer-ID and clicking Next at the bottom of the page.
Remember previously selected Customer will retain the currently selected Customer for future Lite functions.
This can be removed at any time by unchecking Remember previously selected Customer
Scan-Out Location
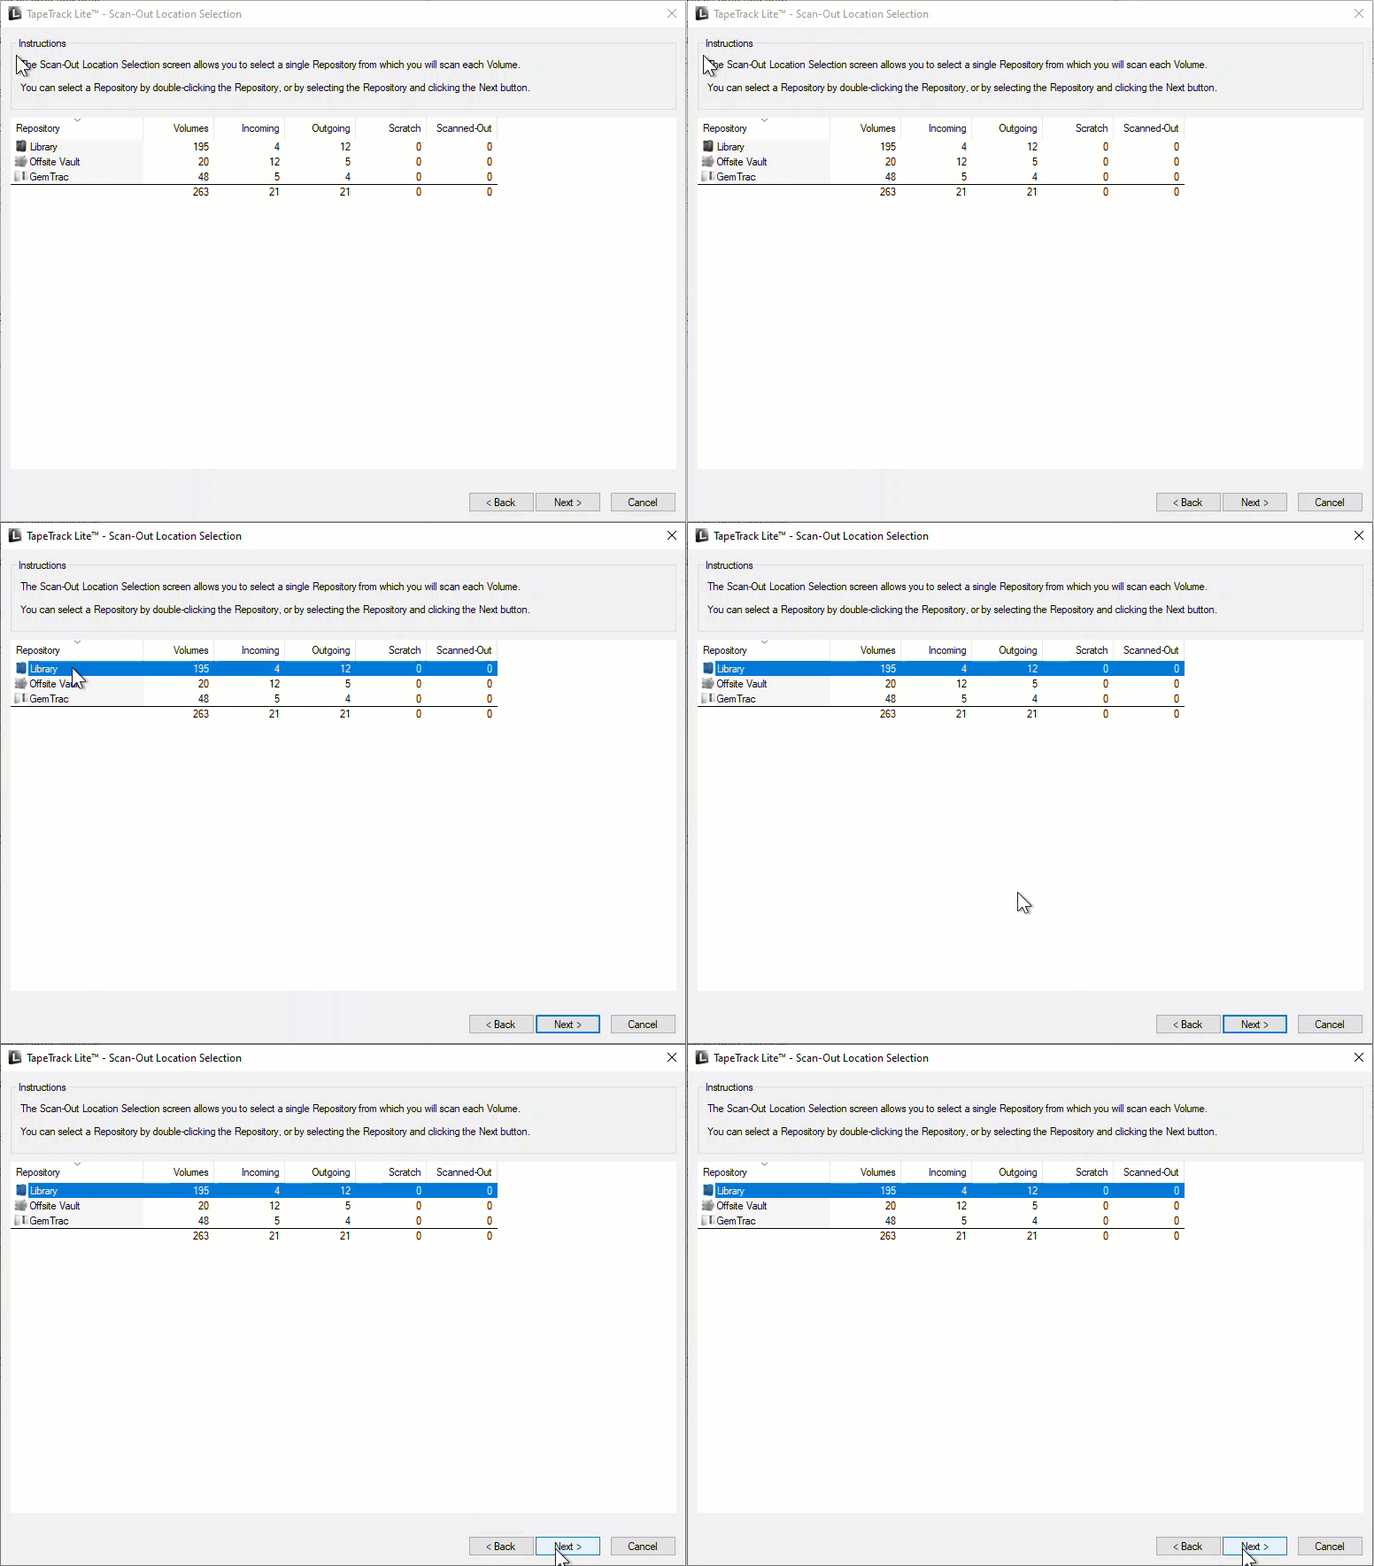
In the Scan-Out Location window select a Repository to Scan-Out the Volumes from by double-clicking on the Repository or left-click to select Repository and click Next to proceed.
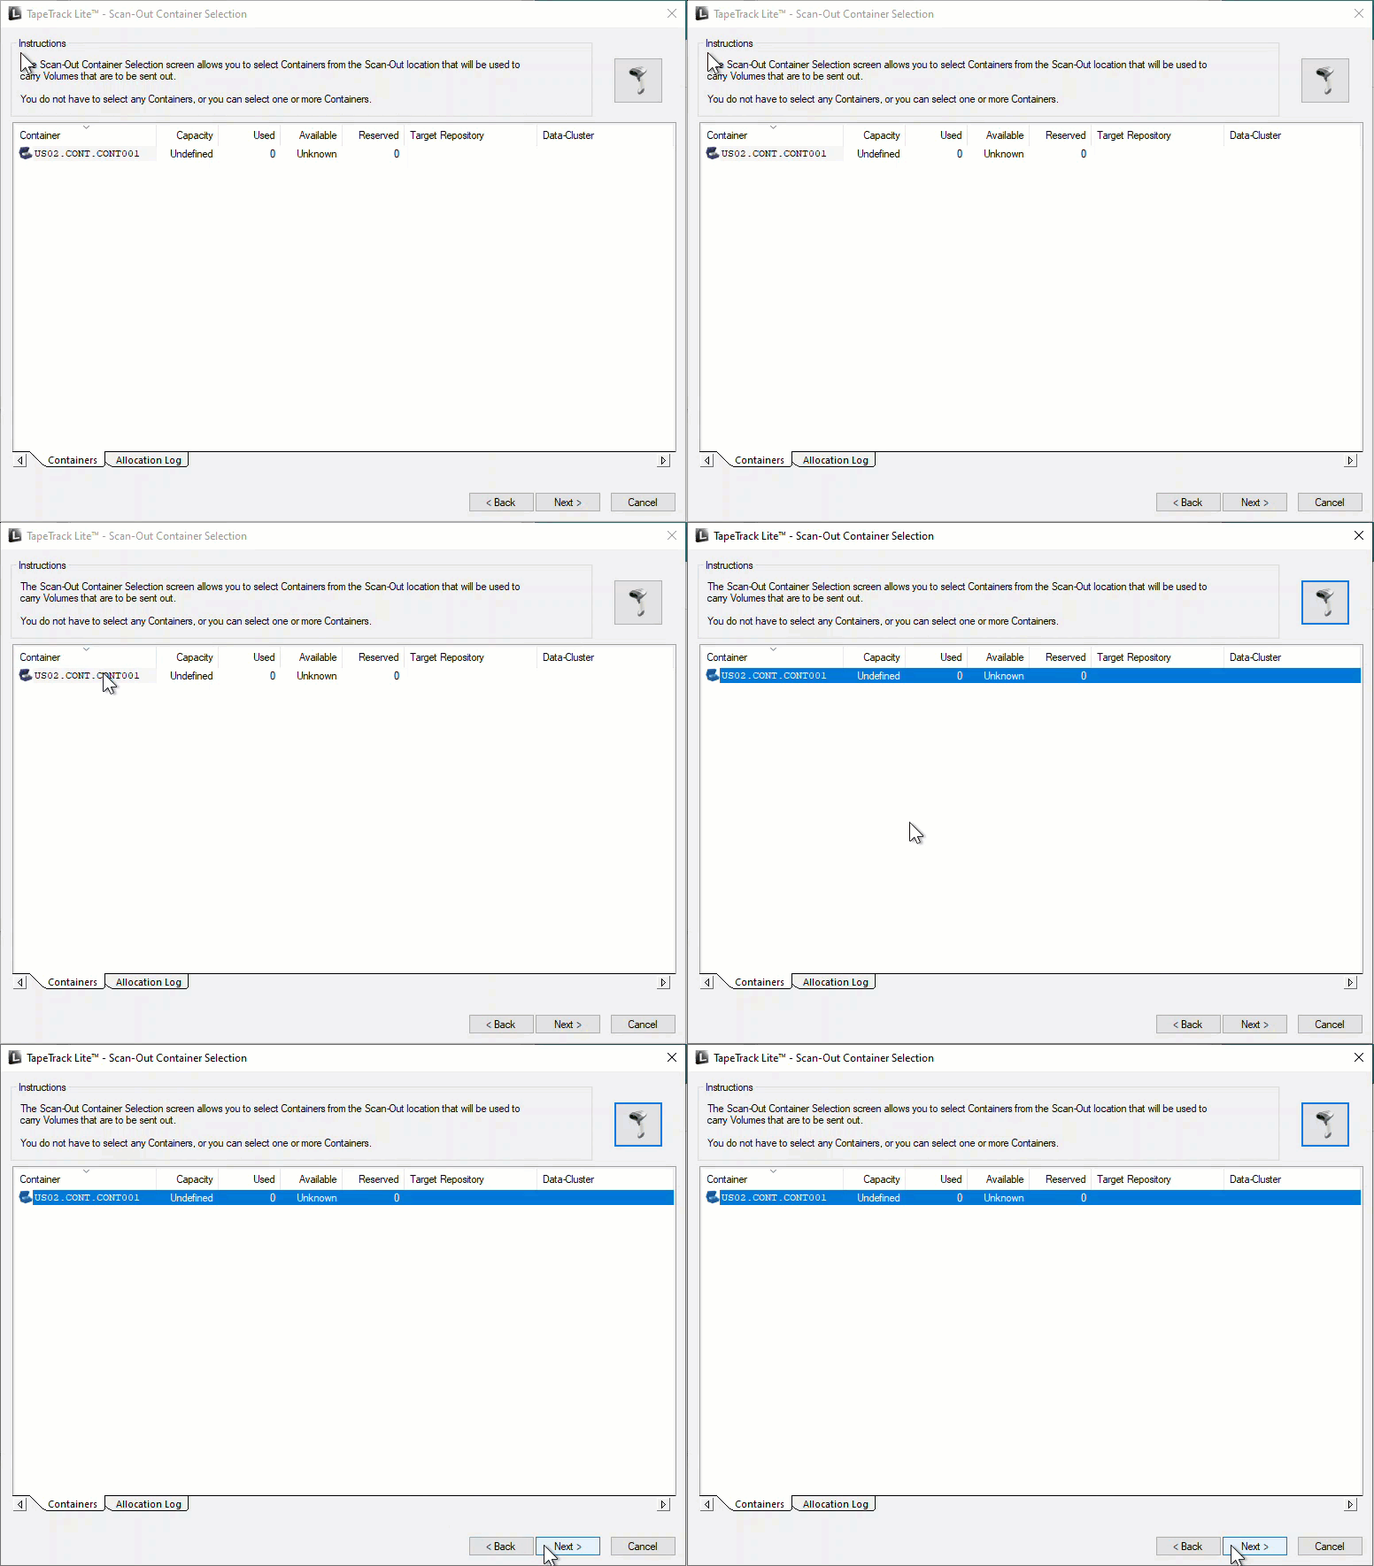
Scan-Out Container Location
If using Containers with unique identities, select from the displayed list the required Containers to assign the Volumes to. Select one Container by double-clicking or by left-clicking Container ID and clicking Next. To select multiple Containers control + left-click to select required choices. Containers can also be Scanned-Out by clicking the Open Volume Scan-In window by clicking on Scan-in Button which will launch the Desktop Scan Window and scan required Containers.
If Volumes have already been assigned to a Container via TapeMaster or Sync process, the correct Container/s will be pre-selected and shown in a grey background, or blue background when the window in clicked on.
If no Containers are needed simply click Next.
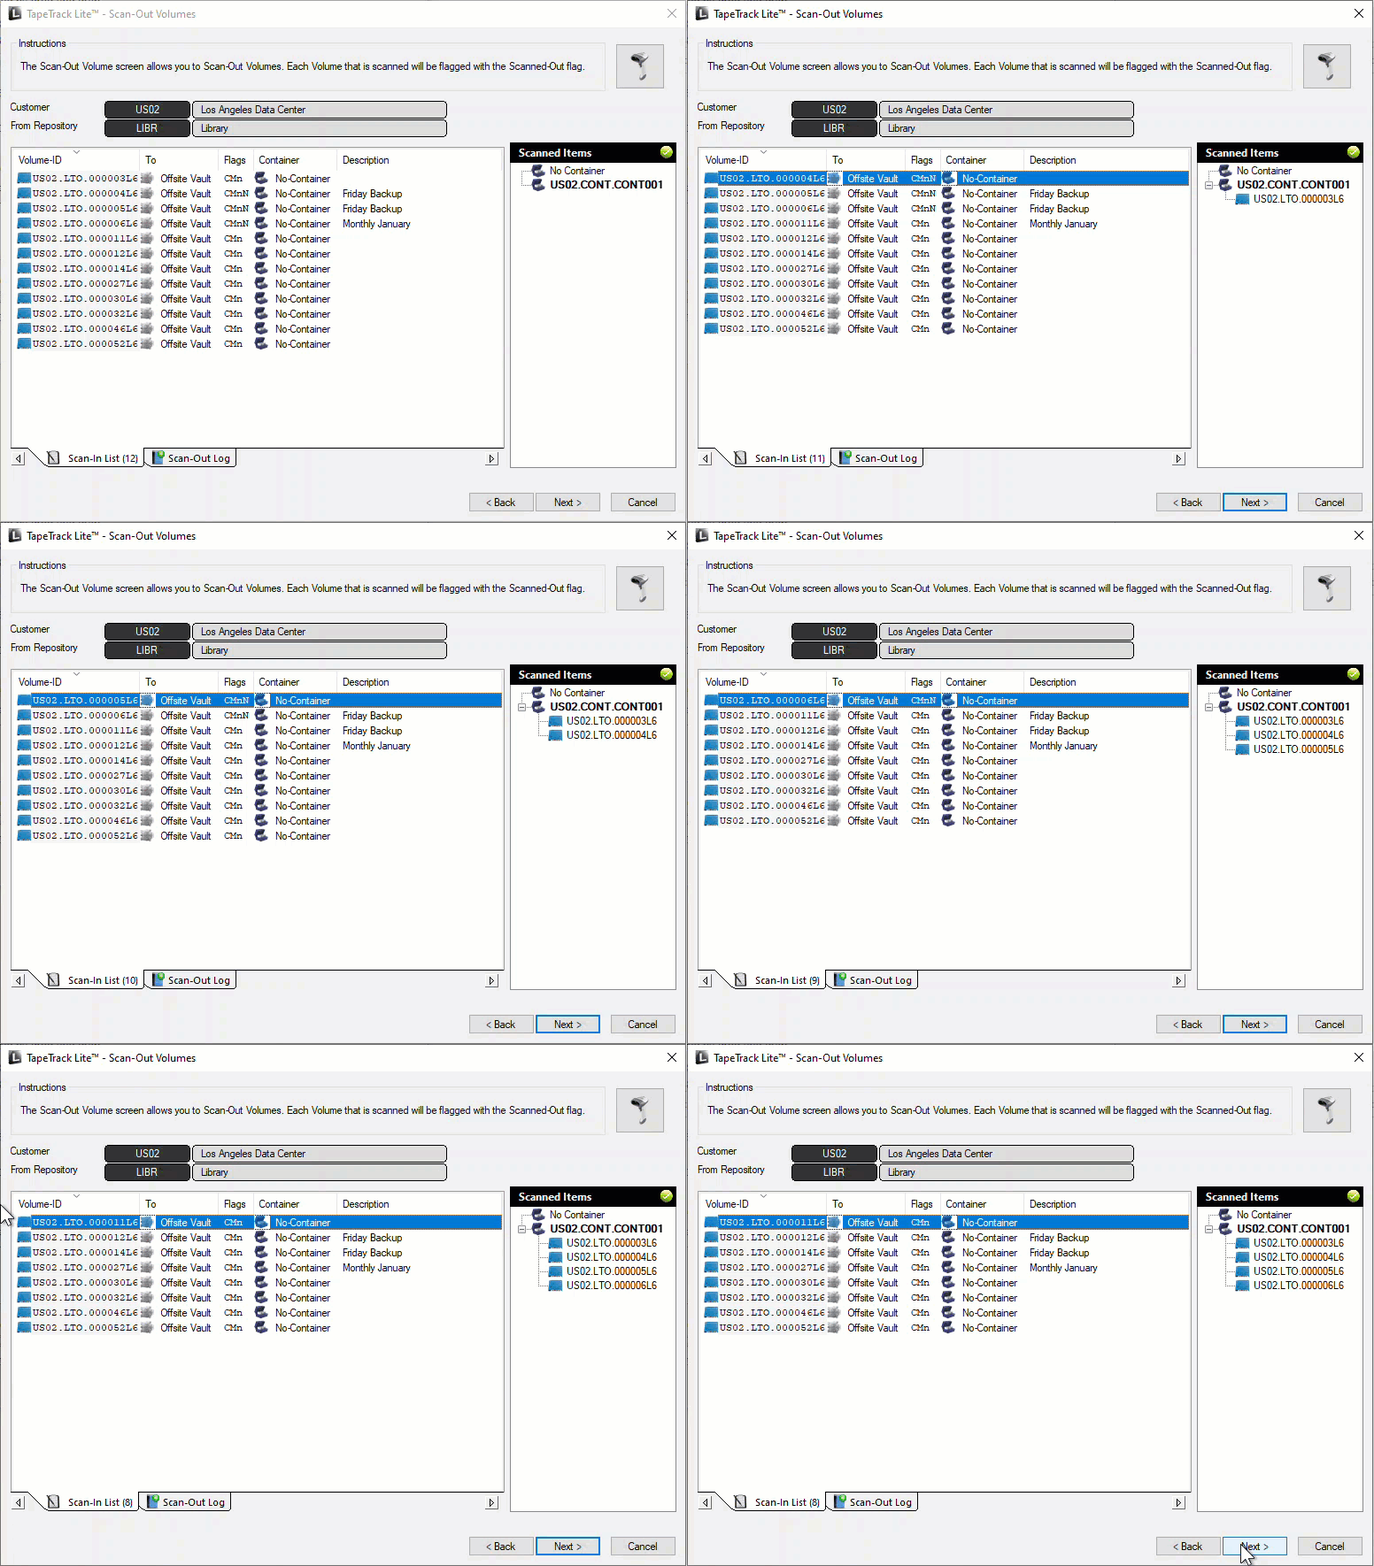
Scan-Out Volumes
The Scan-Out Volumes window will display the tapes eligible for Scanning-Out of the selected Customer and Repository.
This window also, by default, opens the Scan-Out Volumes Input window. Customer-ID and Media-ID values can be entered in the upper right Defaults panel to automatically add these values to the scanned Barcodes if scanning unqualified Barcodes. The field Edit in the Defaults panel can be used to add prefix or suffixes to the Volume-ID.
For example, setting the Customer-ID field to US01, Media-ID field to LTO and edit field to *L5 will change a Barcode of 123456 to US01.LTO.123456L5.
Notes:
- The Scan-Out window shows the items that need to be scanned.
- The Scanned Item tree shows the items that have been scanned and associated Containers. The Container shown in bold signifies the current Container allocation for scanned Volumes
- The
Scanner buttonallows you to reiterate the Scanner Window. - The
Scan-Out Logoption lists any errors in scanned Volumes .
Scan-Out the required Volumes using your preferred scanning method.
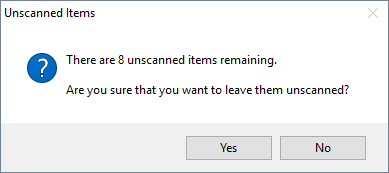
When finished Scanning-out Volumes click Next to continue. If you have not Scanned-Out the entire list a warning of Unscanned Items will be displayed.
If you wish to Scan-Out the rest of the Volumes click No to return to the Scan-Out Volumes window. If you wish to continue and leave the remaining Volumes unscanned (they can be scanned out at a future time) click Yes to continue.
If you wish to Scan-Out the rest of the remaining Volumes, click No to return to the Scan-Out list.
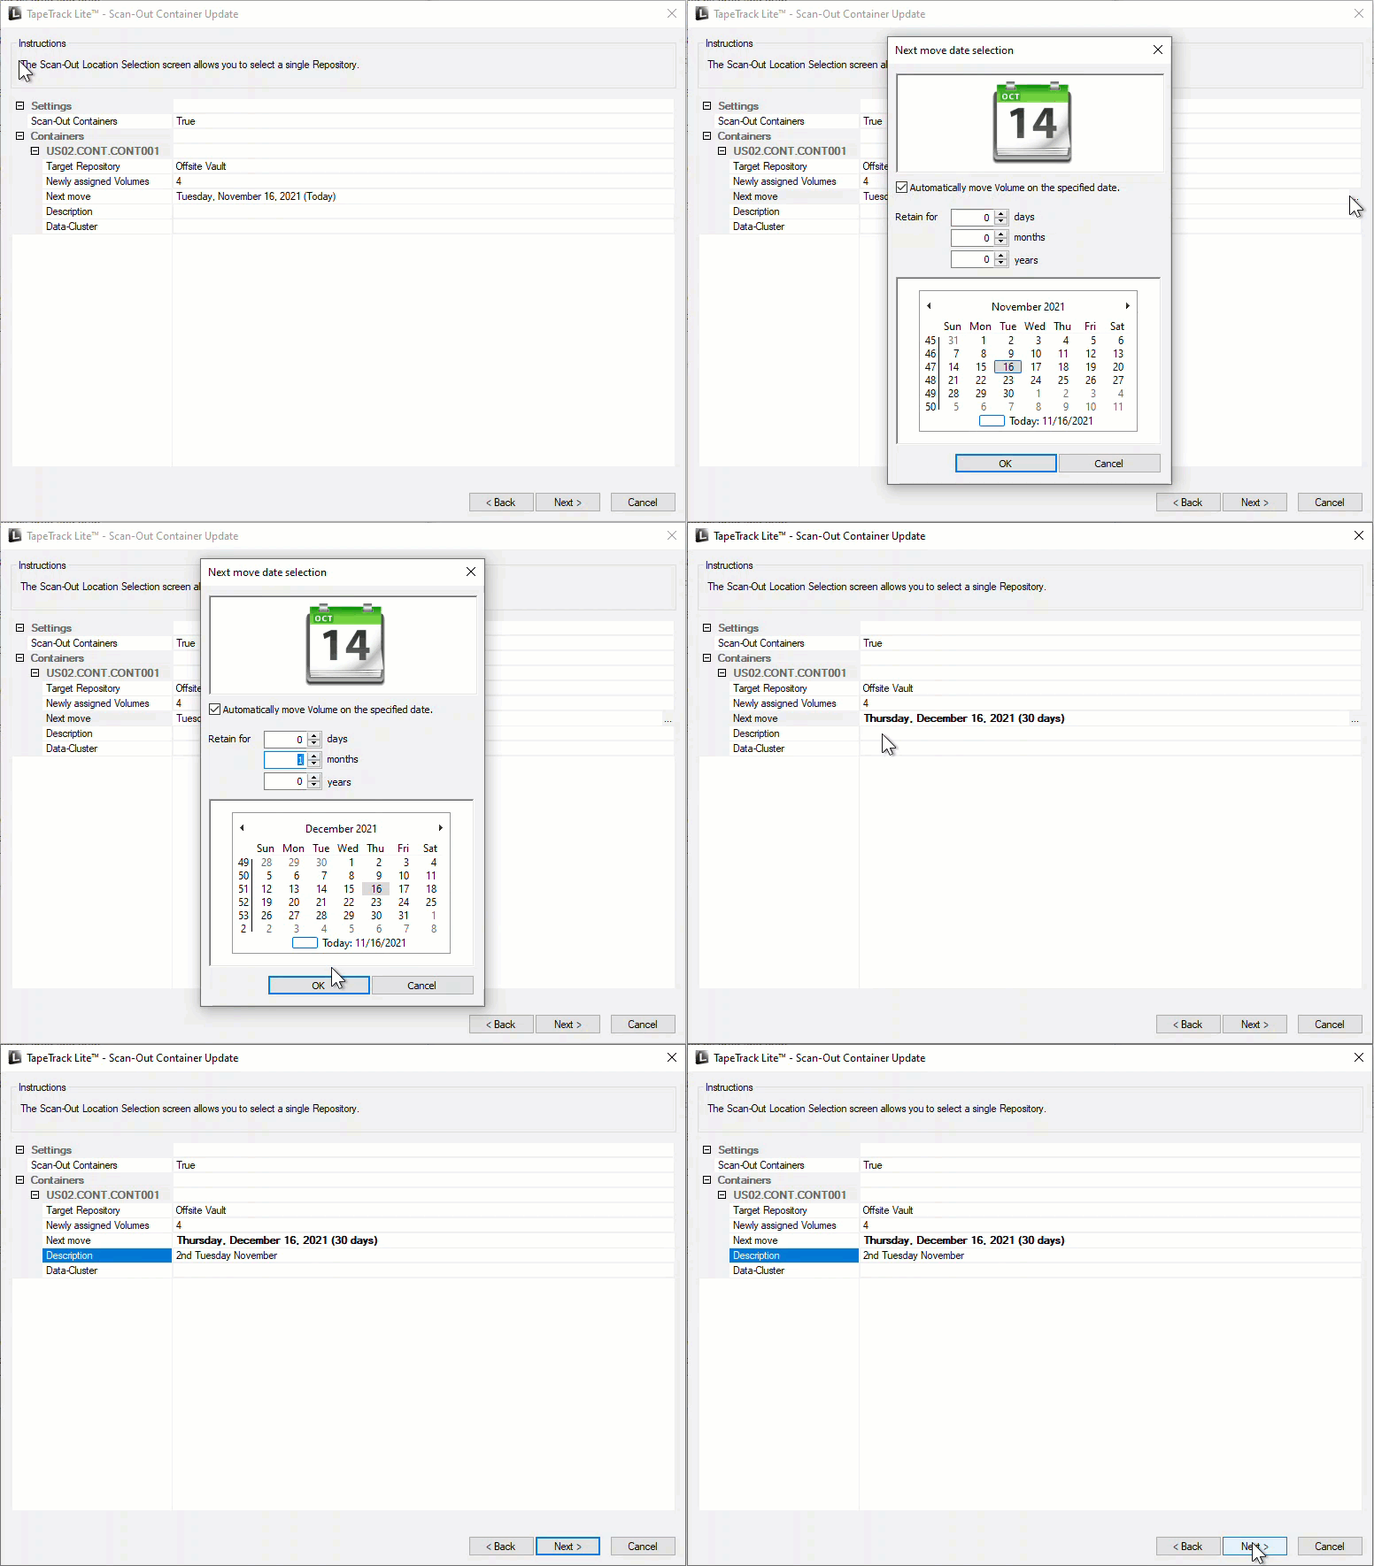
Scan-Out Container Update
From here you can set the next move date, add descriptions for the Container/s and whether to Scan-Out the Container/s as well as the Volumes .
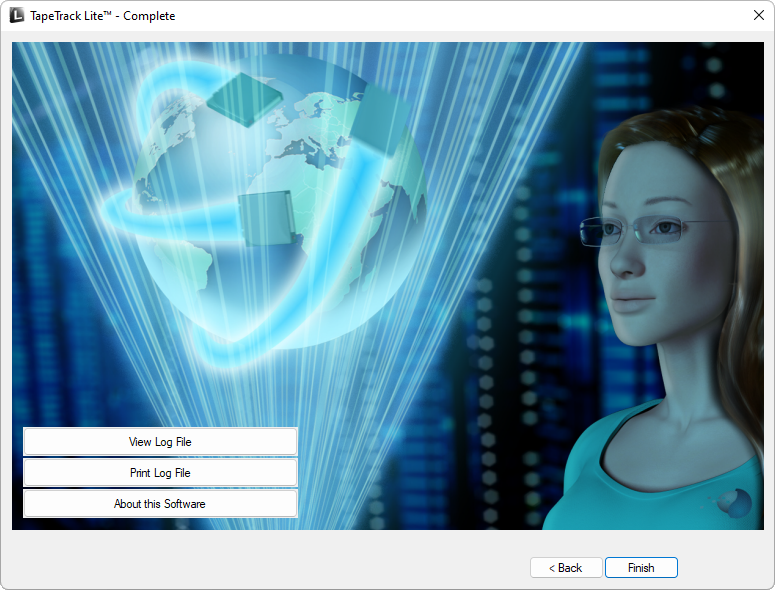
Complete
This will bring up the Complete window, from here you can:
- Click
View Log Fileto view the log file of the last completed process.. - Click
Print Log Fileto save a PDF of the log file to print from your PDF viewer. - Click
About this Softwareto view product and support (email, phone & website) information. - Click
Backbutton to return to start menu and select another task. - Click
Finishbutton orXat the top right of the window to exit TapeTrack Lite.

