Table of Contents
Scan To Slot Via Special Operations Slot Allocation
To use the Allocate to Slot via the Special Operations menu, the selected Volumes must be either moving to or confirmed in a Repository with allocated Repository.
While this process can be used any number of Volumes, you can only select a Slot for one Volume at a time so this process is best suited to one or low number of Volumes. To Slot multiple Volumes more efficiently see Scan to assign using Repository Usage Map.
Select Volumes To Slot
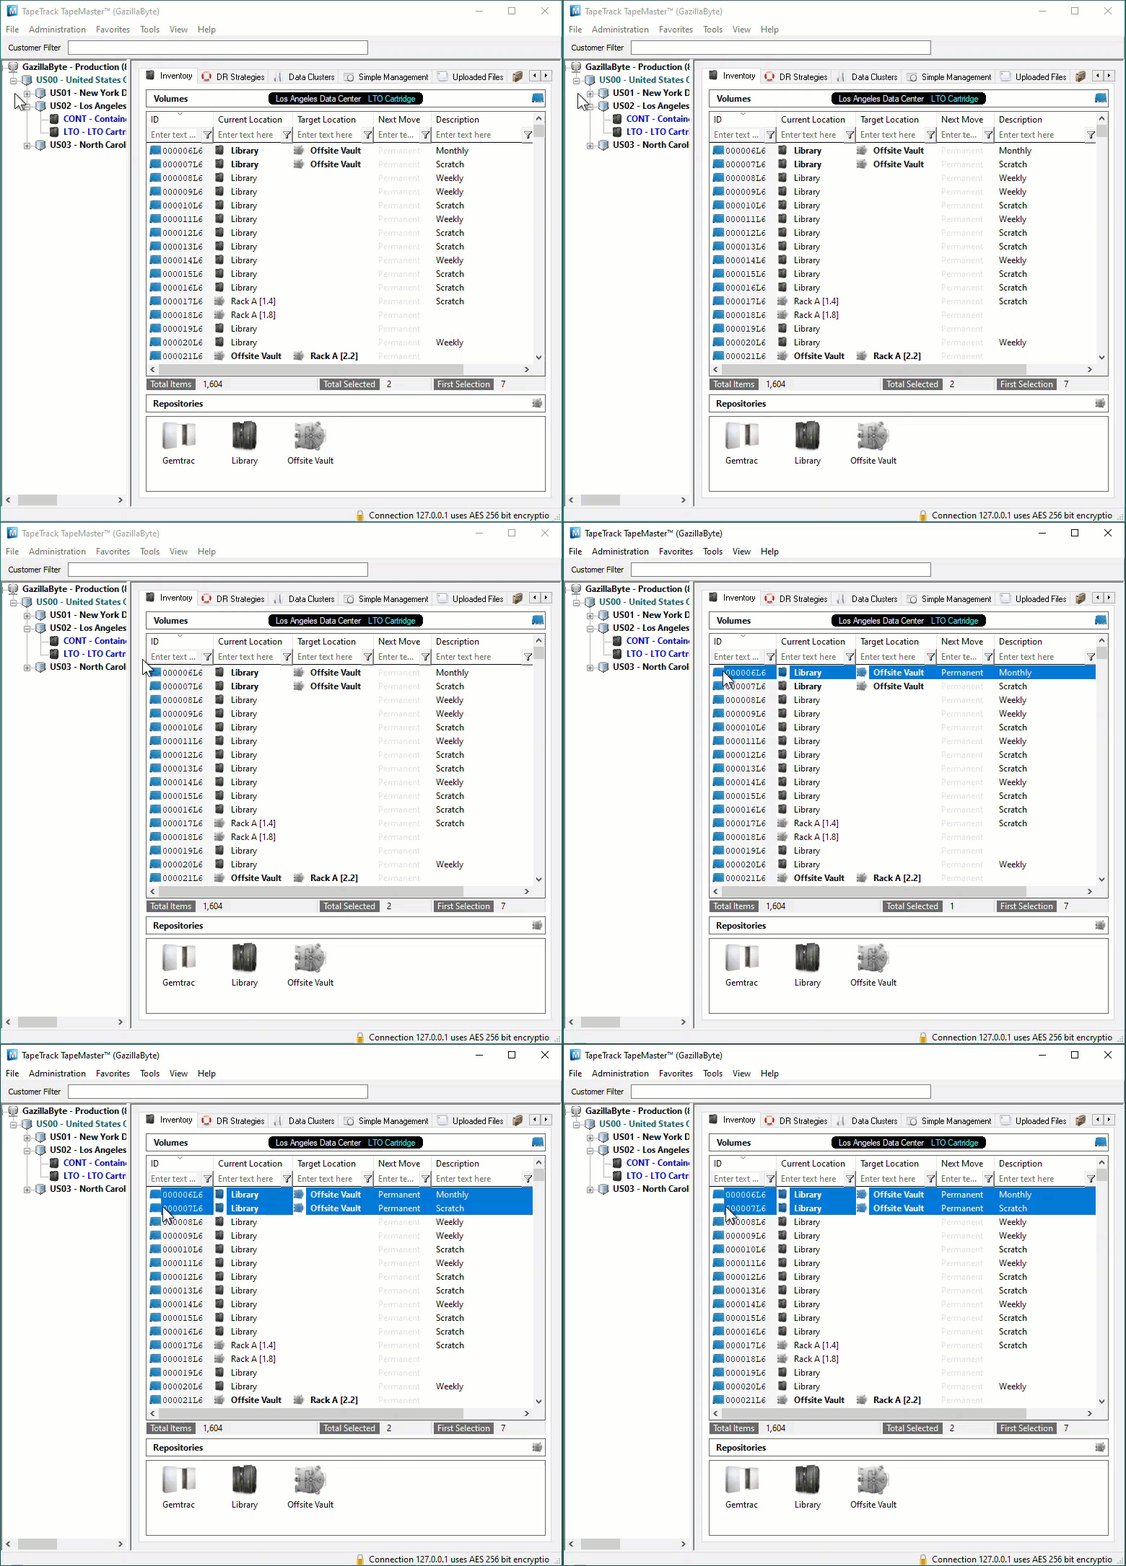
Select Volumes from the Inventory window by clicking on one Volume or using Shift+Click and Ctrl+Click to select a range of Volumes.
Select Slots
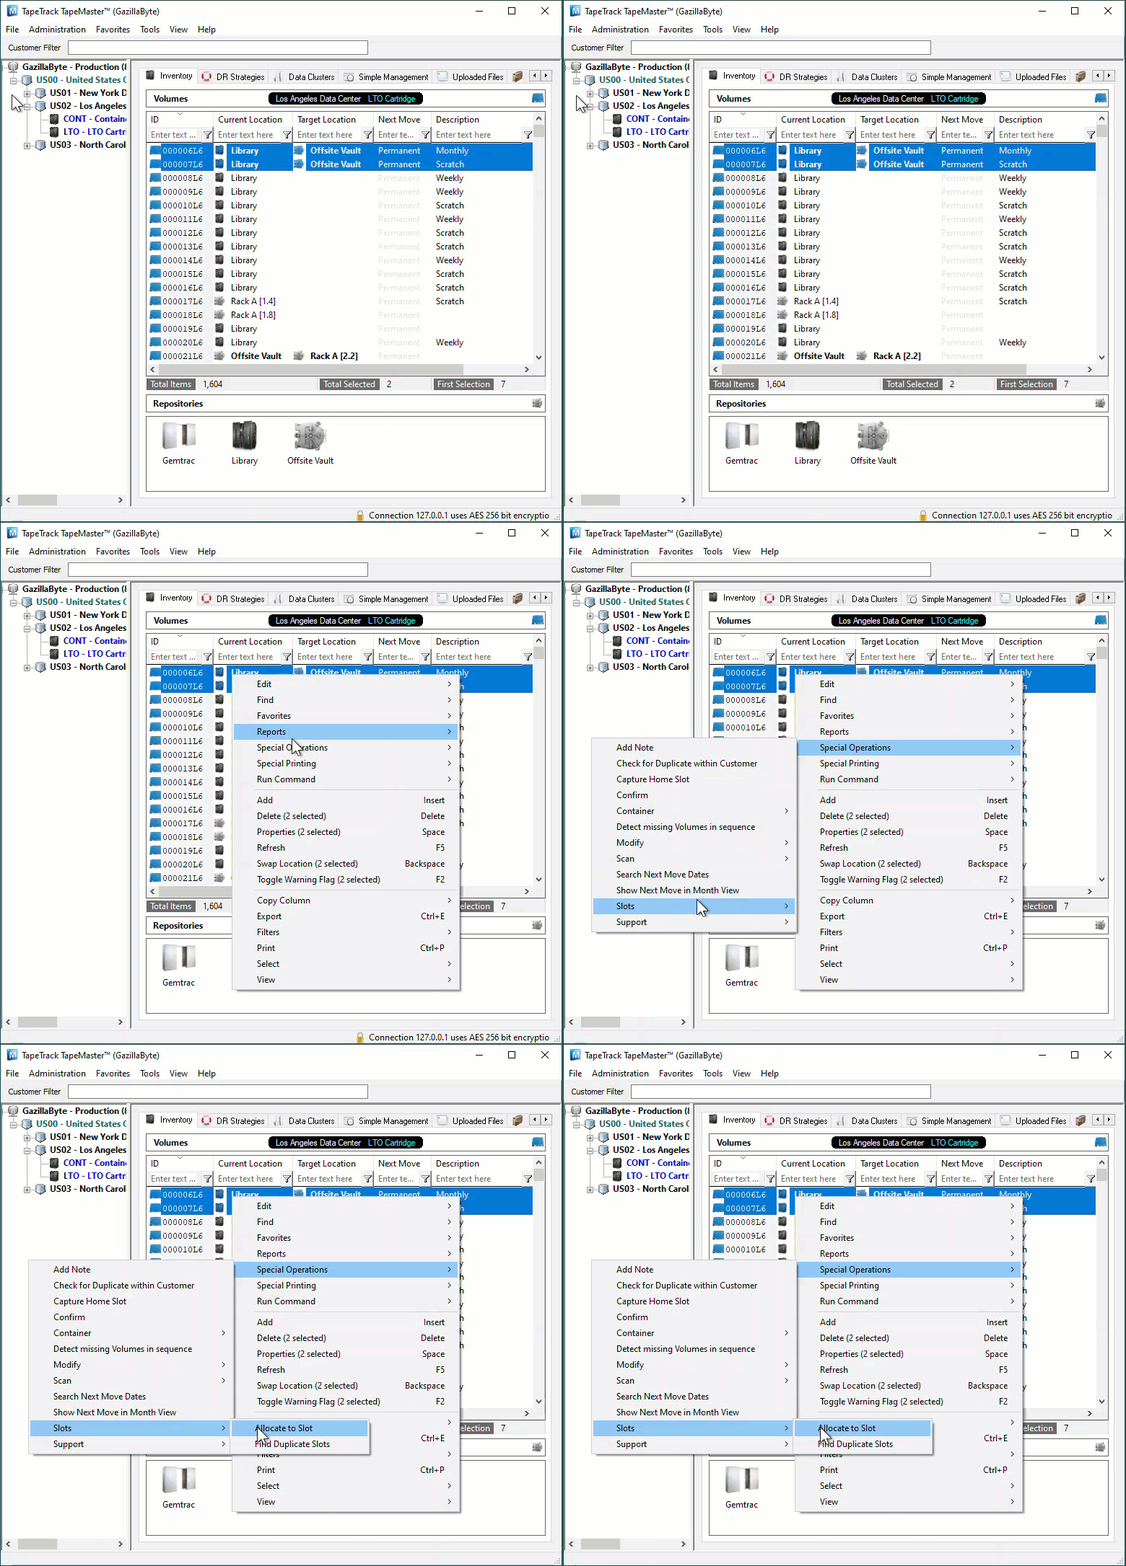
Right click highlighted Volumes and select Special Operations > Slots > Allocate To Slot
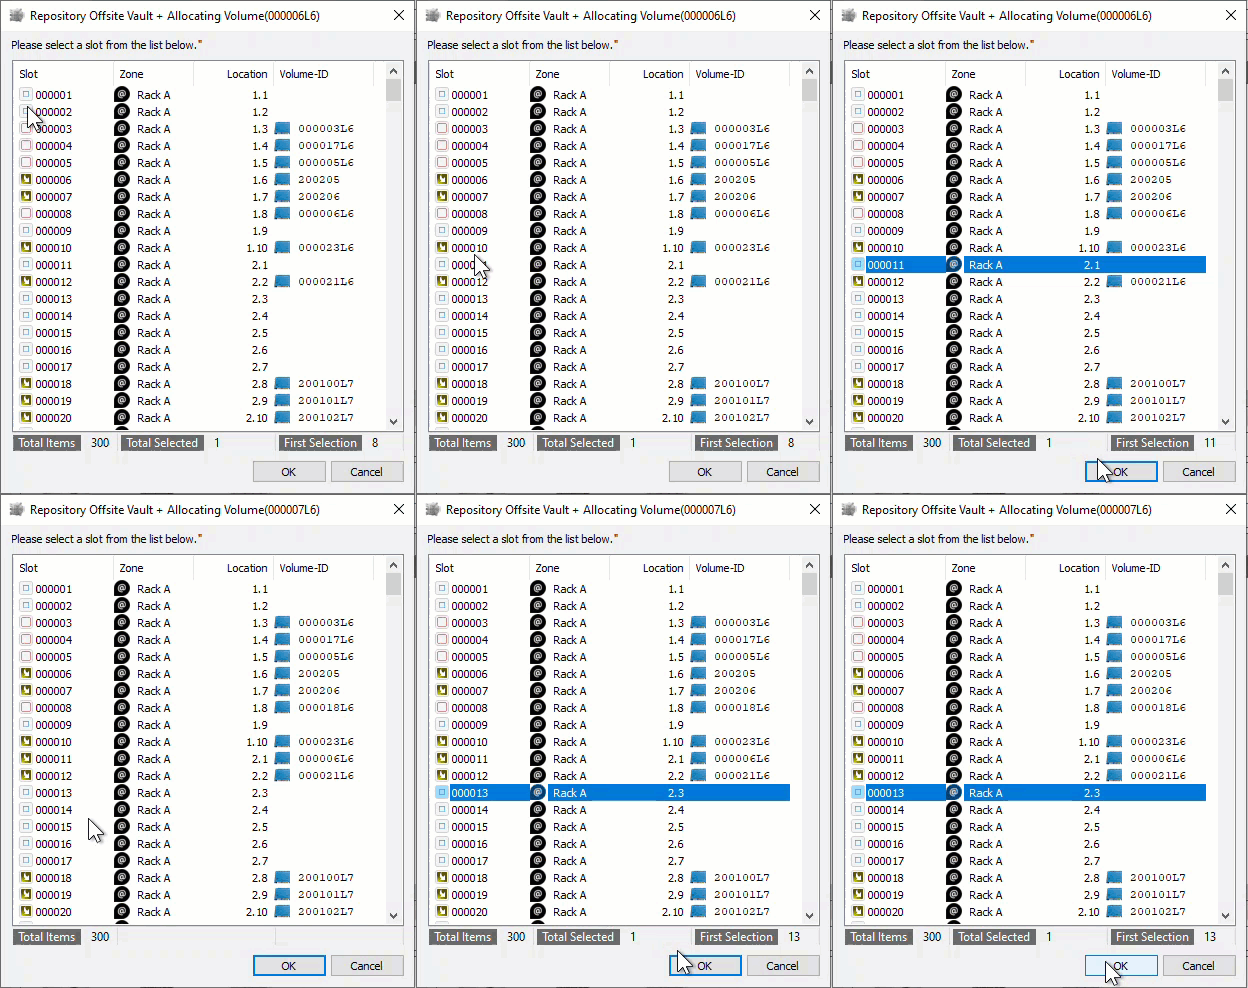
The Slot Selection window will display the Current Repository the Volume is being Slotted in and the Volume-ID currently being allocated in the top header. The main window will display Slot numbers, Zones, Slot Location, Volume-ID if Slot is occupied.
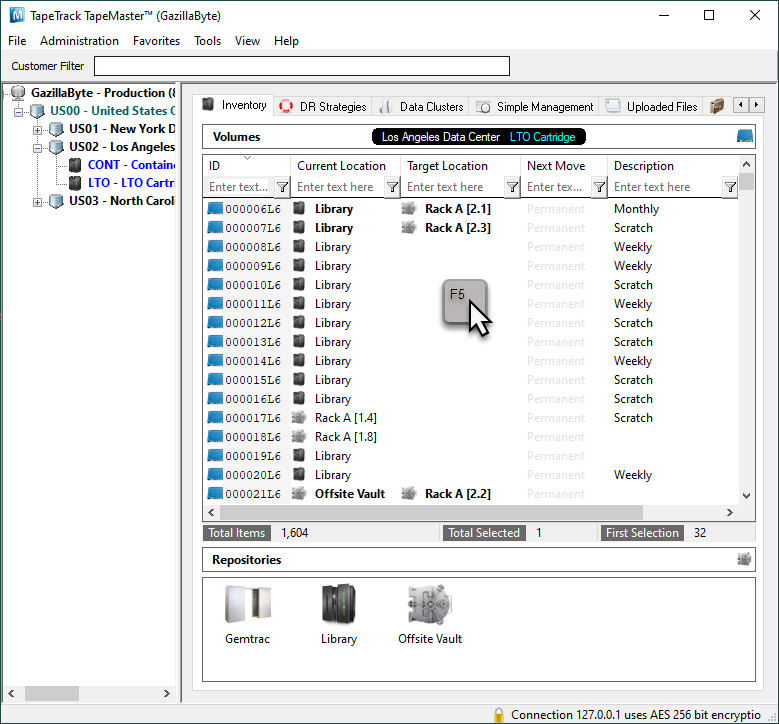
To allocate the current Volume to a Slot, click on an empty or unallocated Slot and then click OK. If you have only one Volume to Slot, the window will close. If you have multiple Volumes to Slot the window will refresh to show the next Volume-ID in the top header, following the same process for each Volume, select a Slot and press OK.


