Table of Contents
Adding and Maintaining Volumes
Adding Individual Volumes
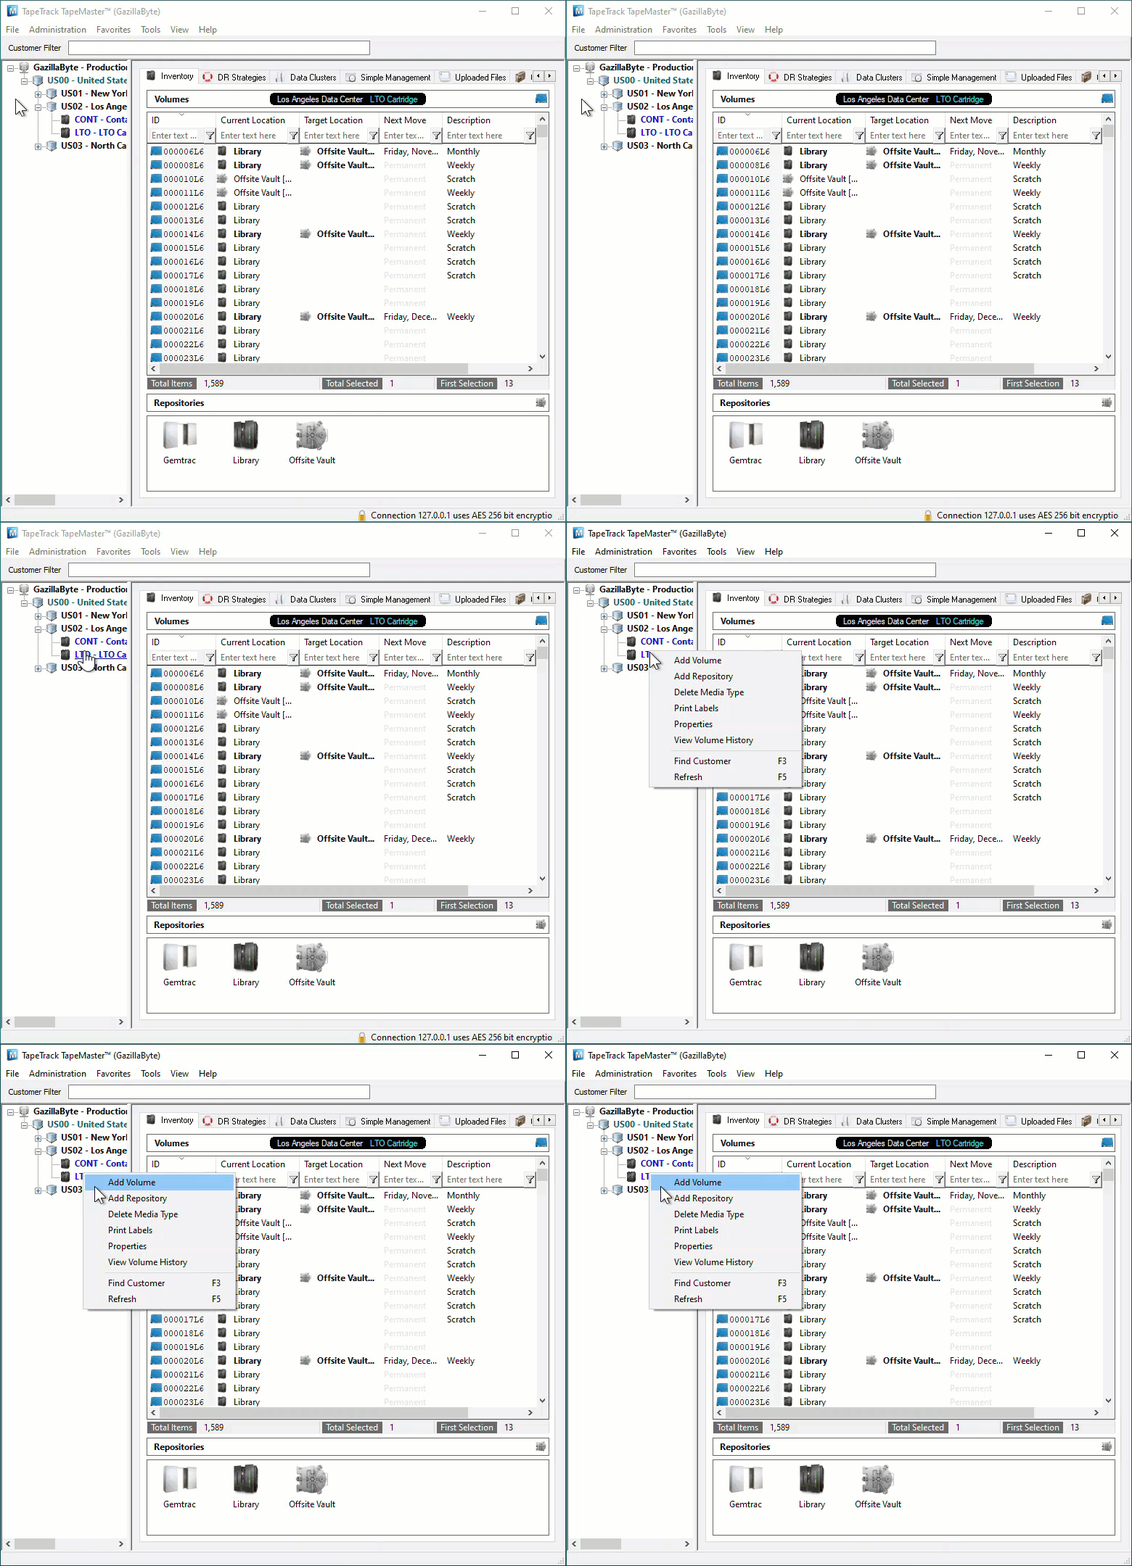
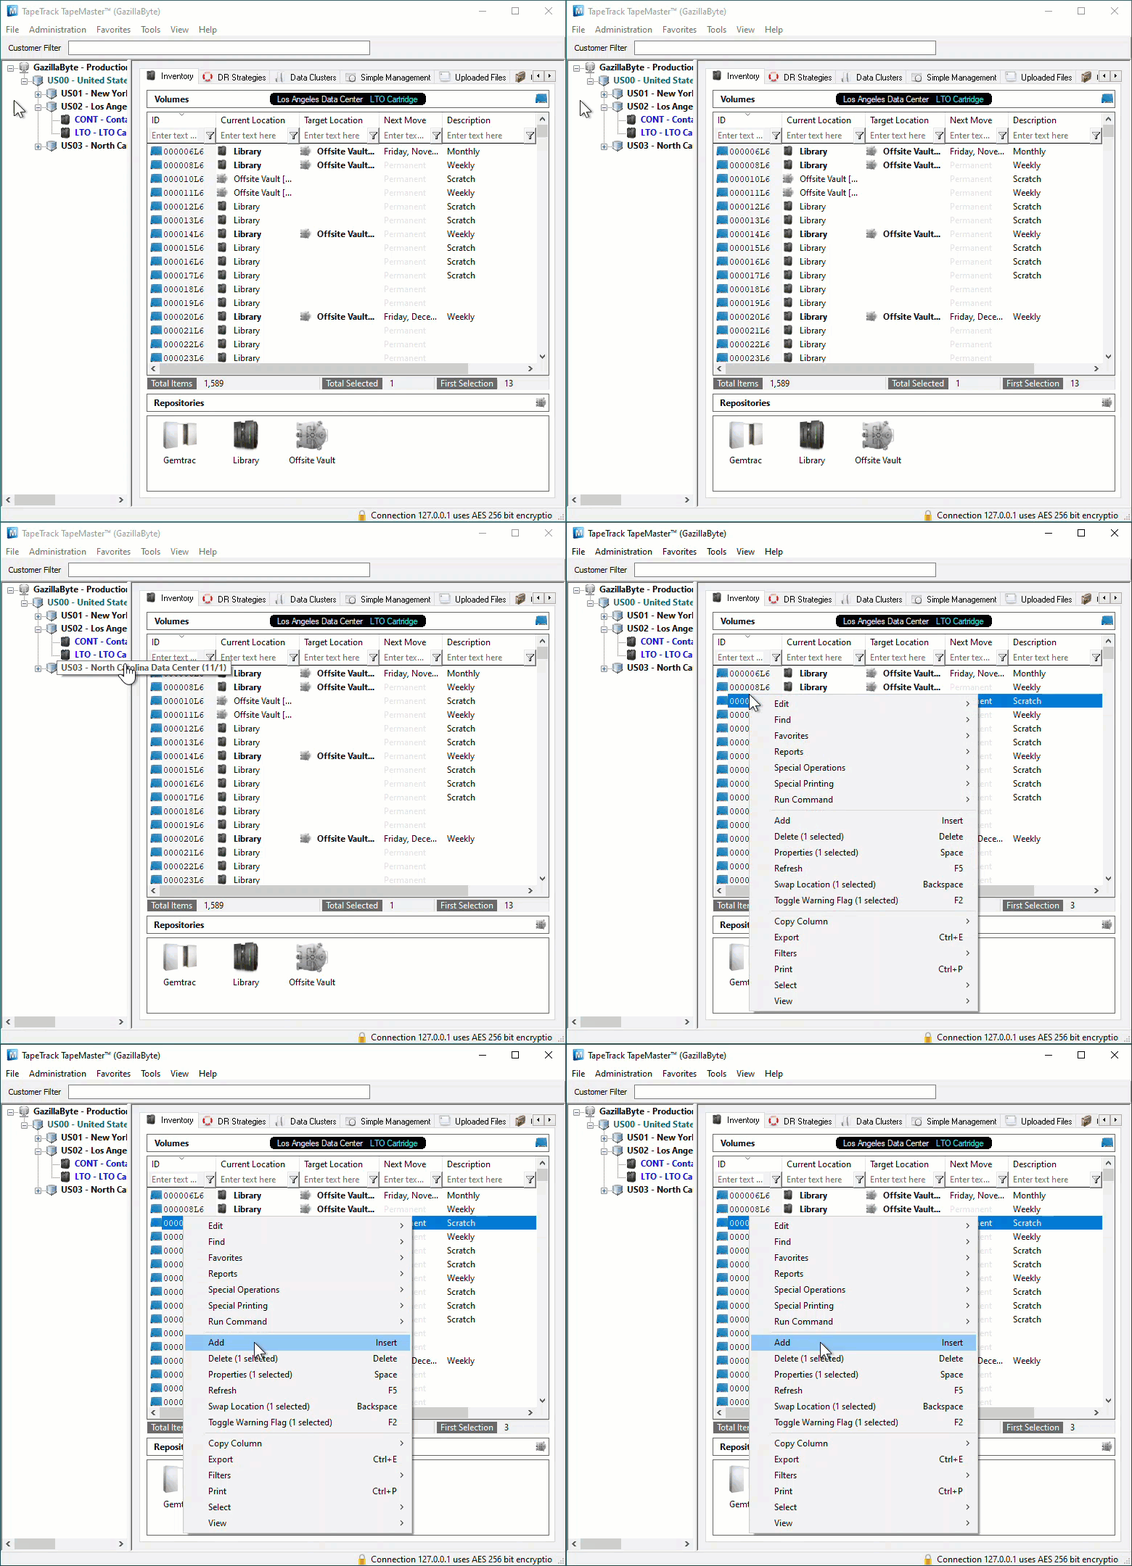
To add an individual Volume either:
Right-click on a Media Type and select Add Volume.
or right-click in the Inventory window and select Add.
or click in the Inventory window and press Insert on the keyboard
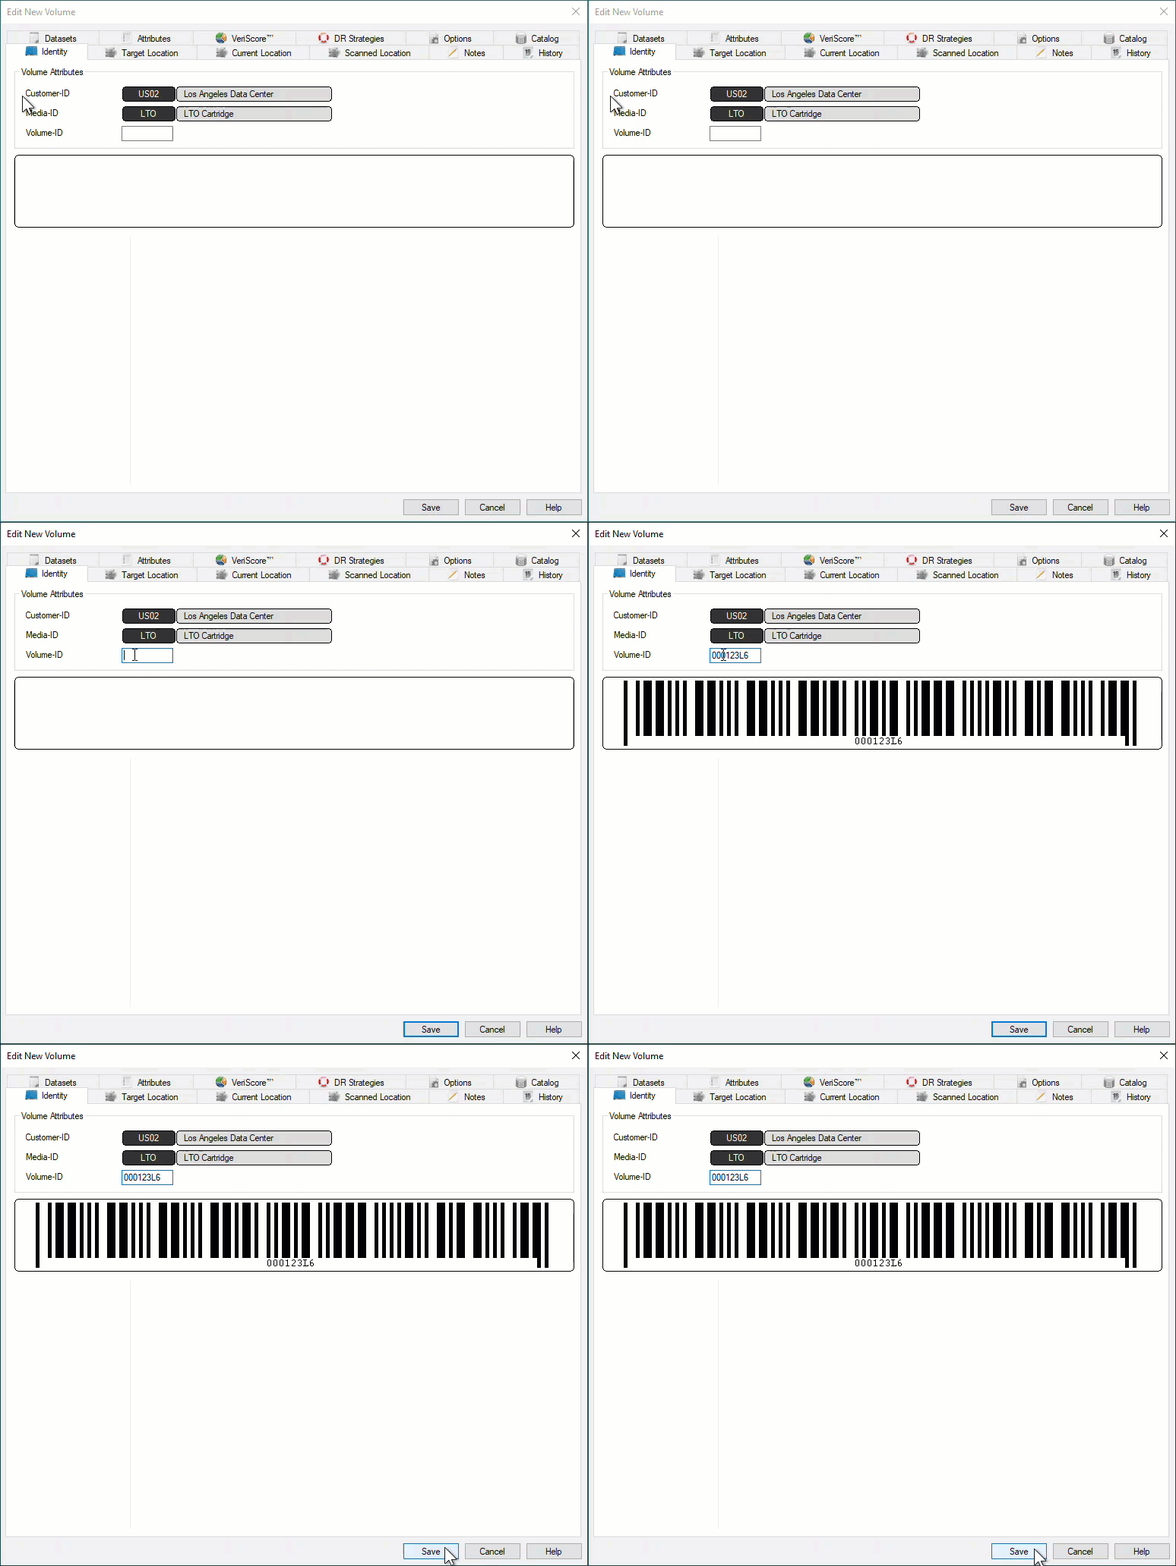
This will open the Edit New Volume window.
In the Edit New Volume window enter the Volume-ID of the new Volume to be added. Volume-ID's must be unique within a Customer/Media Type scope and must be between 2 and 10 alphanumeric characters long.
Click Save to add Volume.
Adding Multiple Volumes
Adding multiple Volumes can be accomplished using several different methods.
- Scanning Volumes using the ''Scan To Add'' process, best suited to adding small groups of Volumes with a scanner, keyboard or GazillaByte CloudScan App.
- Pasting in Volumes from Windows Clipboard or file, best suited to adding new Volumes from emailed or file lists of Volume-ID's.
- Importing Volumes from your Backup Software with TMSS10Sync.
Scan To Add
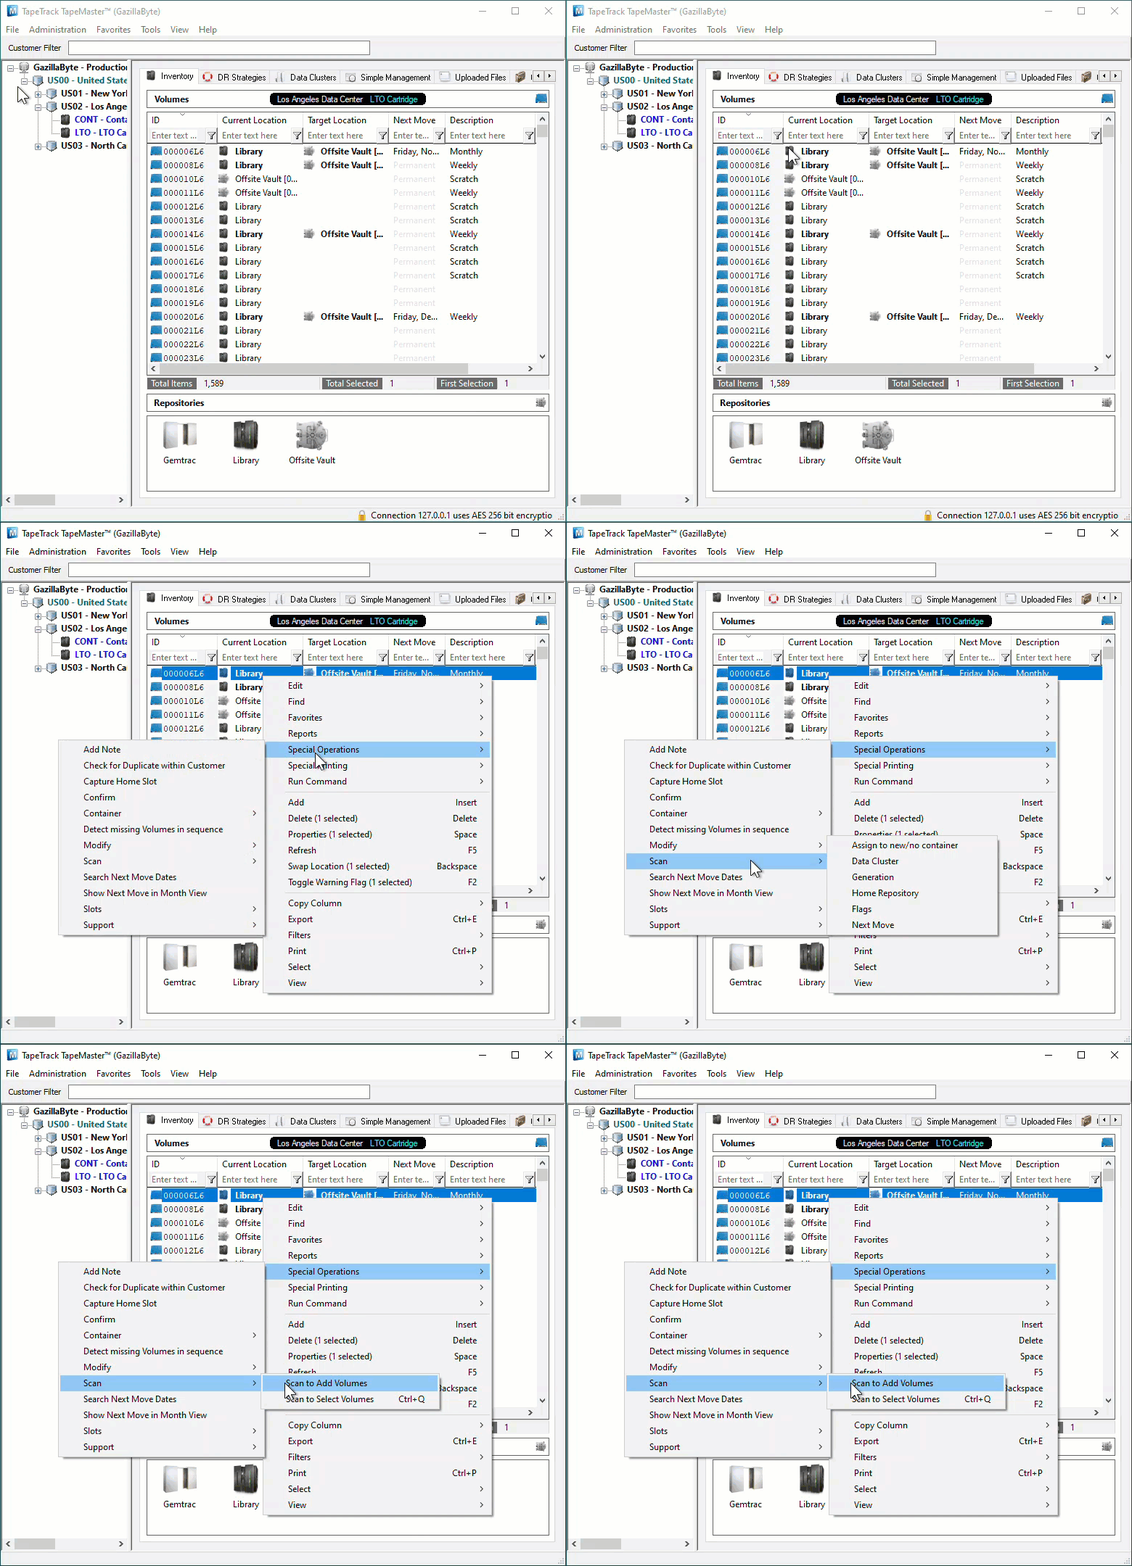
To add Volumes to your default Repository (or Initial Repository if no default is set) right-click in the Volume List, navigate to Special Operations, and select Scan → Scan to Add Volumes to open the Scan In window.
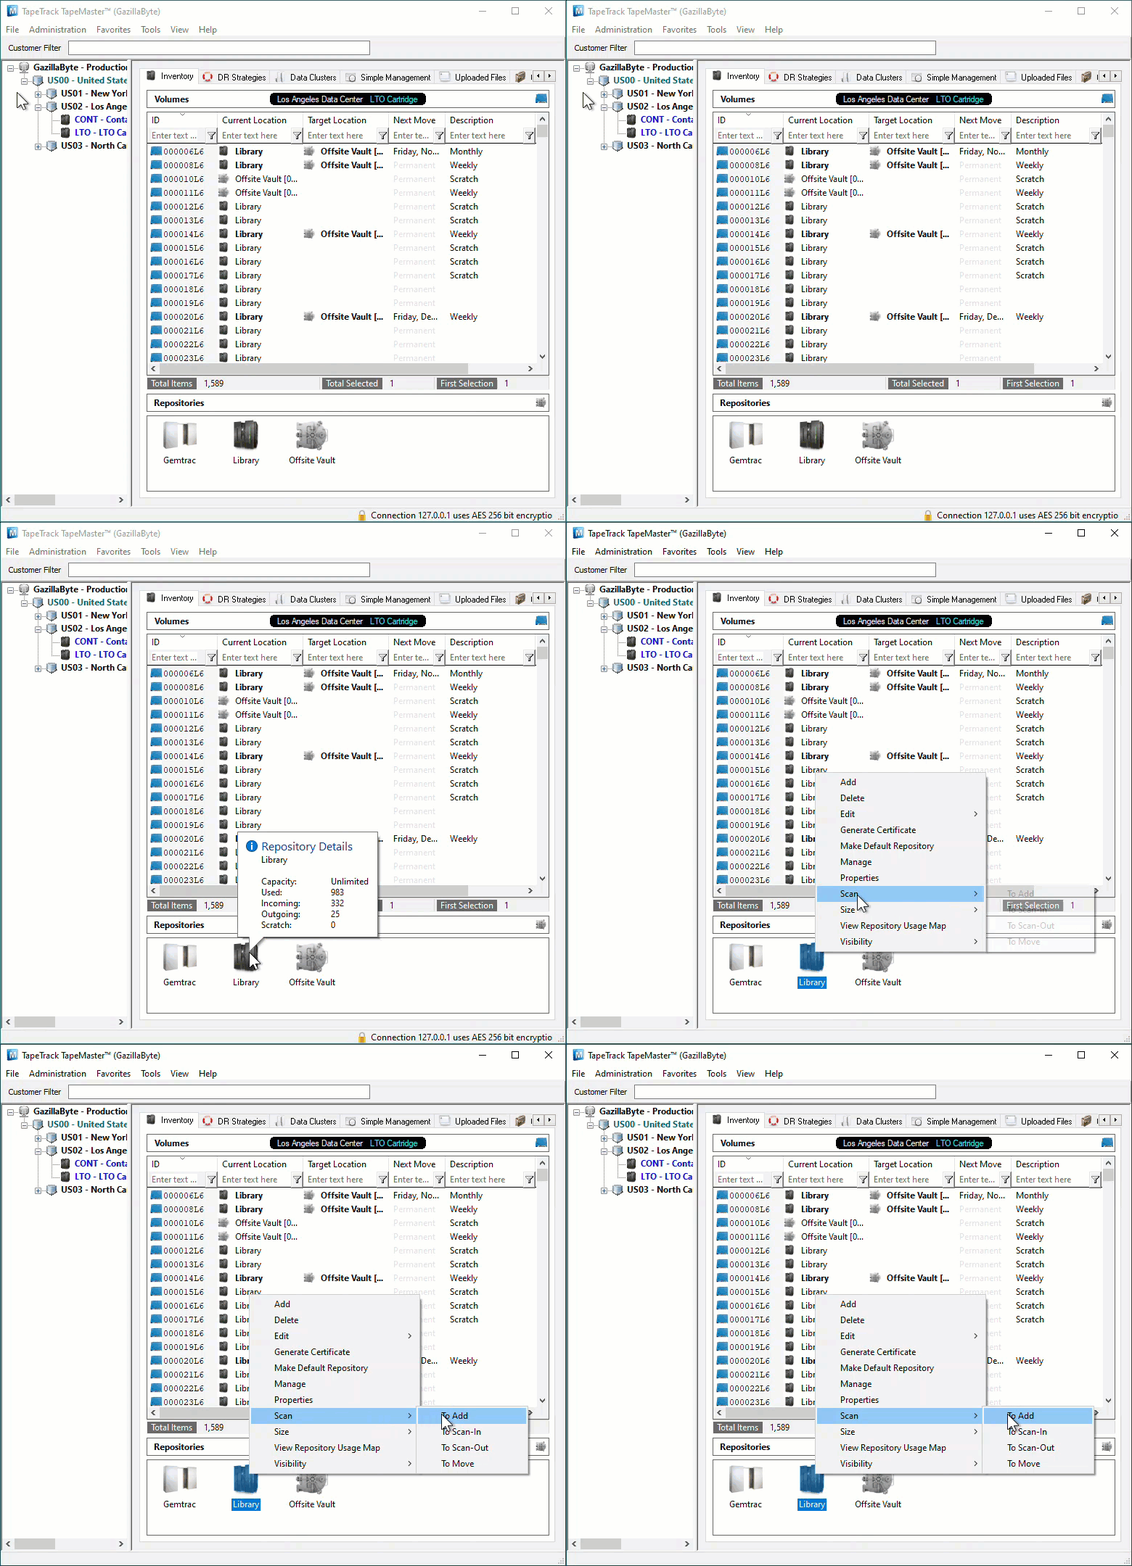
To add Volumes to a Repository other than your default, right-click the required Repository and select Scan → To Add and scan Volumes to be added.
Scan your Volume Barcodes using a Barcode scanner to add Volumes to TapeTrack.
Once all Volumes have been scanned, close the Scan In window by clicking the X at the top right corner.
Paste Volumes To Add
Copy Volume-ID's to windows clipboard.
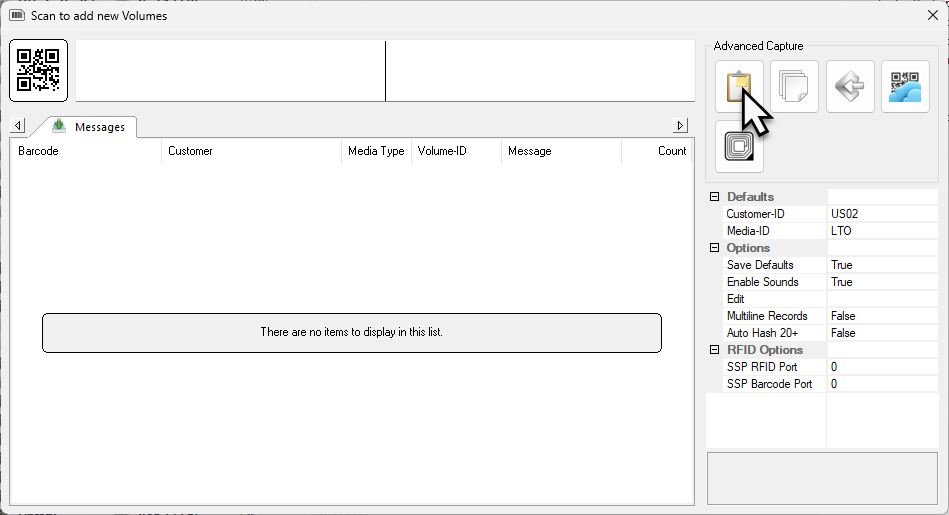
To add Volumes to your default Repository (or Initial Repository if no default is set) right-click in the Volume List, navigate to Special Operations, and select Scan → Scan to Add Volumes to open the Scan In window.
To add Volumes to a Repository other than your default, right-click the required Repository and select Scan → To Add and scan Volumes to be added.
Click the Clipboard icon on the Scan Window to paste in Volume-ID's.
Once all Volumes have been scanned, close the Scan In window by clicking the X at the top right corner.
Deleting Volumes
For information on deleting Volumes see Deleting Volumes
