Table of Contents
Adding and Maintaining Repositories
Repositories are locations where Volumes can be located. This page contains information about Adding and Deleting Repositories.
Adding Repositories
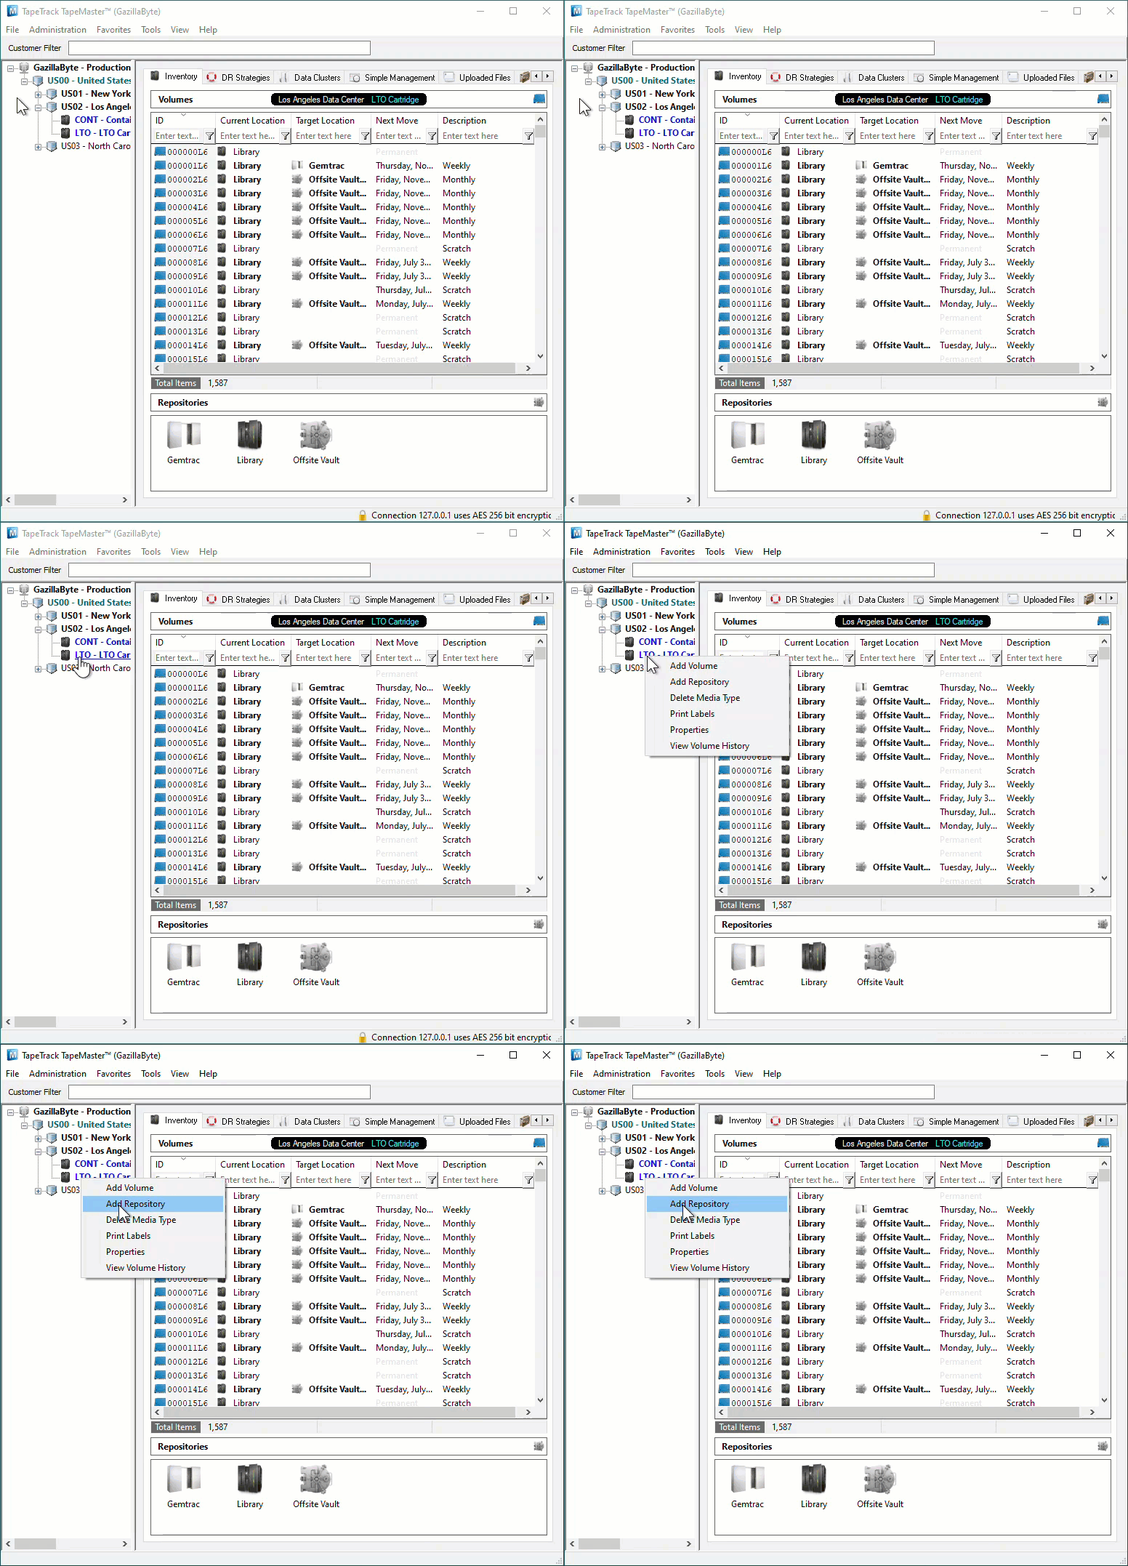
To add a Repository, right-click on the Media Type that the Repository will be listed under and select Add Repository.
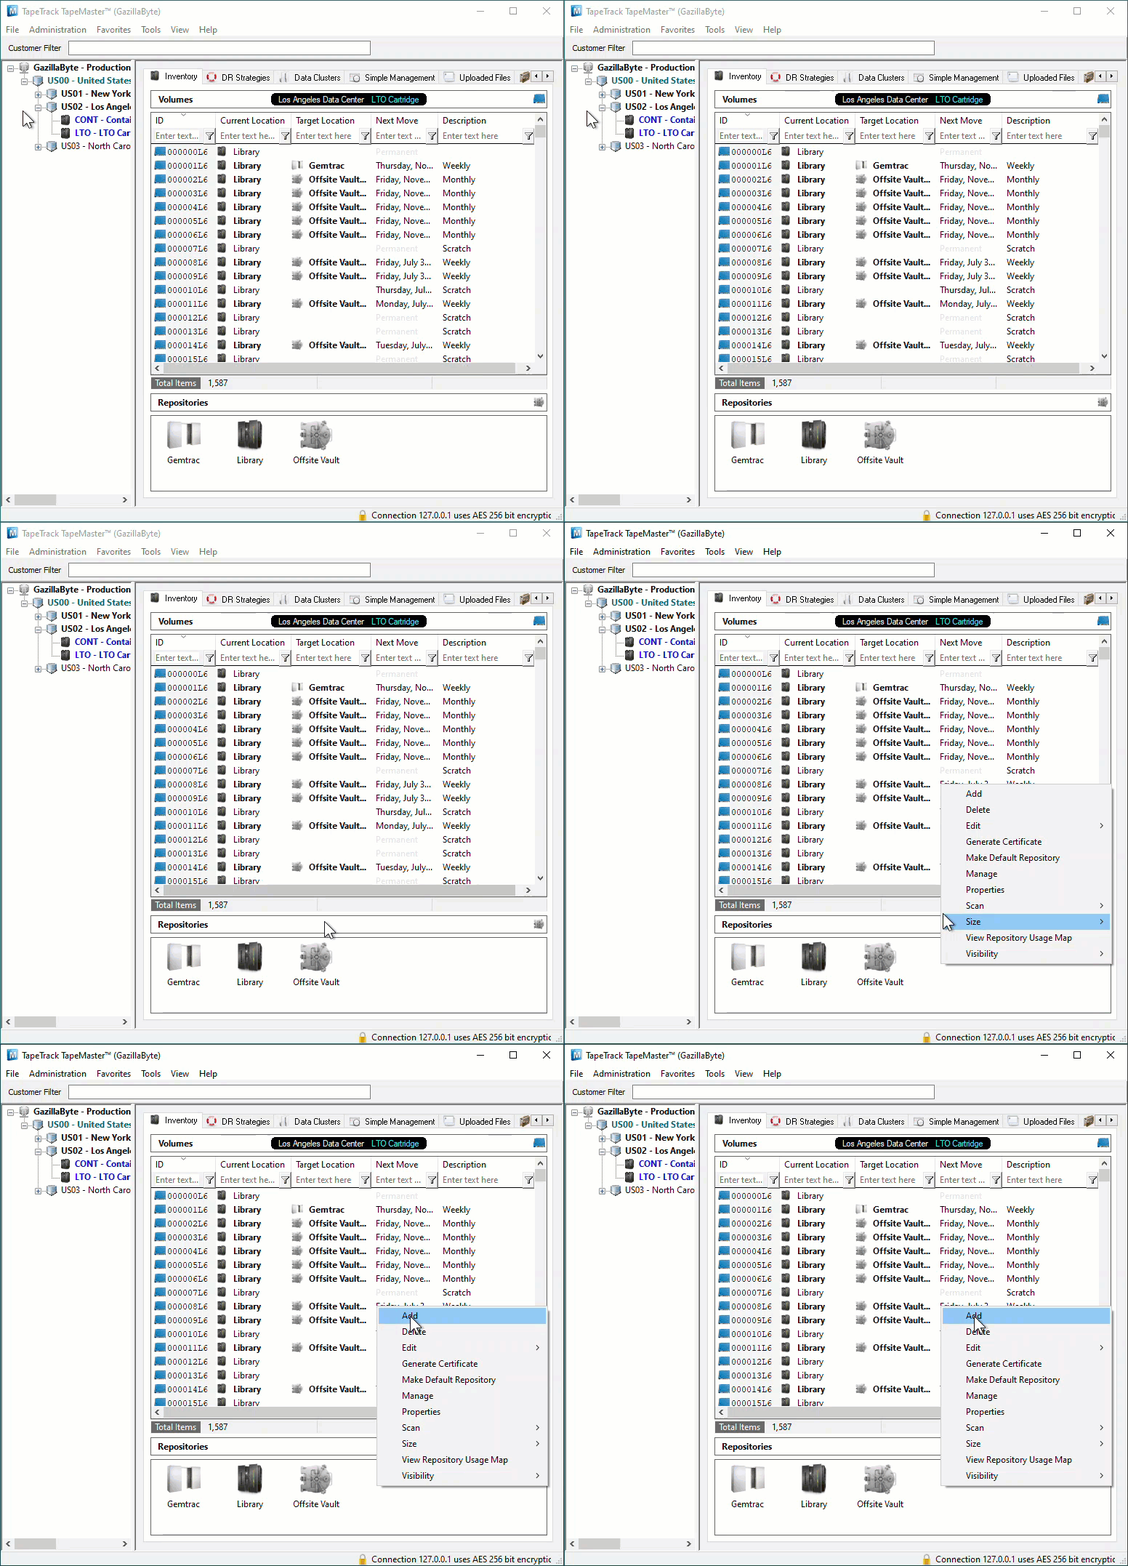
Or, alternatively, right-click in the Repository window and select Add.
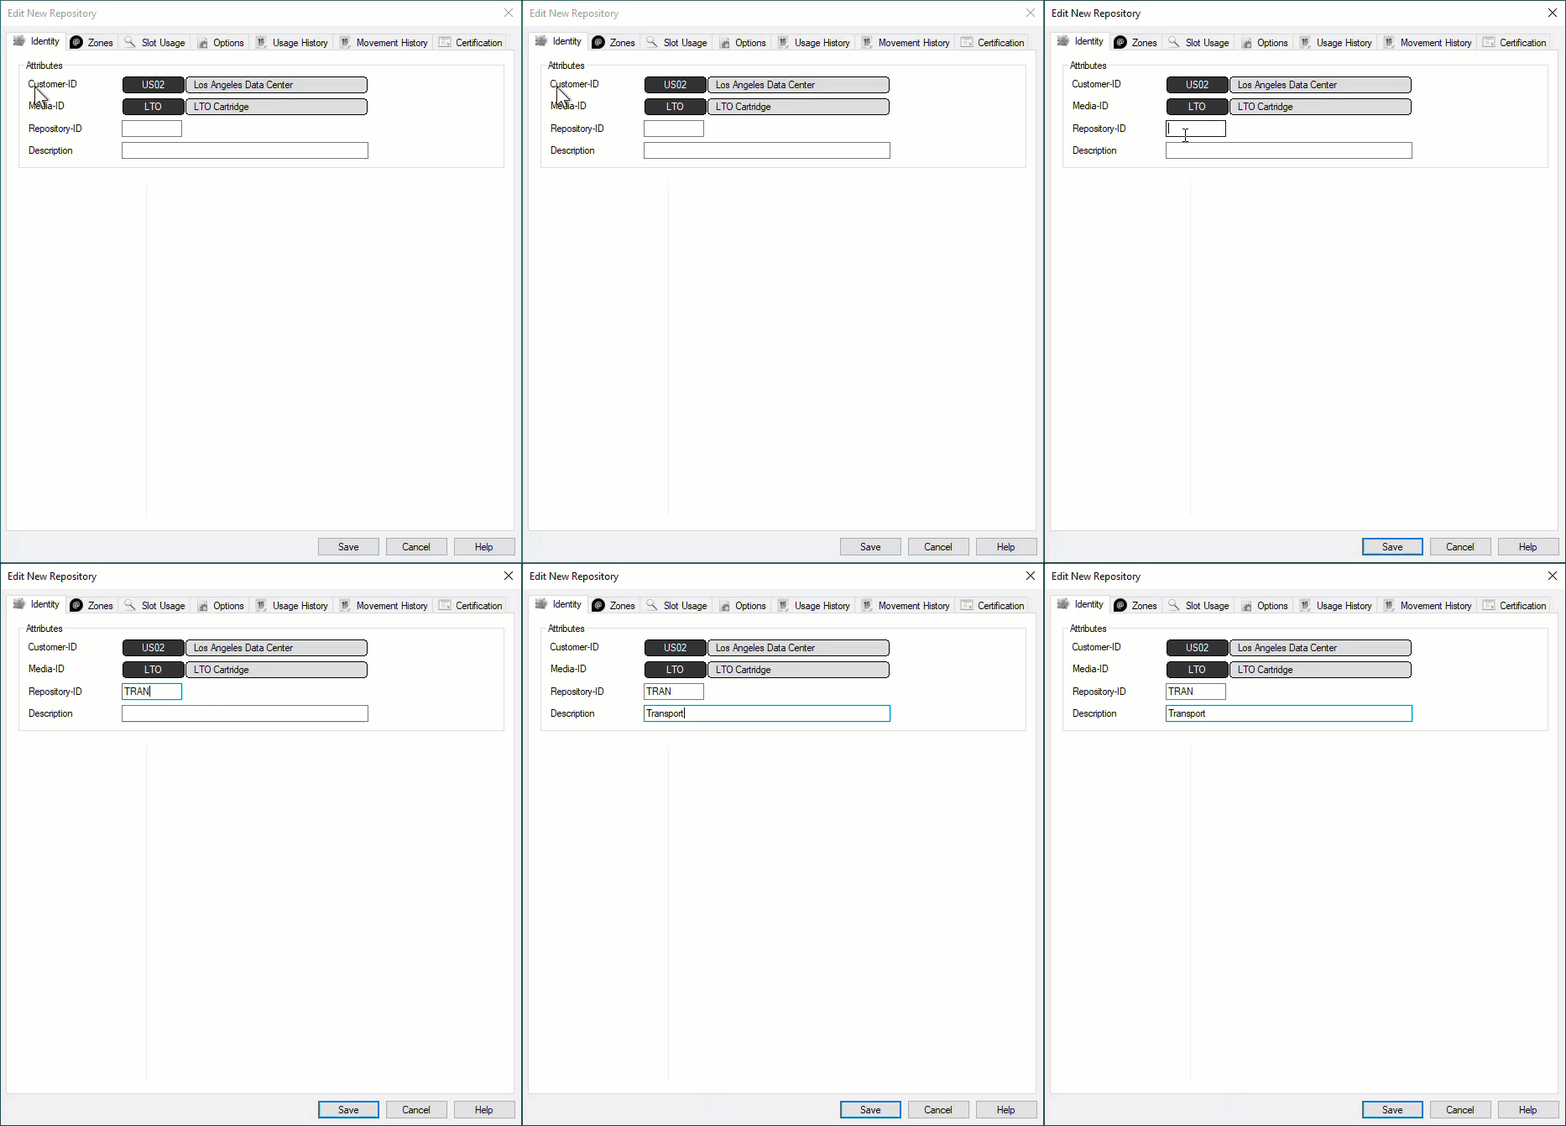
This will launch Edit New Repository window.
Basic Repository Options
Identity
Insert the Repository-ID (up to 4 permanent alphanumeric characters) and Repository Description (up to 20 alphanumeric characters).
The Repository-ID is a permanent value and cannot be edited at a later point. The Repository Description can be altered at any time.
Options
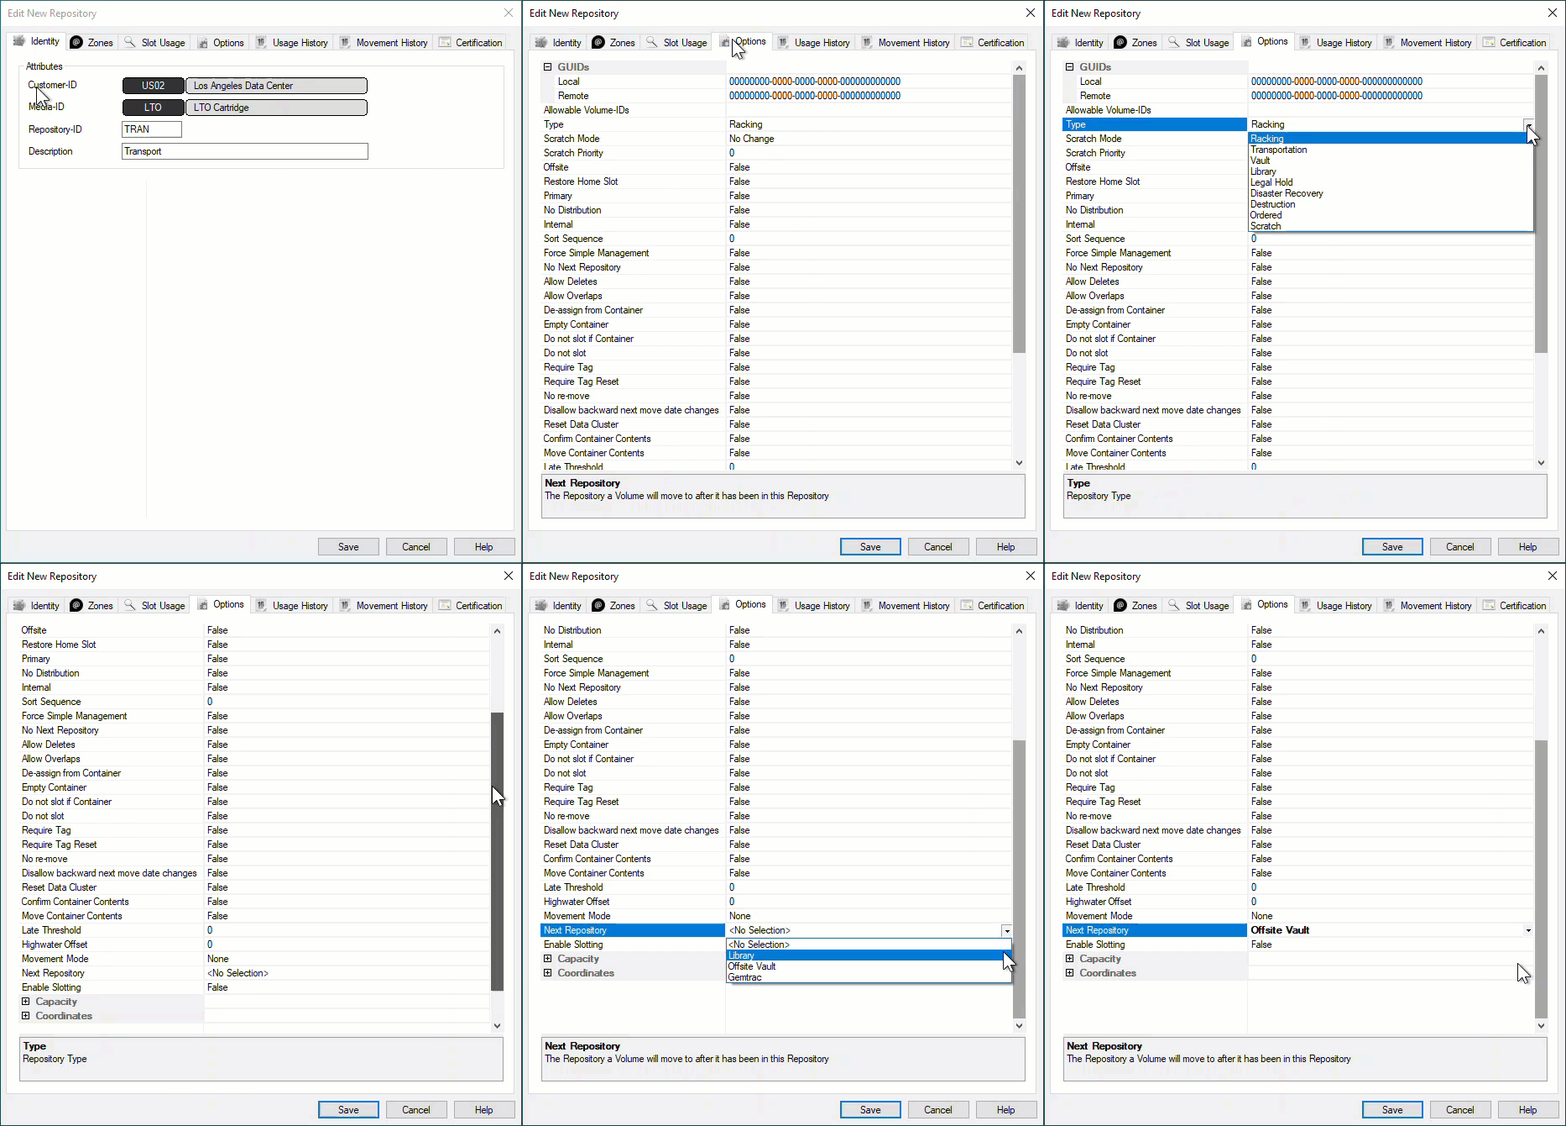
Select type of Repository to change display icon to match repository function. The options are:
Select the Repository the Volume will move to next (required for all automated tape movement) after this Repository.
Click Save to create Repository.
Advanced Repository Options
Deleting a Repository
Before you can delete the Repository, move all Volumes from the Repository and Confirm into another location. Any Volumes in a move to the Repository will be placed in a move to the Initial Repository.
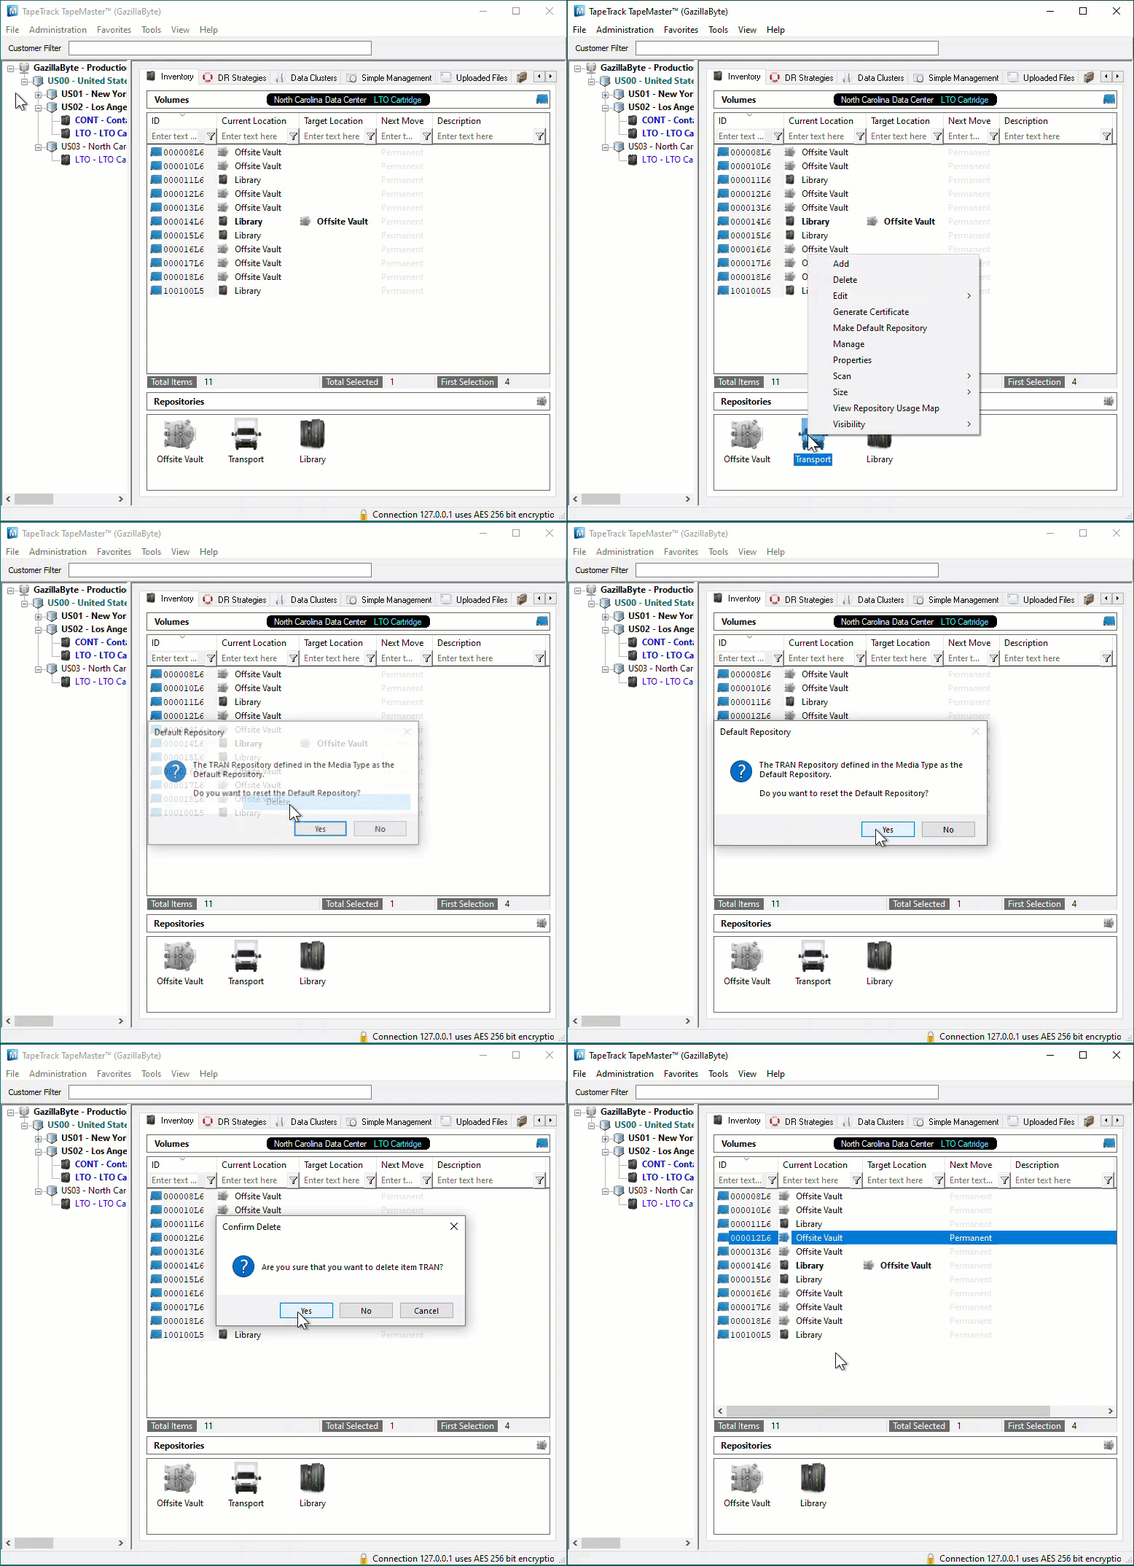
To delete a Repository, right-click on the Repository that needs to be deleted and select Delete.
If the Repository you are attempting to delete is the current Default Repository, you will receive a popup confirming you want to reset the Default value, click Yes to continue.
Click Yes to the Confirm Delete popup.
In older releases, any Repository set as the default (where Volumes are added to when a Target Repository is not specified) cannot be deleted until the dependancy is removed.
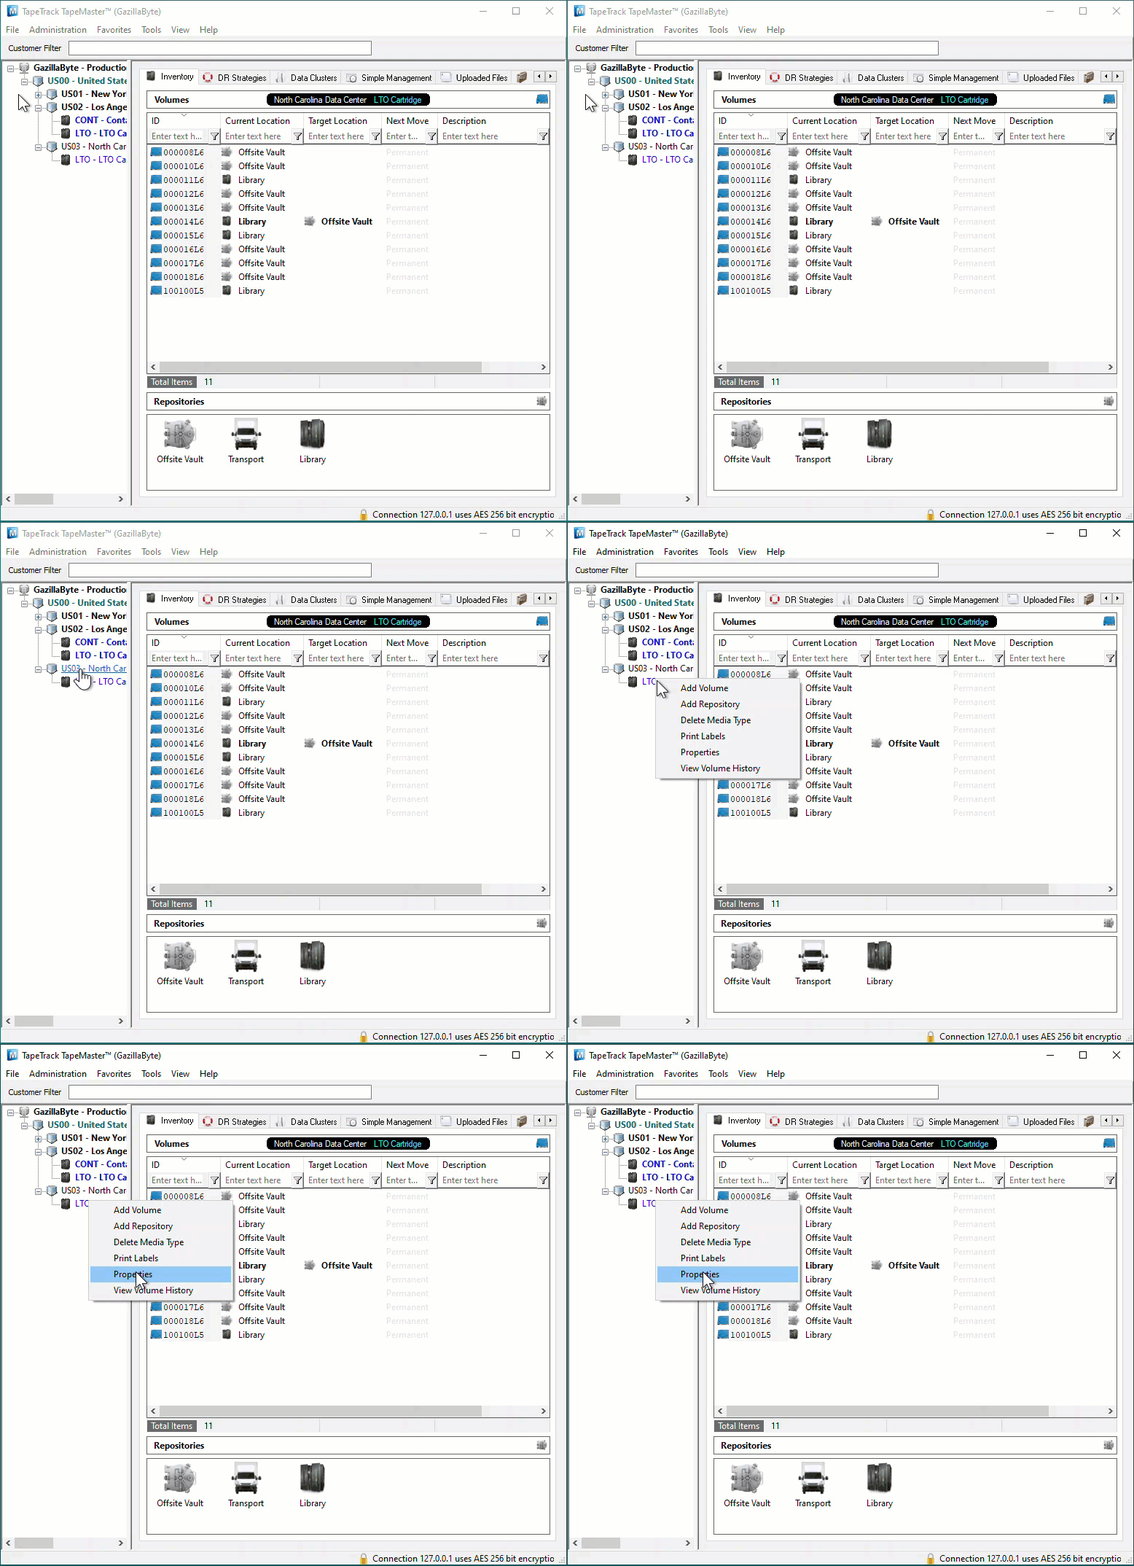
To remove the default setting, right-click the Media Type in the Customer Tree and select Properties.
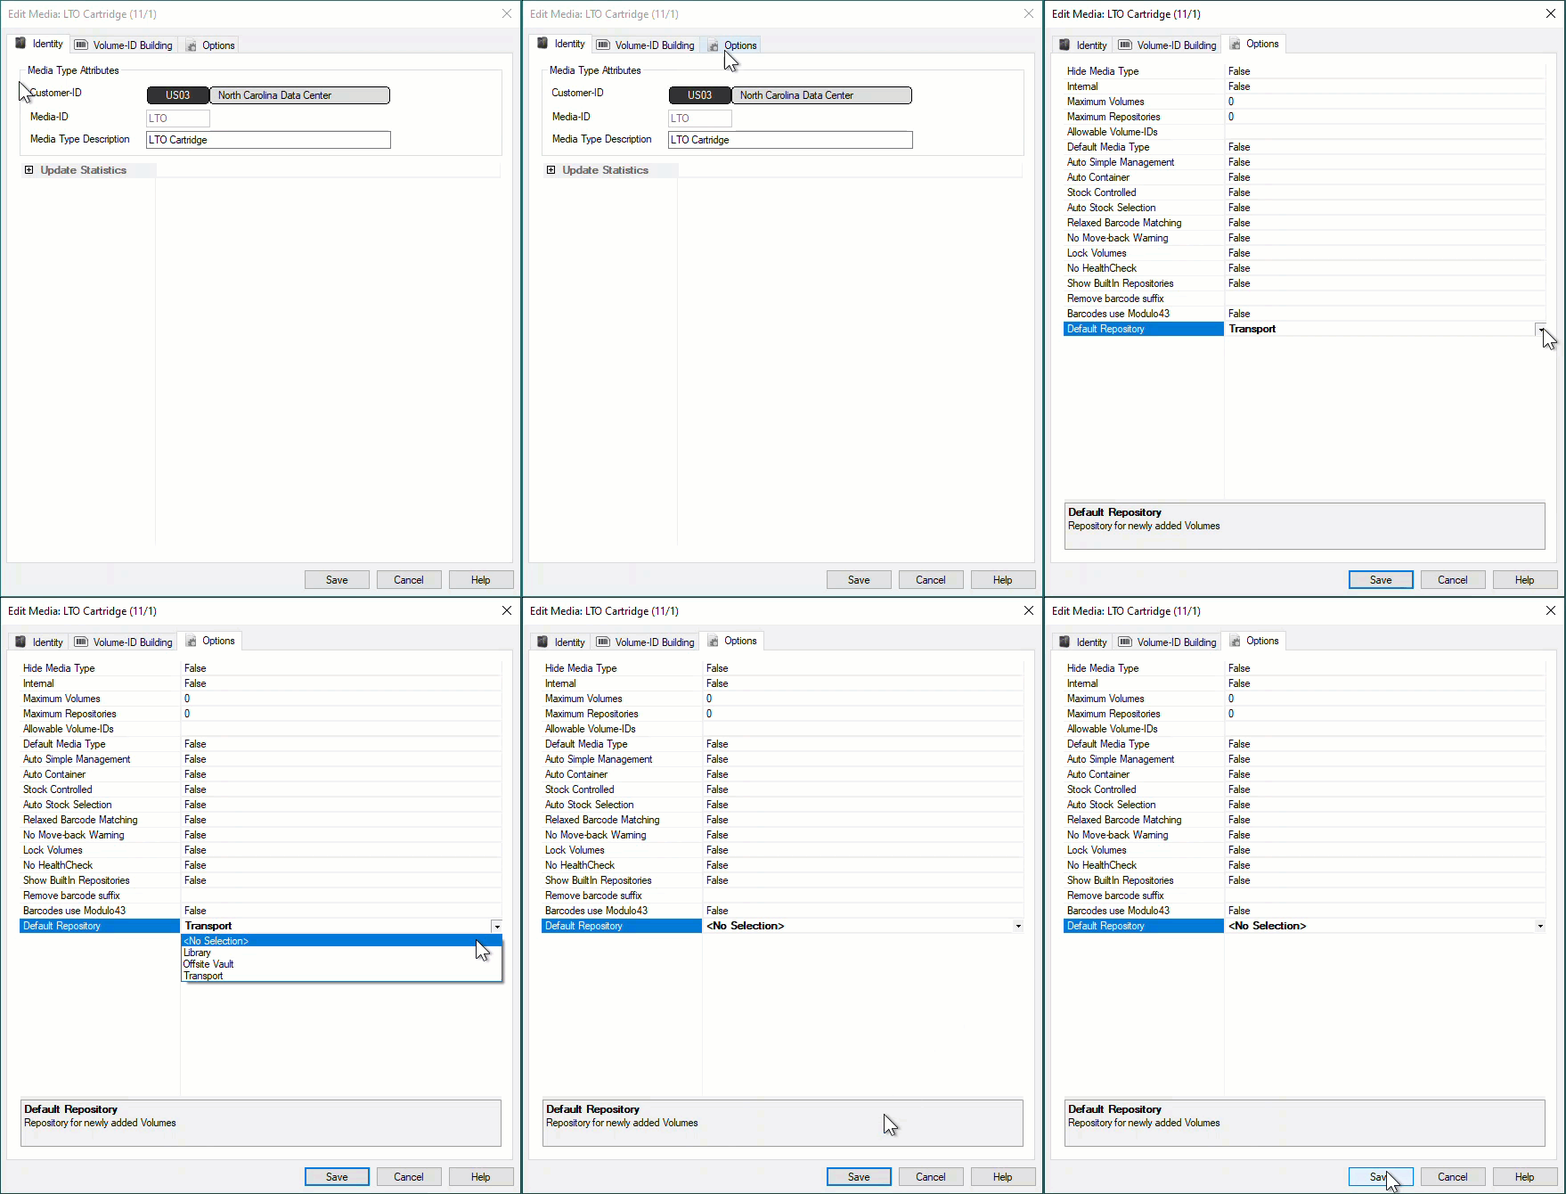
On the Options tab, change the setting Default Repository to <No Selection>, or another Repository, and click Save.
The Repository may now be deleted by right-clicking and selecting Delete and OK to warning dialog.

