This is an old revision of the document!
Pick (Scanning out)
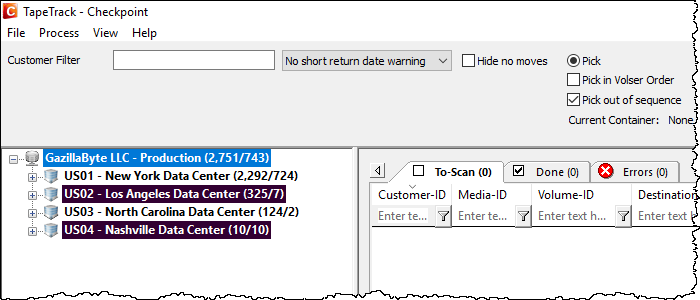
The Pick Option in the Toolbar will set the Start Scan operation to Pick Mode.
There are three options that Pick Mode can operate in:
- Default: When the Pick in Volser Order option is not selected, the Speech Subsystem will announce the Volumes to be picked in the order of their Slot Number.
- Pick in Volser Order: When the Pick in Volser Order option is selected, the Speech Subsystem will announce the Volumes to be picked in the order of their Volume-ID.
- Pick out of sequence: When the Pick out of sequence option is selected, Volumes can be scanned in any order without receiving an Error in the Errors Tab. The Speech Subsystem will still announce Volumes in the order set by the Pick in Volser Order Tick box.
Rebuild or pressing F5.
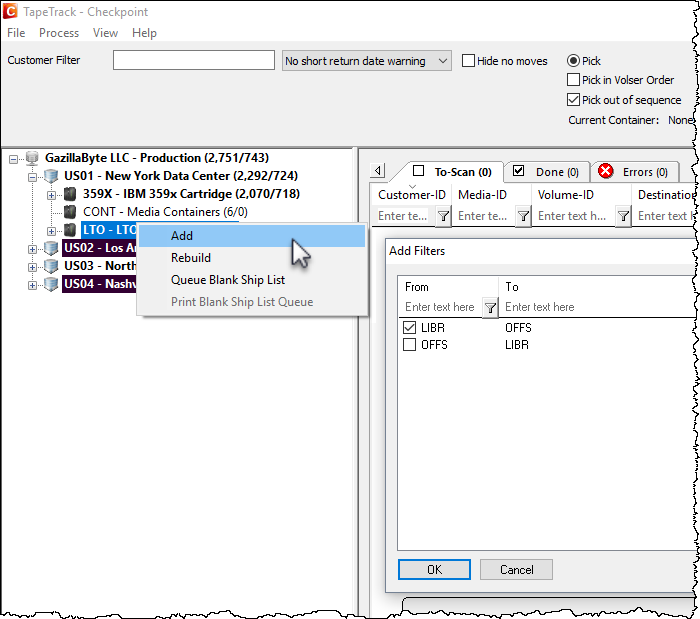
Add required tapes to the Scan In window by right clicking either/or:
- Customer - to add all media in a move status.
- Media Type - to add all volumes in a move status of that media type.
- Repository - to add all volumes in a move status from that repository.
- Target Repository - to add all volumes moving from the current repository to the target repository.
Select required volumes, based on movement direction, from the Add Filters window by checking the boxes and clicking OK.
If any volumes are added by error, select from the main menu Process→Special Operations→Clear Selected to remove all volumes. Add new selection of volumes by following the previous steps.
Once all required volumes have been added to the Scan In window, from the main menu select Process→Start Scan to initiate the Scan window.
During Pick Mode, the Speech Subsystem will announce either:
- Mode 0 : Volume only.
- Mode 1 : Zone and Volume.
- Mode 2 : Zone, Slot and Volume
Set the mode required by entering the mode control character (0, 1 or 2).
Pick and scan the volumes in the order read out by Checkpoint's speech system.
When a Container is scanned in the Start Scan operation, the Container will appear as the Current Container below the Pick Mode options. Volumes scanned during the Start Scan operation in Pick Mode will be assigned to the Container set in the Current Container field.
Once volumes have been scanned, close the scan window and, from the main menu, select Process→Update Server to push the data up to the server.
Any errors from scanning (e.g. scanned incorrect volume or had wrong customer ID in default field in scan window) will be presented. Click Clear Warning to remove the errors and update the server. Click OK to the popup to confirm the server update.
Clicking Abort Server Update will exit from the update server process and return you to the previous window.


