Table of Contents
Adding and Updating User Information
To be able to login to a TapeTrack Framework Server, you must have a User-ID and password.
This section describes how to create a new User-ID and set Attributes for that User-ID.
Group/User Administration
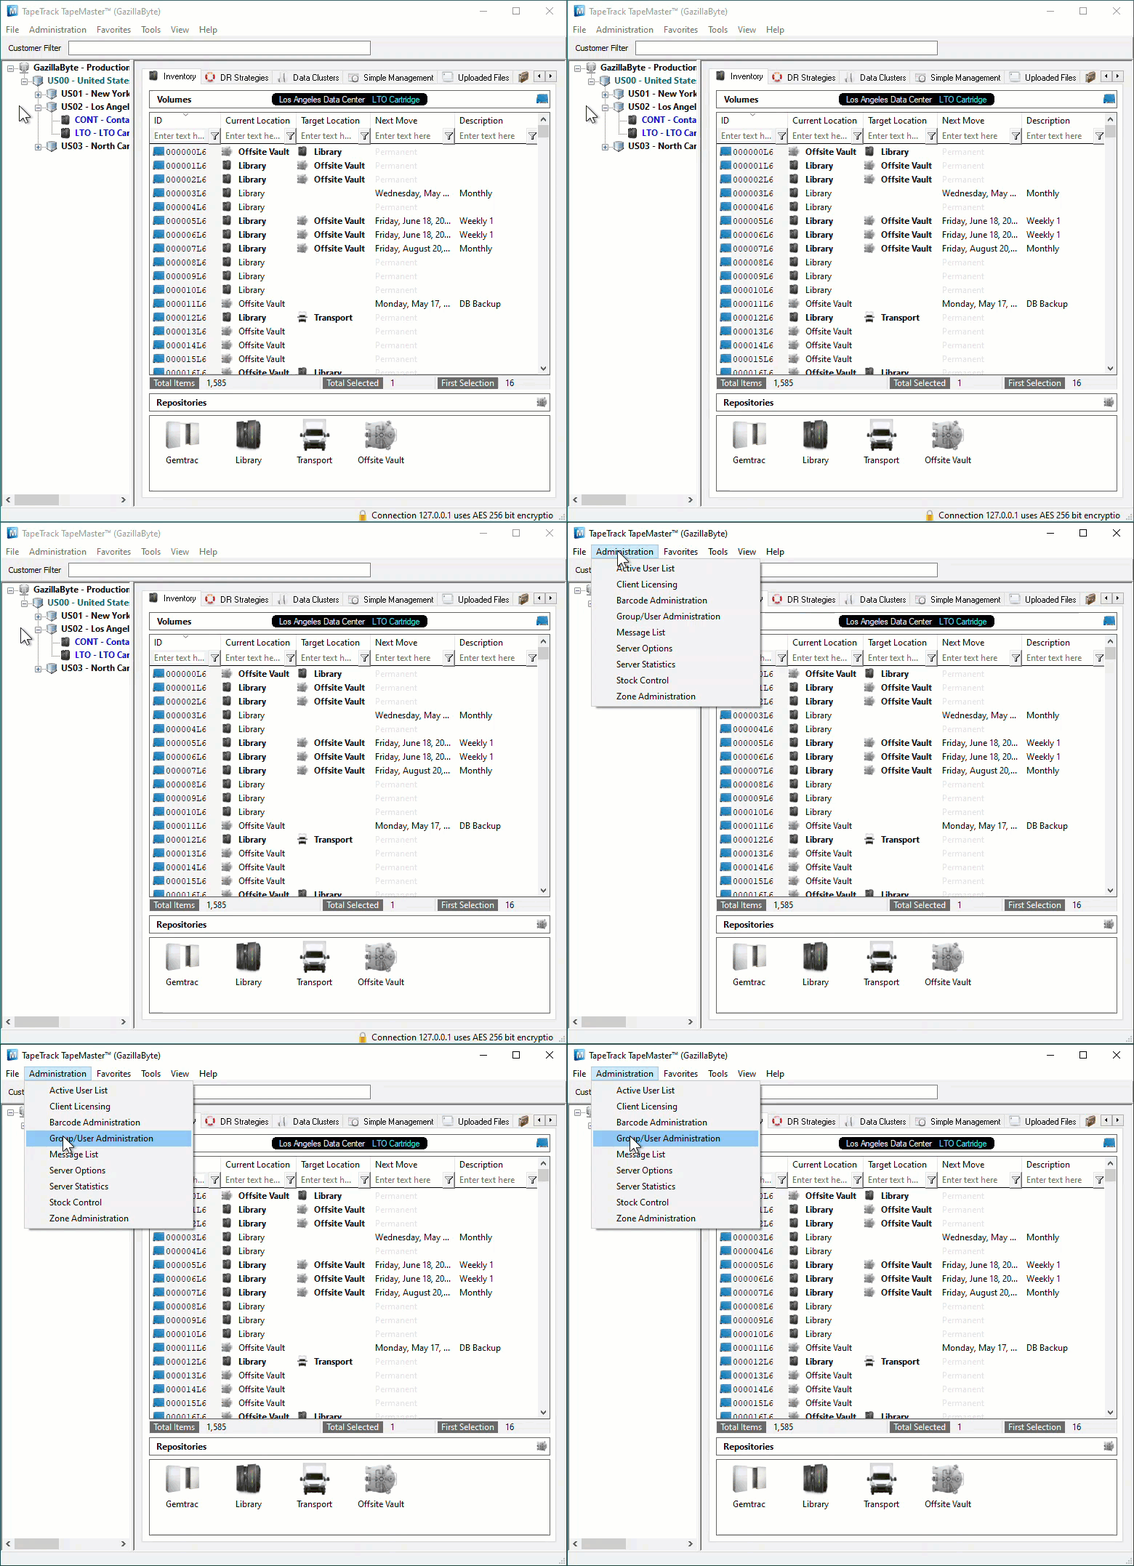
From the main menu select Administration → Group/User Administration.
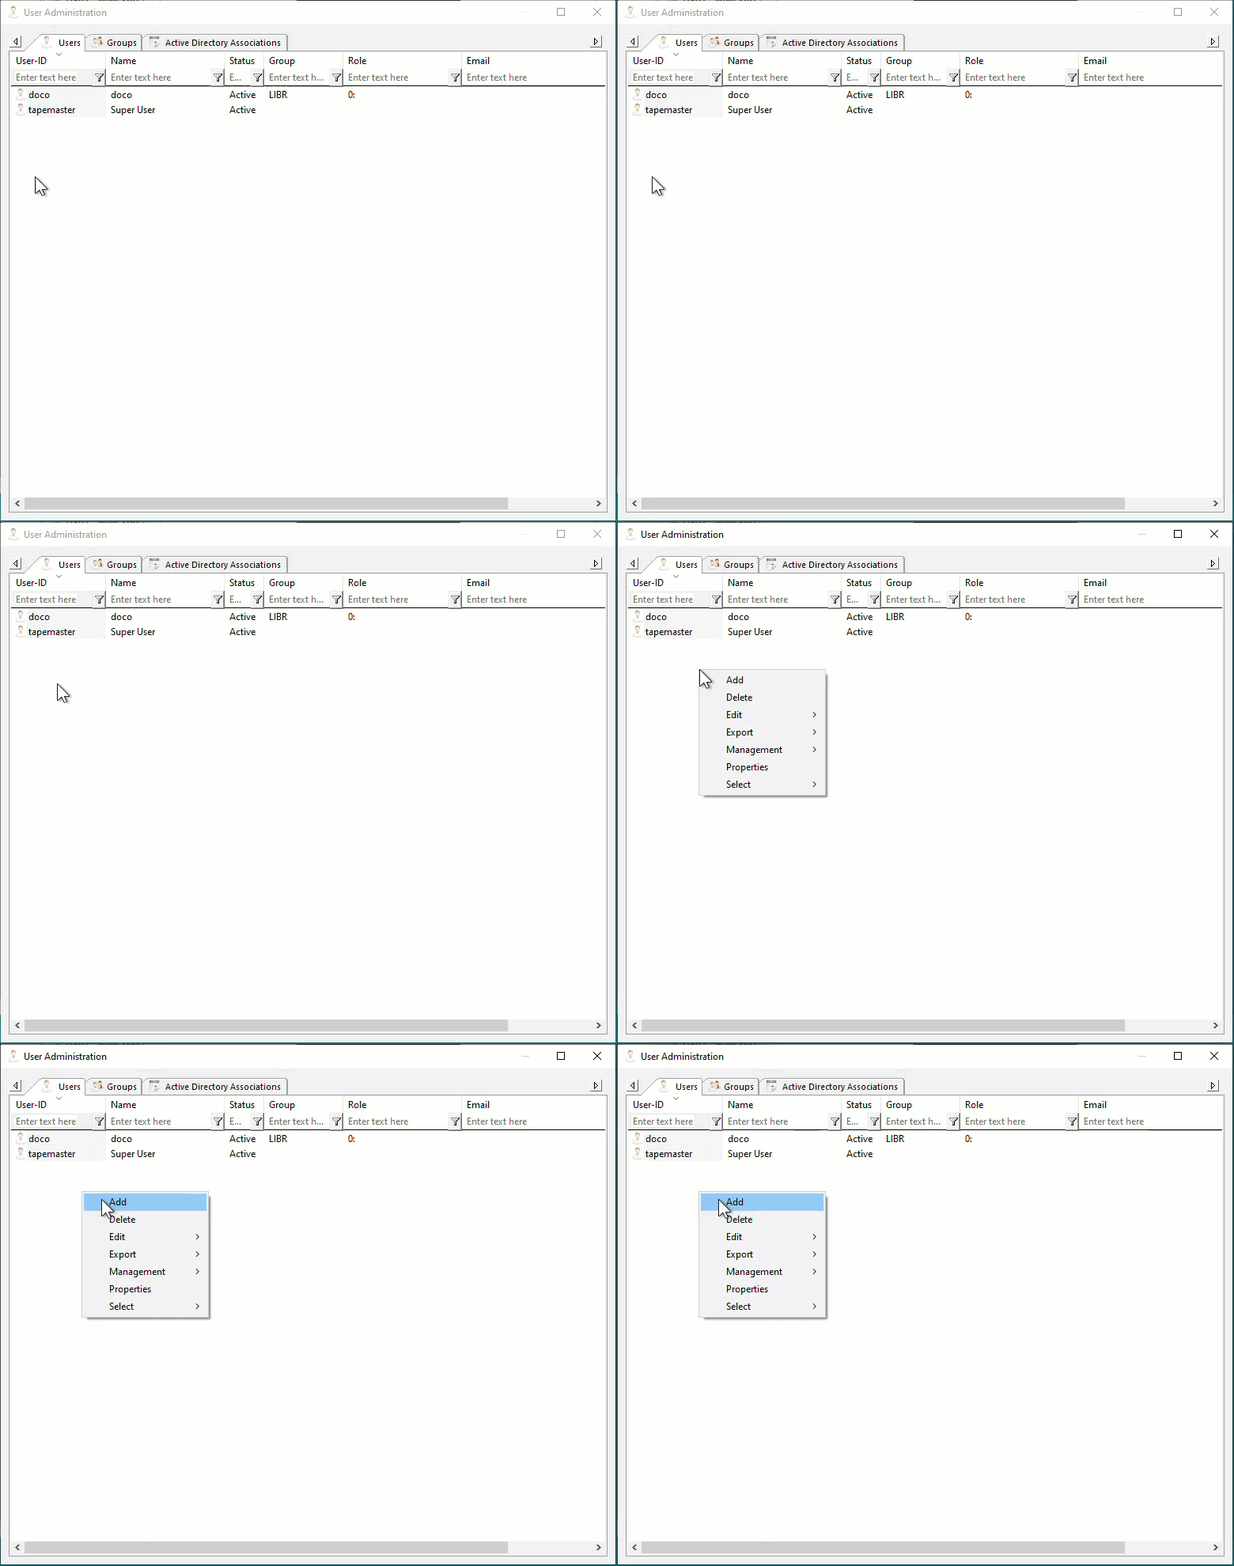
To add a new User, right-click in the white space on the User Administration screen and select Add.
To update an existing User, double-click on that User or right-click and select Properties.
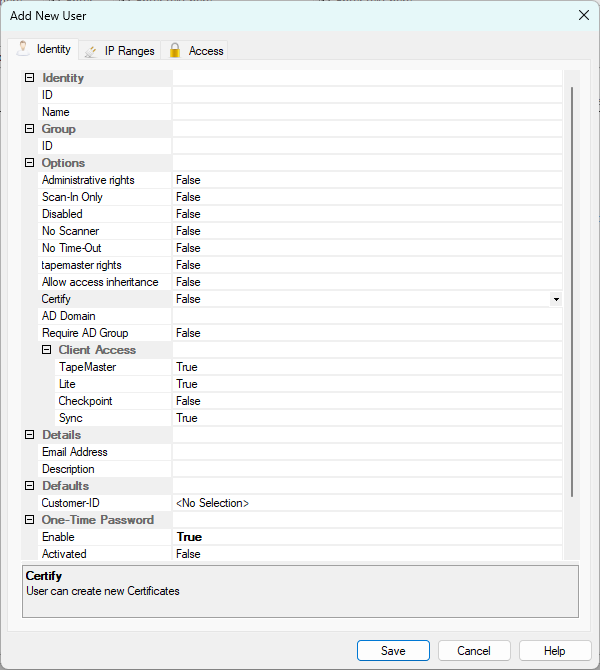
The Add New User window will display three tabs:
Identity
The Identity tab provides fields to update the:
- Identity
- User-ID: The User-ID will be the user name that the user uses to login to TapeTrack products.
- Name: The name is the User's desired display name.
- Group
- Group-ID: Select group to assign user to from the drop-down list or add new group.
- Role: Hierarchical role of the User.
- Options
- Administrative rights: When set to
Truethe User will have Administration Rights with Server Administrator privileges or the ability to Add/Delete Customers and Media Types. - Scan-In Only: When set to
Truethe User will only be able to Scan tapes into the system. - Disabled: When set to
Truethe User's access will be in a disabled status, so that they are not able to access any TapeTrack products. This does not delete the User. - No Scanner: When set to
Truethe Barcode Scanning Window will provide an auto-complete drop-down. - No Time-Out: By default, all User's are logged out of TapeMaster after ten minutes of inactivity. Setting this to
True, the selected User will not time out. - tapemaster rights: When set to
True, it allows the User to gain the same administrative rights as the tapemaster superuser account. Only the User-ID tapemaster can add tapemaster rights to another user. - Allow access inheritance: Allows User to inherit another User's access rights using variable TMSSUSERINHERIT with Command Line Utility Programs
- Certify: Assigns the ability to generate certificates.
- AD Domain: This is required if the User logs on to TapeTrack with their Active Directory Username and Password.
- Require AD Group: When set to
True, the User must use their Active Directory credentials to logon.
- Client Access
- TapeMaster: Authorizes User-ID access to TapeMaster
- Lite: Authorizes User-ID access to Lite
- Checkpoint: Authorizes User-ID access to Checkpoint
- Sync: Authorizes User-ID access to Sync software.
- Details
- Email Address: Allows inclusion of user email, which may be used instead of username to log into TapeTrack directly (ie not using Active Directory)
- Description: Add description to User-ID.
- Defaults
- Customer-ID: Sets Customer-ID for User in Scan-In window. Once Customer-ID is set, Media-ID field will be displayed.
- Media-ID: Sets Media-ID for User in Scan-In window.
- One-Time-Password
- Enabled: Enables the use of 2FA or One time password for login.
- Activated: Shows if 2FA or One time password is activated. Activated only displays if Enabled is set to True.
IP Ranges
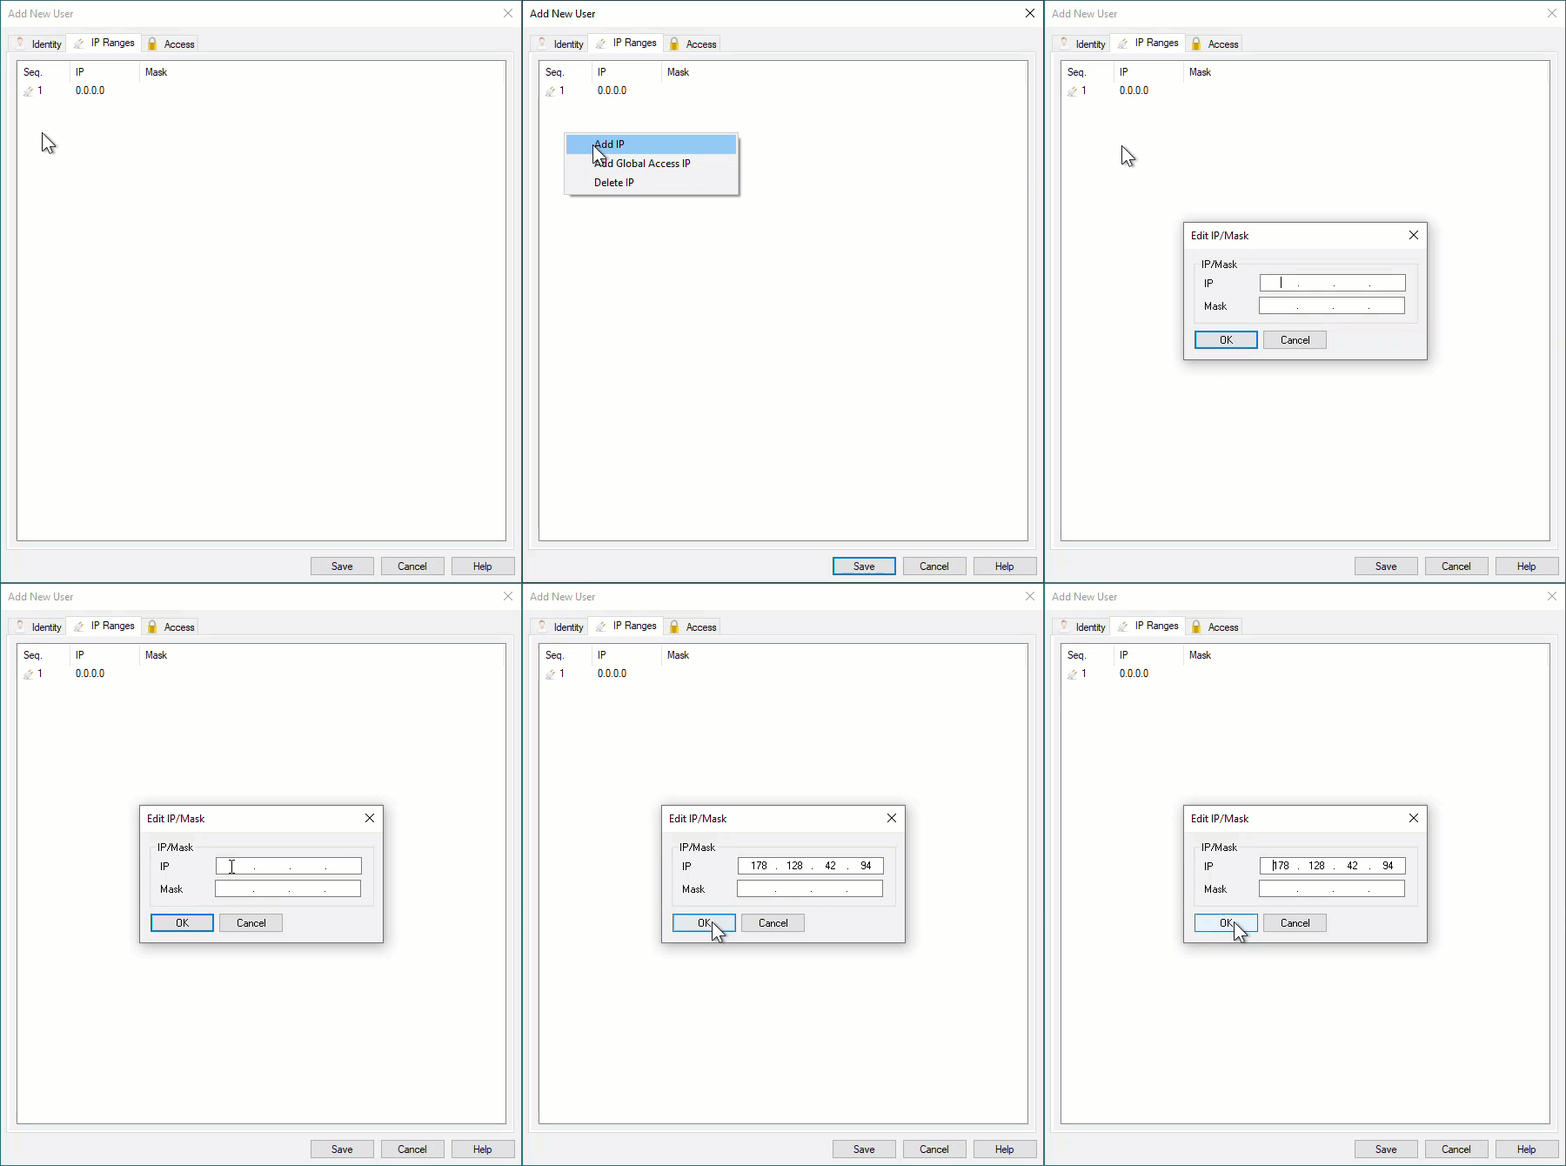
The IP Ranges tab sets restrictions on which IP addresses a User can access the TapeTrack Server from.
If setting IP's, ensure Users have a static IP address so they are not denied access if trying to access from a dynamic address such as using a remote or home connection.
To add or delete, right-click the window and select from the menu.
Global Access (0.0.0.0) will allow access from any IP, this value will need to be removed if added a restricted IP list as all values in the list are valid.
Access
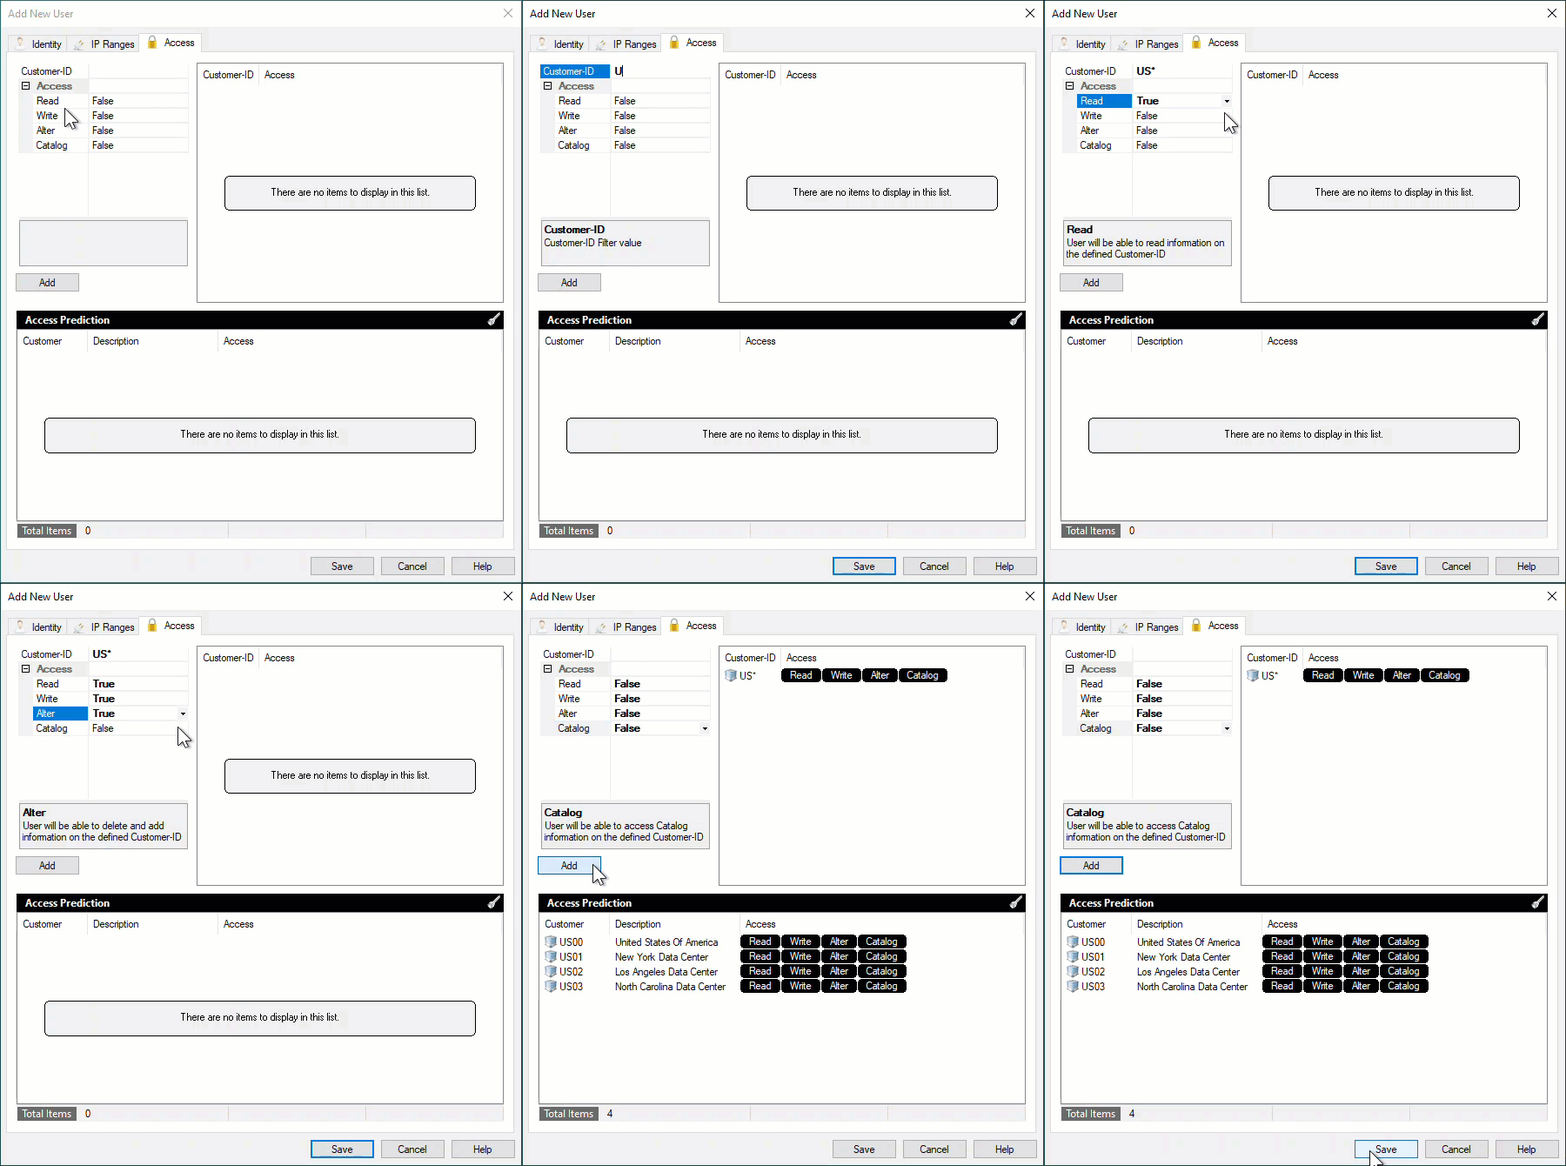
The Access tab sets permissions for which Customers the selected User can access and how that User can interact with Volumes in the selected Customer.
- Customer-ID: Enter the Customer-ID for the Customer that the User should have access to.
- US01 will give access to US01 only
- US* will give access to all customers starting with US
- * will give access to all customers
- Read: Allows the User to view but not update Volumes in the above Customer. Must be enabled for the User to be able to view Volumes in the selected Customer-ID.
- Write: Allows the User to perform basic operations for Volumes to the selected Customer.
- Alter: Allows the User to Add and Delete Media and Volumes to the selected Customer.
- Catalog: Allows User to access Catalog information on the selected Customer.
For each Customer access, click Add to commit the data. Predicted access rights will then be displayed in the lower window.
Once all data has been entered, click Save to create User.

