Table of Contents
Slotting
A Slot is a location in a Zone large enough for one Volume. Slotting is a process of allocating a Volume to a particular Slot to allow documentation of the exact storage location of that Volume.
Adding Slots to a Repository
To add Slots to a Repository, create a Zone using the Zone Administration tool in the Administration Menu. Then, follow the steps to Add a Zone to a Repository.
Manually Add a Volume to a Slot
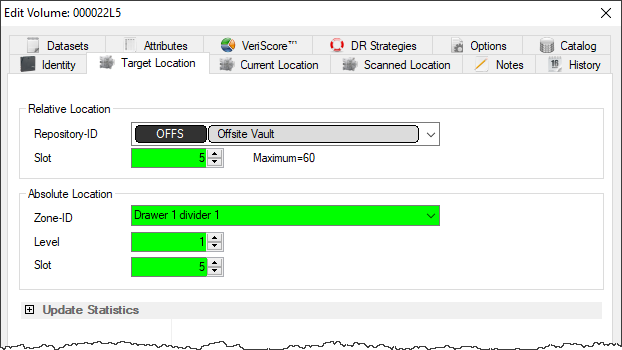
To manually add a Volume to a Slot, double-click a Volume in the Volume List or right-click a Volume in the Volume List and select Properties. This will launch the Volume Properties Window.
Select the Target Location tab and enter a Slot number in either the Slot field in the Relative Location window or the Level field and Slot field in the Absolute Location window.
Click Save and the Volume will be put into a Move to that slot, even if that Volume is moving to a Slot within its Current Repository.
Press F5 in the inventory window to update the display to show new target slotting.
Automatic Slotting
Automatic Slotting in TapeTrack is done with a Command Line program called TMSS10SlotAllocation that is included in installs of TapeTrack Framework Server and TapeTrack Server Utilities in conjunction with Windows Task Scheduler.
TMSS10SlotAllocation must be run on the TapeTrack Framework Server, but it can be launched remotely if necessary.
Sample Slotting Script
TMSS10SlotAllocation -S user:-password@tapetrack.domain.com > "%TMSS10REPORTS%\slotting_report.txt" 2> "%TMSS10REPORTS%\slotting_error.txt"
Preparing TapeMaster for Automatic Slotting
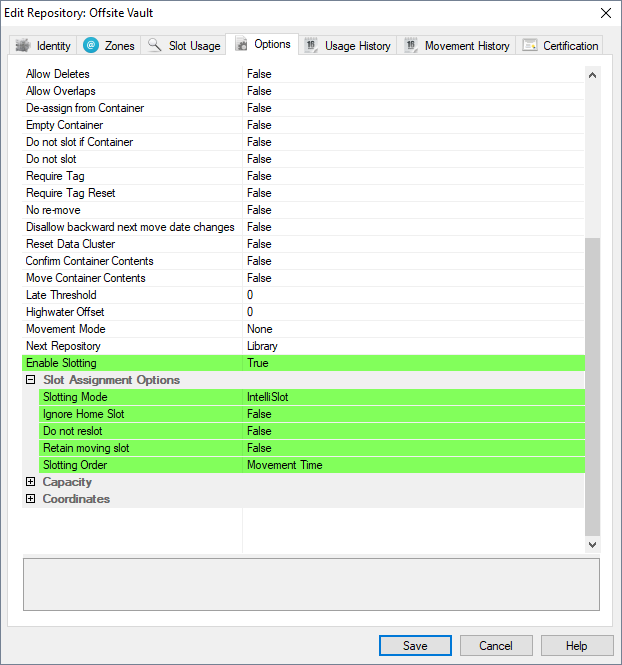
Before running TMSS10SlotAllocation , Repositories must be set so that Slotting is Enabled. This can be done under the Options Tab of the Repository Properties Window.
Once Slotting is enabled, the slotting Assignment Options can be set.
- Slotting Mode
- IntelliSlot: The Slotting batch process will Slot Volumes in groups by Consignment or Slotting Order until the available group slots are filled. At this point, empty Slots will be filled on a First Available Status.
- First Available: Volumes will be put in the first available Slot in their Repository and will not be grouped.
- Bypass: When Volumes are automatically confirmed (see above), they will not be assigned Slots.
- Ignore Home Slot: If a Volume has been assigned a Home Slot in the Options Tab of the Volume Properties Window, this Repository will ignore it and Slot using the Slot assignment Options.
- Do not reslot: If set to true a Volume will not be reslotted in it's previous slot when it is moved back.
- Slotting Order: There are three orders with which Volumes may be assigned Slots:
- Movement Time: Volumes will be assigned Slots based on when they arrived at the selected Repository.
- From Location: Volumes will be assigned Slots based on which Repository they were sent from.
- Volume-ID: Volumes will be assigned Slots in the alphanumeric order based on their Volume-ID's.


