This is an old revision of the document!
Table of Contents
Adding and Maintaining Volumes
Adding Individual Volumes
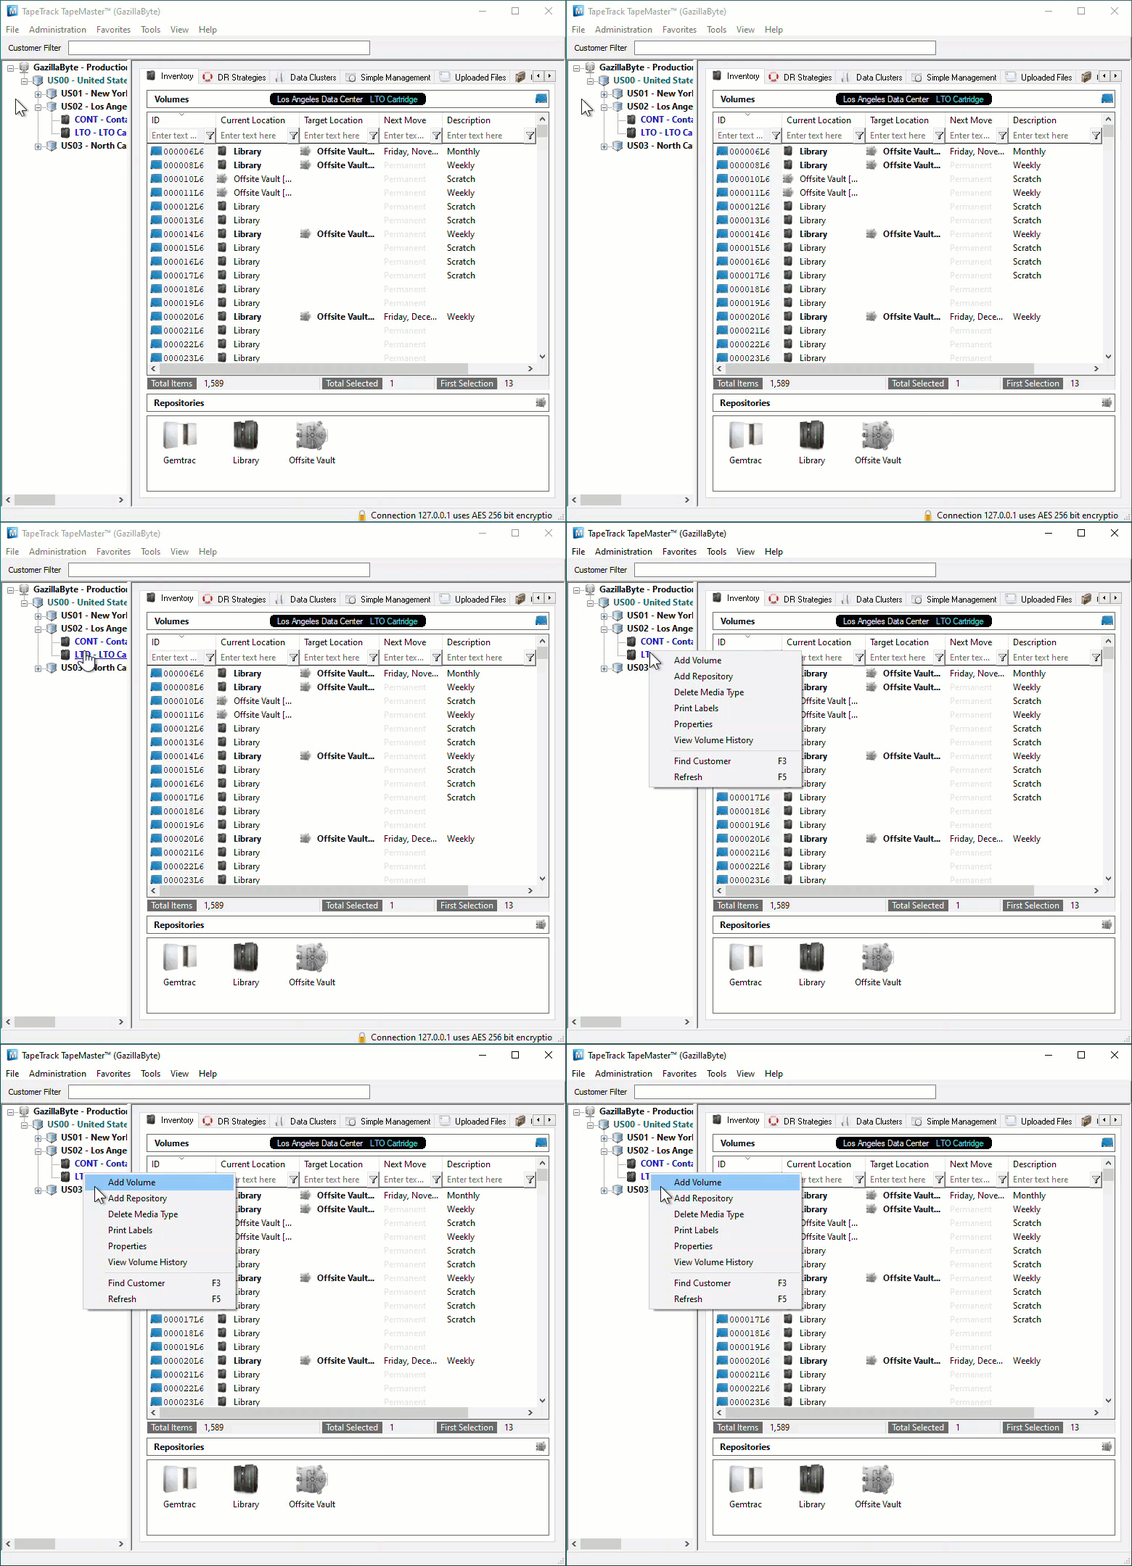
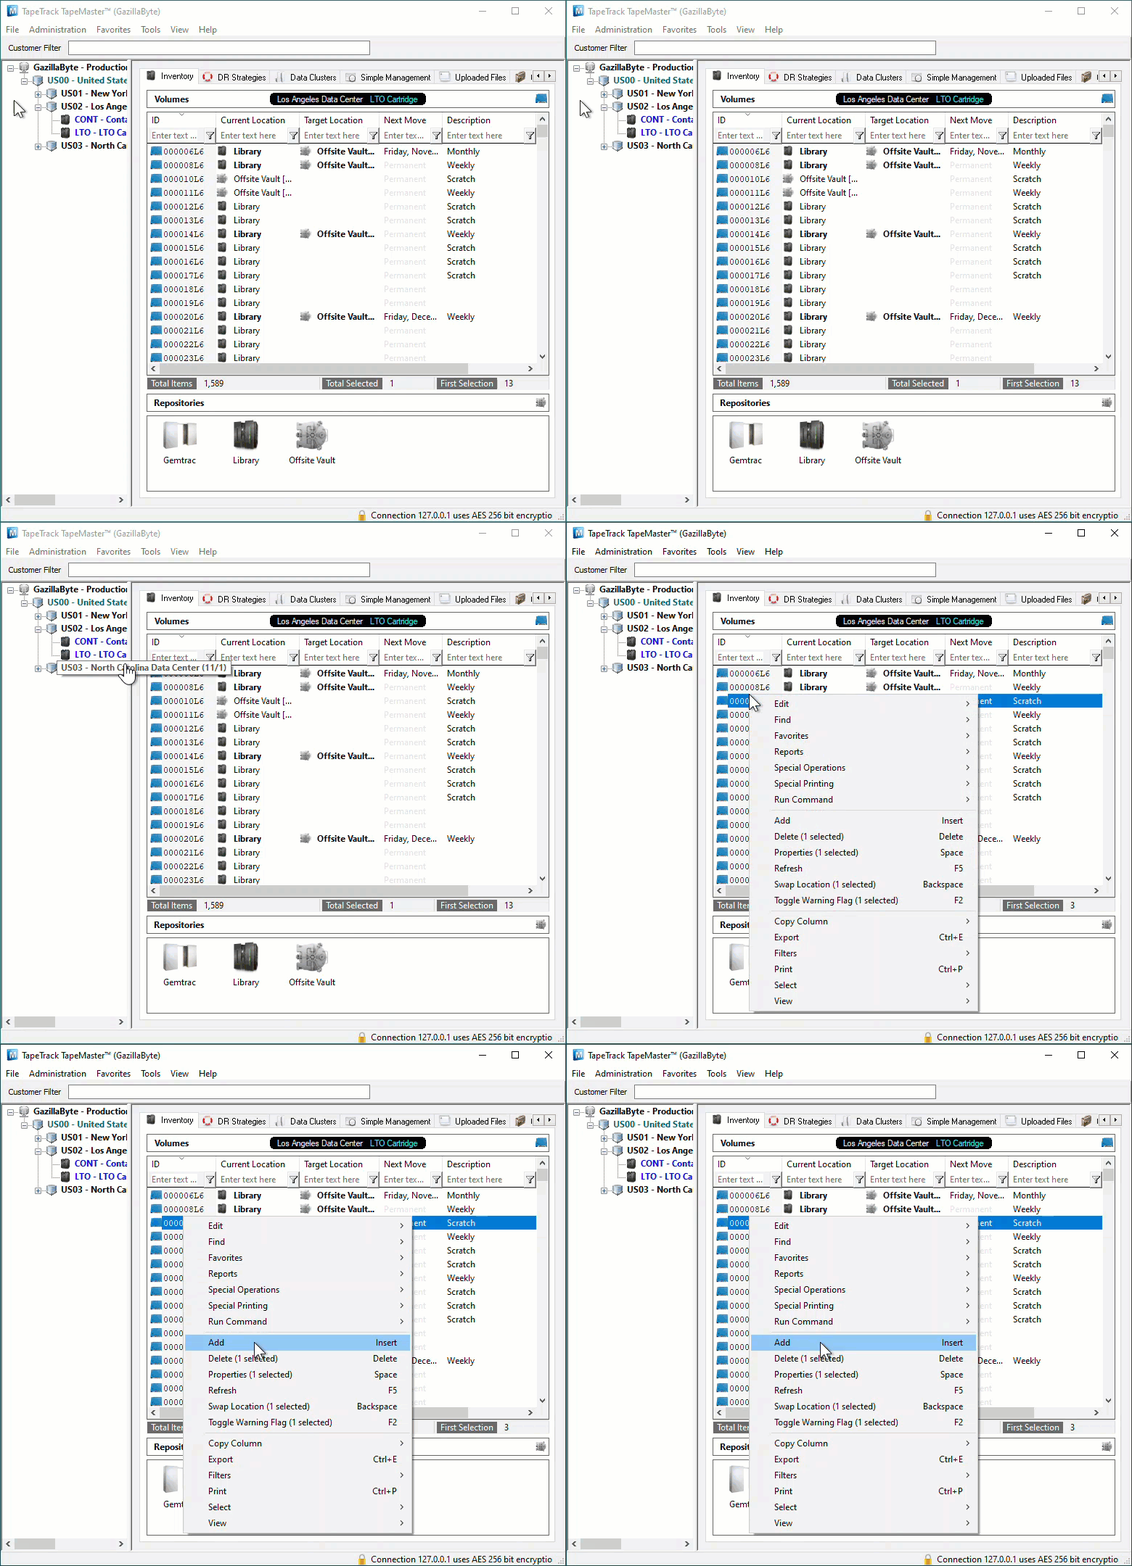
To add a Volume either:
- Right-click on a Media Type and select
Add Volume.
- Right-click in the Inventory window and select
Add.
- Click in the Inventory window and press
Inserton the keyboard
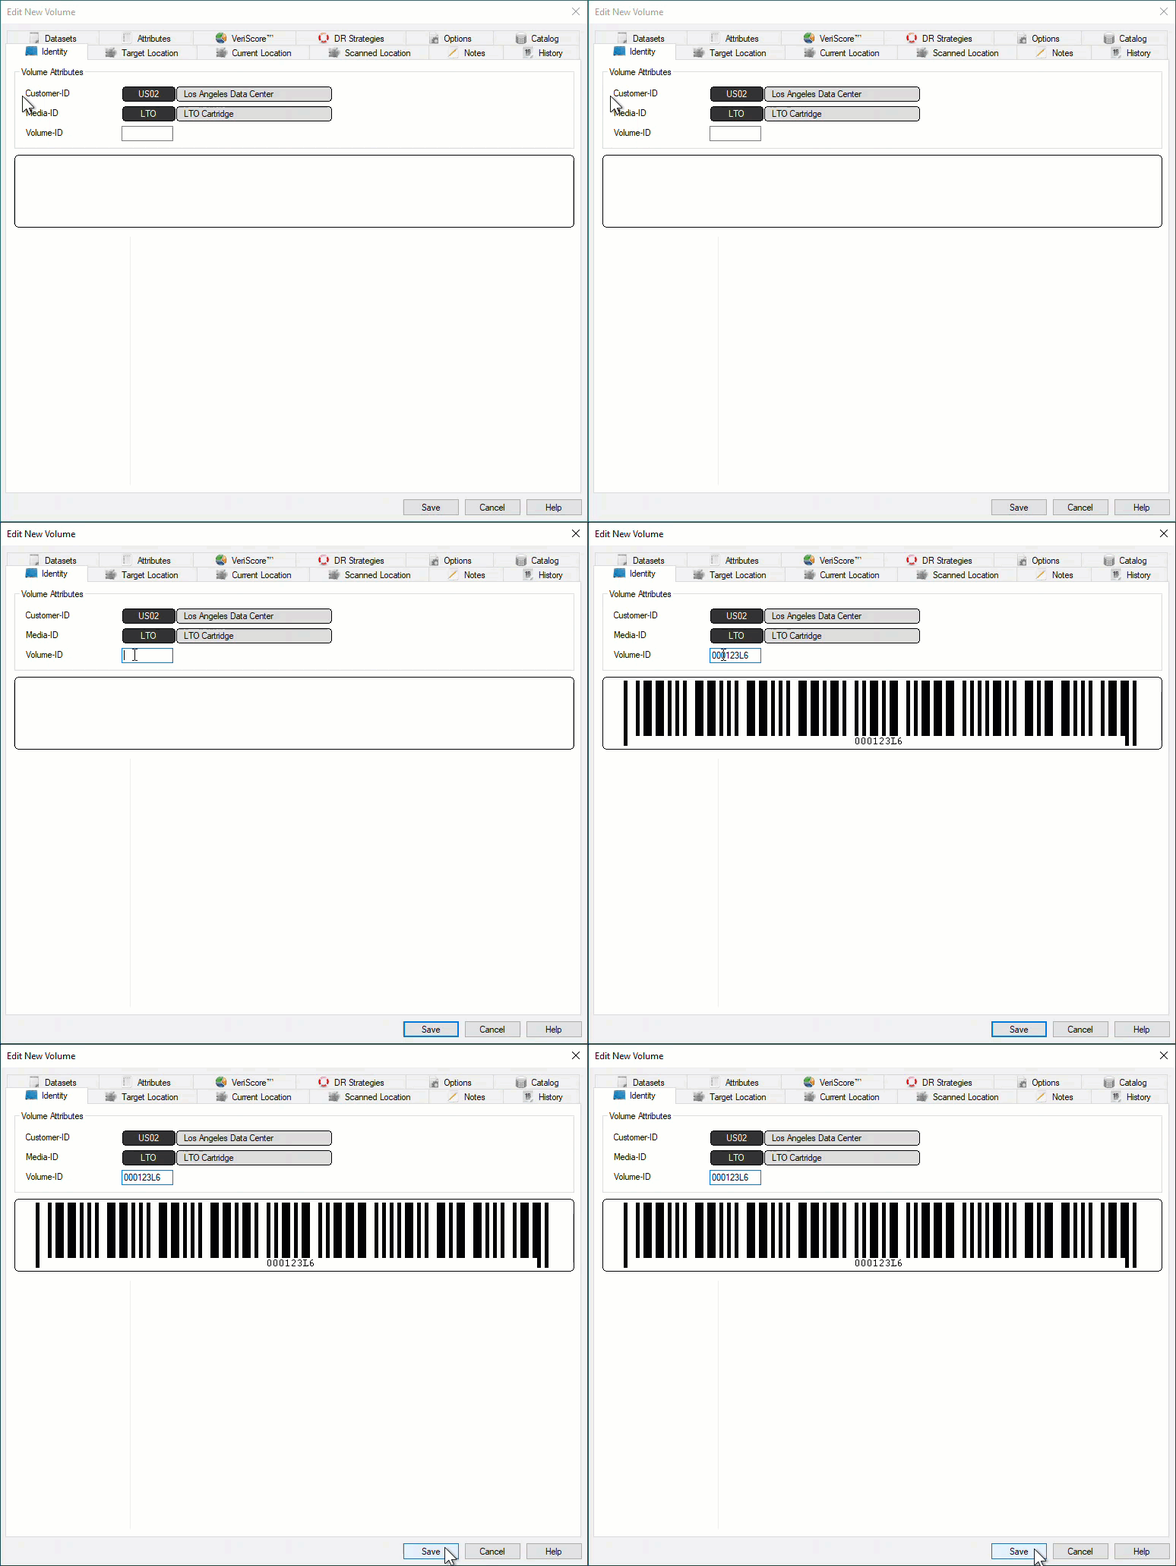
This will open the Edit New Volume window.
In the Edit New Volume window enter the Volume-ID of the new Volume to be added. Volume-ID's must be unique within a Customer/Media Type scope and must be between 1 and 10 alphanumeric characters long.
Click Save to add Volume.
Adding Multiple Volumes
Adding multiple Volumes can be accomplished using several different methods.
- Scanning Volumes using the
Scan To Addprocess, best suited to adding small groups of Volumes with a scanner, keyboard or GazillaByte CloudScan App. - Pasting in Volumes from Windows Clipboard or file, best suited to adding new Volumes from emailed or file lists of Volume-ID's.
- Importing Volumes from Excel file, best suited to adding Volumes and additional data from Excel sheets.
- Creating Volumes using the
Volume-ID Buildingtool, . - Importing Volumes from your Backup Software with TMSS10Sync.
Scan To Add
To add Volumes to your default Repository (or Initial Repository if no default is set) right-click in the Volume List, navigate to Special Operations, and select Scan → Scan to Add Volumes to open the Scan In window.
To add Volumes to a Repository other than your default, right-click the required Repository and select Scan → To Add and scan Volumes to be added.
Scan your Volume Barcodes using a Barcode scanner to add Volumes to TapeTrack.
Deleting Volumes
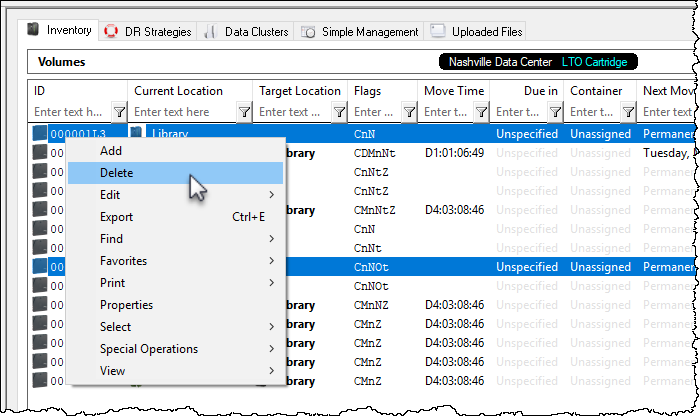
Select the required Volume , or range of Volumes from the inventory window you want to delete.
Right-click highlighted Volumes and select Delete, or press Delete (DEL) on the keyboard.
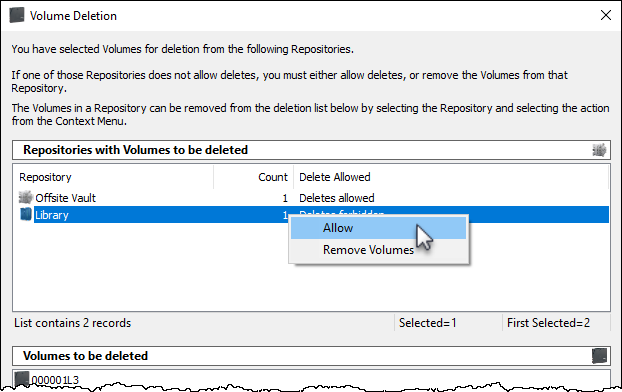
The Volume Deletion window will display the Repository where the Volumes to be deleted are located in the top pane and Volume-ID's in the lower pane.
Each row in the top pane will, along with the Repository Description (or ID), list the number of Volumes for deletion and the delete status of either Deletes Allowed or Deletes Forbidden.
For any Repository listed with a status of Deletes Forbidden you must either:
- Right-clicking the row and selecting
Allowto change status to Deletes Allowed - Right-clicking the row and selecting
Removeto remove the Volumes before deletion of any Volumes located in a Repository with Deletes Allowed status.
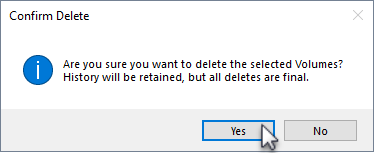
Click Delete Volumes and Yes to the delete confirmation to delete the Volumes.
As deleting Volumes is permanent, clicking No to the delete confirmation is your last opportunity to cancel the delete function.
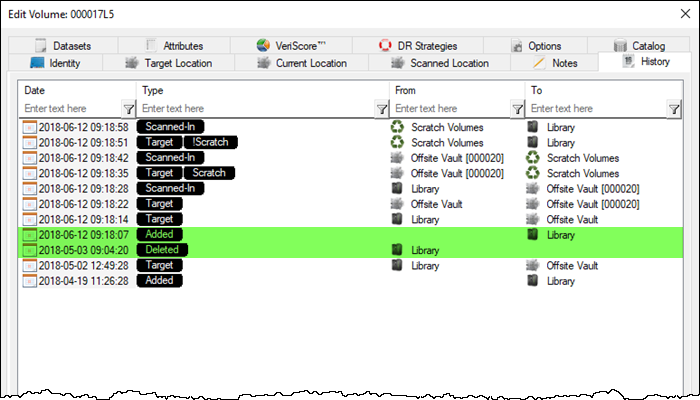
When a Volume is deleted its historical entries remain in the database. If a deleted Volume is added back into the database, all previous history records including when deleted and added back, are listed under that Volumes History tab.
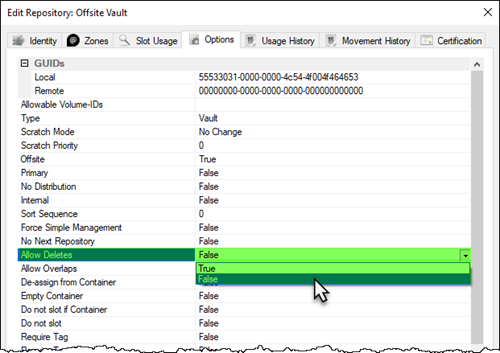
As setting Repository to Allow Deletes alters the properties of that Repository, if required, reset the Repository to no deletes by right-clicking the required Repository, selecting Properties and change the Allow Deletes field in the Options tab to false.
See Special Operations Menu for further information.

