Table of Contents
Moving Volumes Automatically By Move Date
TapeTrack, using Server Utilities, can automatically move Volumes to their Next Repository when the Move Date comes within the scope set.
Move dates can be set via TMSS10Sync, Simple Management Rules or manually via TapeMaster.
Moving a Volume automatically in TapeTrack is intentionally a multistep process. This allows you to control both the timing of the individual steps as well as what Volumes are moved in each step, for example you may want to move Volumes that are going offsite once or twice a week, but move Volumes from your racking to the library daily. Or you may want to expire all Volumes offsite daily but only place them into a move once a week.
Prerequisites
Server Utilities
TapeTrack Server Utilities must be installed on the computer that will run the scheduled commands, the Server Utilities are installed alongside the Framework Server, but can be installed on any computer that has access to the Framework Server installation.
To check if the Server Utilities are installed on your computer you can either:
- Open a command prompt and run the command
TMSS10ExpireByDate, if no parameters are used it will simply run the program and report the missing parameters, no database updates will be made, if this is displayed, the Server Utilities are installed. If you get 'TMSS10ExpireByDate' is not recognized as an internal or external command, operable program or batch file, the Server Utilities are not installed or registered. You can download the executable from here. - Check the installation directory, the default locations is C:\Program Files\TapeTrack\TapeTrack Server Utilities
- From a command prompt, run the command
setand check the Path variable for the value “C:\Program Files\TapeTrack\TapeTrack Server Utilities\bin\tapetrack”;. If your installion is in another location, look for the end of the variable location to match “TapeTrack\TapeTrack Server Utilities\bin\tapetrack”.
Next Repository Setting
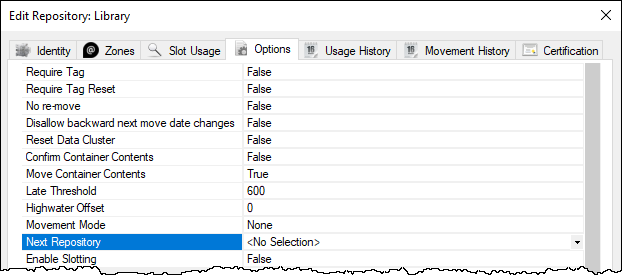
All Repositories that are included in the scope of the Volumes that will be targeted for automated movement must have a Next Repository value set in their Properties tab in TapeMaster. This is the Repository that the Volumes will be placed in a move to.
To check or set the Next Repository in the Repository options, right-click the required Repository and select properties or double click the Repository and select the options tab.
See Next Repository Options for more information.
Next Repository is set to <No Selection> the Volumes will have a p Flag assigned during the following process but will not be placed into a move.
Identifying Volumes To Move
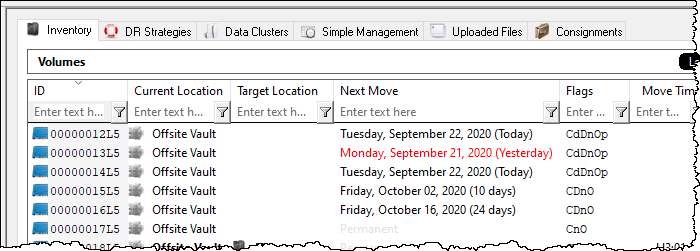
Executing TMSS10ExpireByDate will identify all Volumes within the scope set that qualify to be moved. Any qualifying Volumes will have a p Flag added.
Example Execution
Identify all Volumes for Customer US01 with a Next Move Date range of 100 days ago until today.
Using the date range -100 to today means as log as you execute the program more than once every 100 days, all Volumes with a Next Move Date up to the day it is run will have a p Flag added. The date range can be set to any range required, as well as into the future allowing you to place Volumes into a move status that will compensate for return time delays. This means if it takes two days for your offsite provider to action the physical return of Volumes from the time they are recalled, expiring the Volumes two days in advance so they are shipped on the required day, saving the added expense of unnecessary storage costs and faster reuse of Scratch Volumes.
TMSS10ExpireByDate -S username:-password@localhost -V "US01.*.*" -R "*-100:*"
See TMSS10ExpireByDate for more detailed information.
Moving Volumes
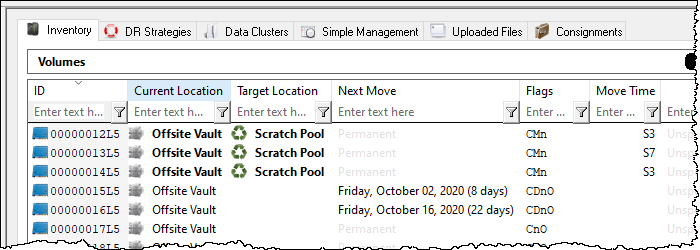
Executing TMSS10MovePending will identify all Volumes, within the scope set, and place them in a move to that Repository's Next Repository.
See Next Repository Options for more information.
Once the Volumes are placed in a Move Status, the Next Move Date is reset to Permanent (no Next Move Date). If you require a Next Move Date to be set, this can be done via Simple Management Rules based off Data Cluster Assignment or Repository values.
Example Execution
Move all Volumes for Customer-ID US01, Media-ID LTO.
TMSS10MovePending -S user:-password@localhost -V "US01.LTO.*"
See TMSS10MovePending for more detailed information.
Creating Move Lists
While TMSS10MovePending will give you a report of all Volumes that were placed into a move when executed, TMSS10MoveList gives you the ability to produce a movement report that contains all Volumes currently in a move status. This can be useful to supply to Library staff as picking/packing list at the end of the week rather than supplying daily lists or manually combining separate reports.
Using TMSS10MoveList you can create an output file (text, Excel, CSV or PDF) of all Volumes that are currently in a Move status.
These reports can be filtered to only include the relevant information you require. They can be filtered by:
If required you can also remove columns from the report that are not required, creating a cleaner report with only relevant information required, eg a picking list for Tape staff only may only require the Volume-ID and location.
Example Execution
Report all LTO Volumes for Customer US01, moving from Repository OFFS to Repository SCRA.
TMSS10MoveList -S user:-password@server -V US01.LTO.* -C OFFS -T SCRA
See TMSS10MoveList for more detailed information.


