This is an old revision of the document!
Table of Contents
Scanning-In
Overview
The TapeTrack Lite Scan In function allows you scan in volumes in a move status to the current repository.
TapeTrack Lite will only allow you to initiate the Scan-In task if there are tapes currently in an Incoming status.
Video Walkthrough
Video coming soon…..
Steps
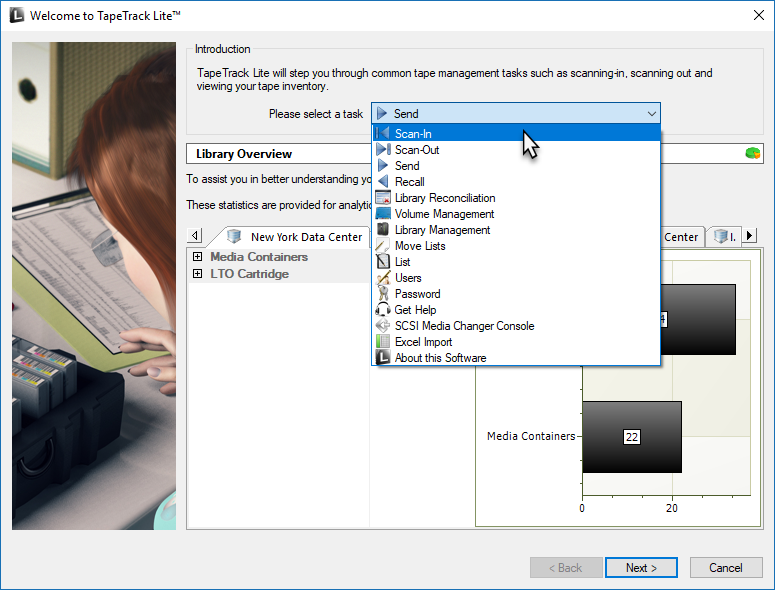
Select Scan In
- Select Scan In from the Library Management Tasks drop-down menu.
- Once you have selected the required task, press Next to progress to the next screen.
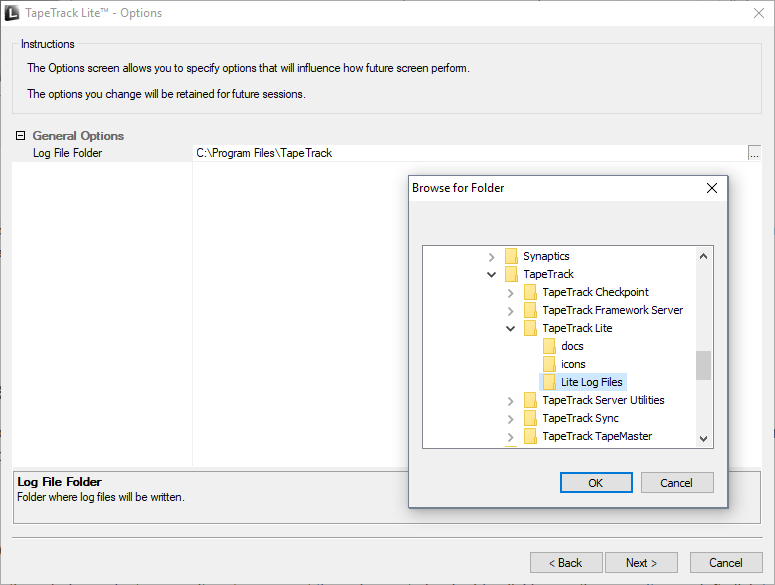
Options
This will open the Options window. If required you can set the location for the log files to be written to, or leave the default. To change the default directory, click in the right of the Log File Folder and click on the more options button (…) and select the preferred directory.
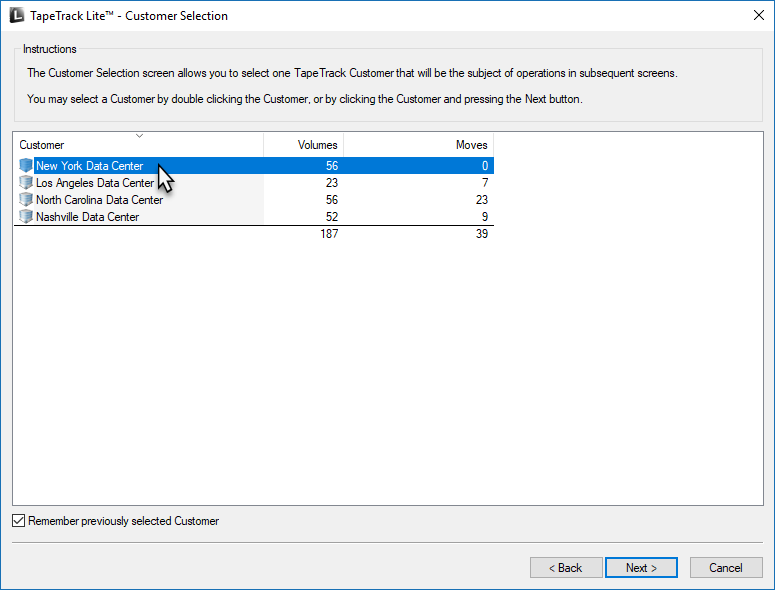
Customer Selection
Select the account or customer that you want to manage tapes for by double-clicking the customer-ID or left clicking the customer-ID and clicking Next at the bottom of the page to continue.
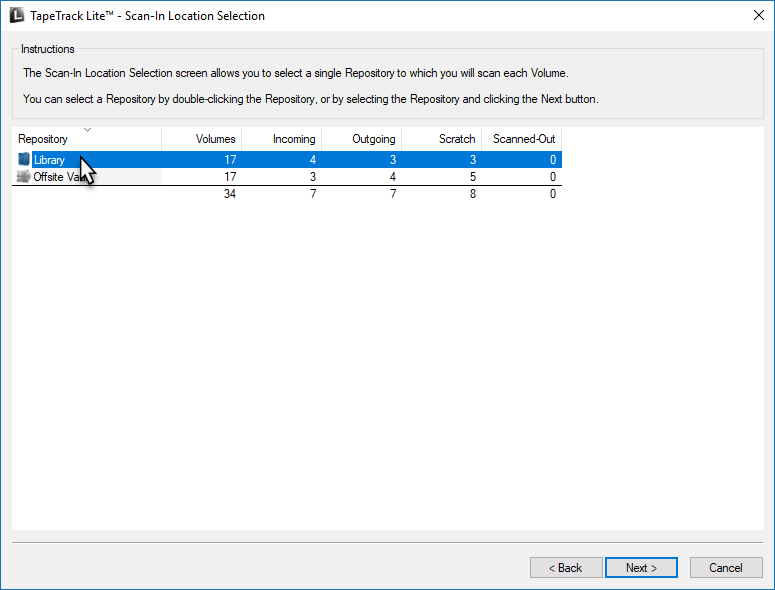
Scan In Location
In the Scan-In Location window select a repository to scan in the volumes to by double clicking on the repository or left click to select repository and click Next to proceed
Scan In Volumes
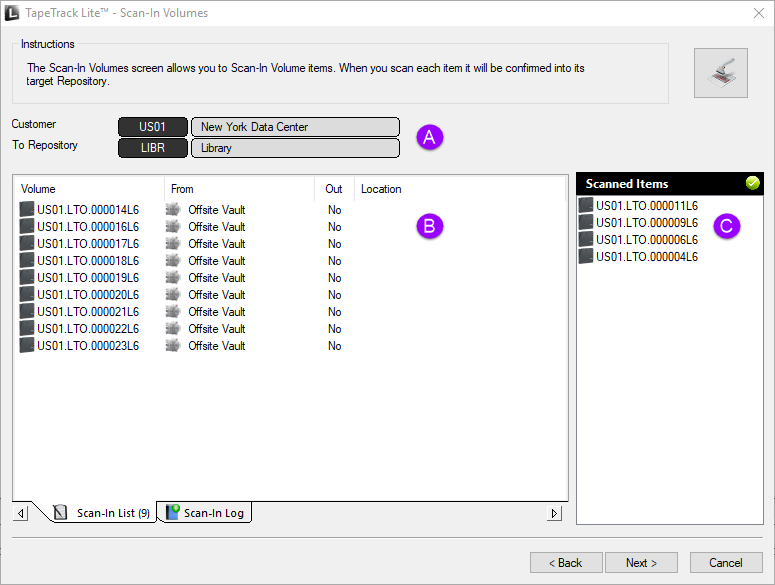
This opens the Scan-In Volumes window and the input window. The Scan-In Volume window displays
- A Customer ID and description, Repository ID and description where volumes are being scanned into.
- B The volumes to be scanned in.
- C Volumes scanned in.
Scan in the volumes using your preferred scanning method
When all volumes are scanned in close Scan To Add Volumes window by clicking X at top right of window.
{image}
Barcode Scanner
- Open Volume Scan-In window by clicking on scan-in button at the top right of window. Use barcode scanner to scan volumes from the Scan-In list or type in volume barcode/s with keyboard. Correct volumes scanned in will display in the lower window with an audible beep and a message “Request OK”. Incorrect volumes will display in the lower window with an audible warning “The volume scanned was not in the list” and message displayed in red Scanned Volume is not in the list. Incorrect volumes scanned will not be entered into TapeTrack.
{image}
Keyboard Input
To scan in volumes select one of the following methods
- Select volumes from list in Scan-In Volumes window by left clicking volume-ID. Multiple volumes can be selected by using shift + click and/or control + click. Right click selected volume/s and select scan. Volumes can also be scanned in by pressing the spacebar after selecting the volumes (this method requires careful and accurate checking of the barcode).
{image}
Windows Clipboard
Open Volume Scan-In window by clicking on scan-in button at the top right of window. Copy the volume-ID/s to windows clipboard from a text file, csv file email or other accessible file format. Click the paste button at the top of the window and volume-ID/s will be scanned in.
{image}
File Input
- Open Volume Scan-In window by clicking on scan-in button at the top right of window. Open the file containing the volumes to be scanned in by clicking on the file input button at the top of the window. Locate and select the file in the browser and click open. Volumes will be loaded from the file and scanned in.
Once all volumes have been scanned in, close the Volume Scan-In window by clicking the X in the top right of the window.
{image}
Click next on the Scan-In Volumes window to continue.
Complete
This will bring up the Complete window, from here you can
- Click
Finish,CancelorXto exit TapeTrack Lite - Click
Backto return to start menu and select another task - Click
View Log Fileto view the log - Click
Print Log Fileto print out log file for further reference - Click
About This Softwareto view product and support (email, phone & website) information

