Table of Contents
Volume Management
The Volume Management task allows you to manage Volume data by editing Next Move Dates as well as Volume Attributes.
Managing Volumes Process
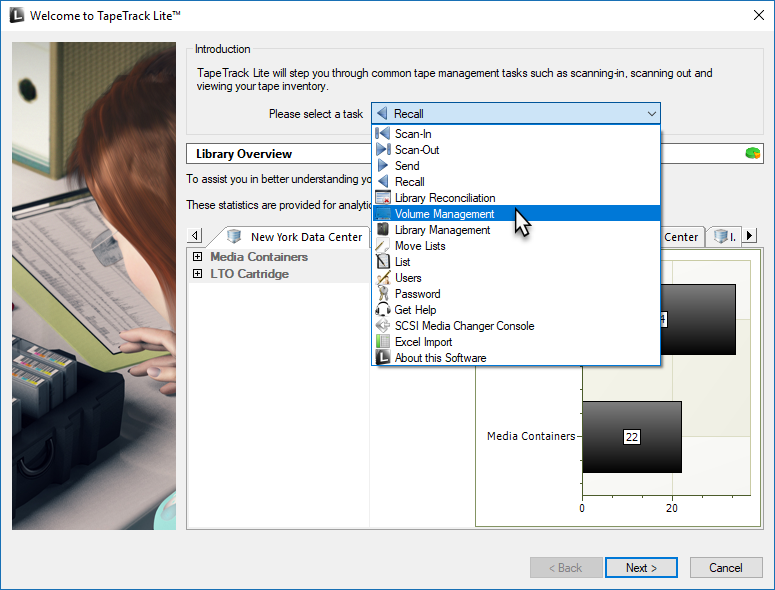
Select Managing Volumes
Options
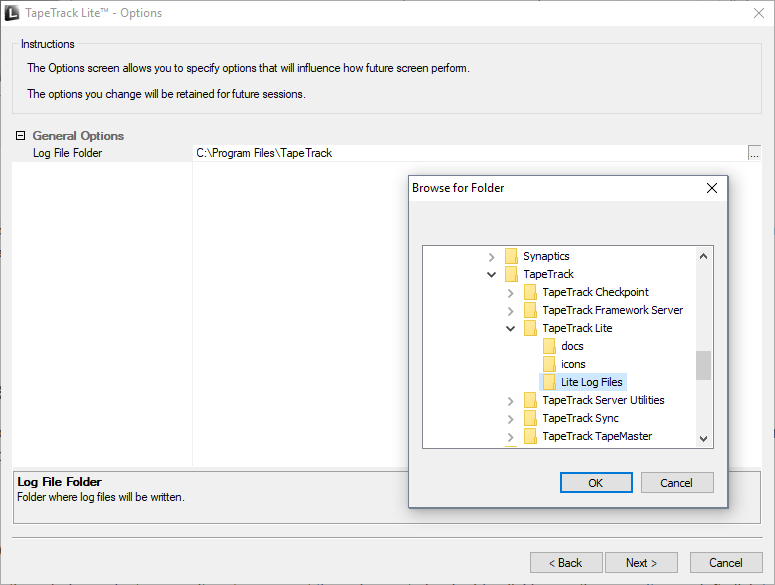
This will open the Options window. If required you can set the location for the log files to be written to, or leave the default.
To change the default directory, click in the field to the right of the Log File Folder and click on the (…) button and select directory.
Click Next to continue.
Selecting a Customer
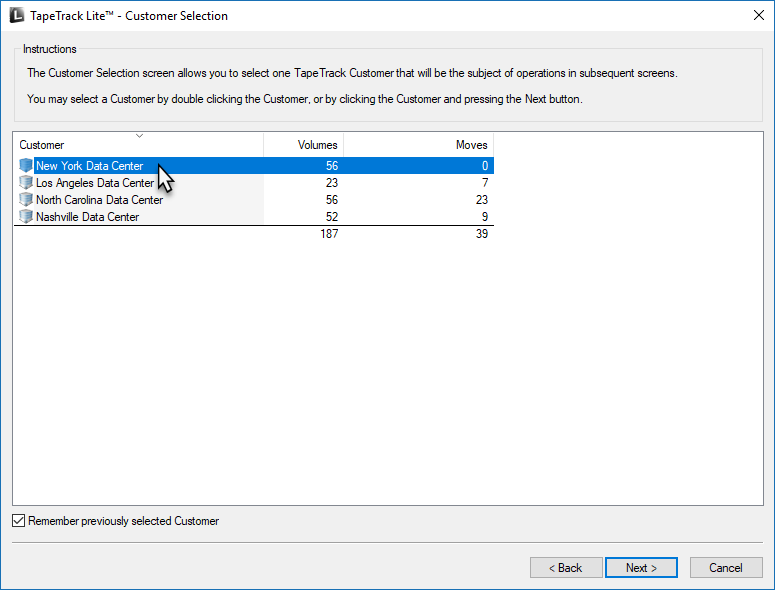
From the Customer Selection window select a Customer that will be the subject of operations in subsequent screens by double-clicking a Customer or selecting a Customer and clicking Next.
Remember previously selected Customer will retain the currently selected Customer for future Lite functions.
This can be removed at any time by unchecking Remember previously selected Customer
Managing Media Types
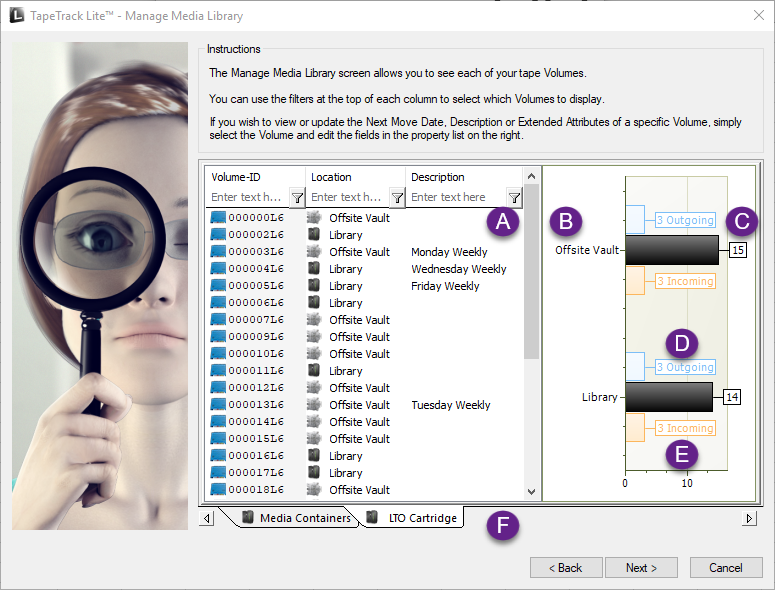
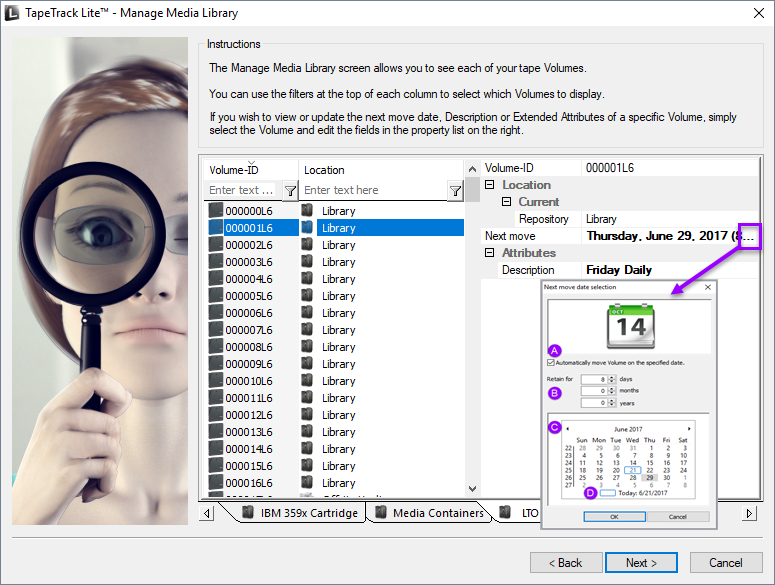
The Manage Media Library window displays each of the Volumes separated into tabs by Media type. Each volume is displayed with its Volume-ID and Current Repository. The right of the window displays, in graphical format, the different Repositories, the total number of Volumes as well as the Volumes flagged to move in or out of that Repository.
- A Volumes-ID & Repository
- B Volumes by Repository
- C Total Volumes in Repository
- D Volumes moving out
- E Volumes moving in
- F Media Type Tabs
To manage Media, select a Volume by clicking on the Volume-ID.
When a Volume is selected the fields Next Move and Attributes can be edited.
To edit the Next Move Date click the button (…) in the Next Move text box to open up the Next Move Date Selector. Select the required Move Date
The Next Move Date can be set by selecting the required number of years, months and days in top input boxes or by scrolling through the calendar using the scroll arrows to go forward or backwards to select a specific date.
Clicking on the month or year displayed between the scroll arrows will alter scope from one month to one year to 12 years to 120 years to allow quick acquisition of the required date.
Clicking on a displayed selection will zoom the scope inwards by incrementing steps until your back at a one month display. When displaying one month at a time, clicking on Today at the bottom of the calendar will return you to today’s date.
Click OK to close the Next Move Date Selection window.
To edit the Attribute/s click in the field to the right of the Attribute (default Description) and enter required value/s.
Notes
- A Click the Automatically move Volume on the specified date checkbox to open up the Calendar Input.
- B Input time offset to automatically select Move Date.
- C Scroll and select to manually set Move Date.
- D Click checkbox to set today as the Move Date.
Right-Click Options
Right-clicking in the Inventory window:
Change AttributeDescription: Sets Attribute to Description (Attribute 0).- Other Attributes set in TapeMaster.
ScanTo Add: Opens Scan window to scan in New Volumes.
Copy ColumnVolume-ID: Copies Volume-ID values to windows clipboard.Location: Copies Volume-ID values to windows clipboard.Displayed Attribute: Copies displayed Attribute (default Description) values to windows clipboard.
Export (Ctrl+E): Exports selected Volumes to file.FiltersClear All (Ctrl+F):Restore (Ctrl+L):Save (Ctrl+K):
Print (Ctrl+P): Prints selected Volumes to PDF.ScanTo Add: Opens Scan window to Scan in new Volumes.
SelectViewIcon (Ctrl+1): Set inventory view to Icons.List (Ctrl+2): Set inventory view to List.Report (Ctrl+3): Set inventory view to Report.Small Icon (Ctrl+4): Set inventory view to Small Icons.
When all Volume alterations are complete click Next.
Complete
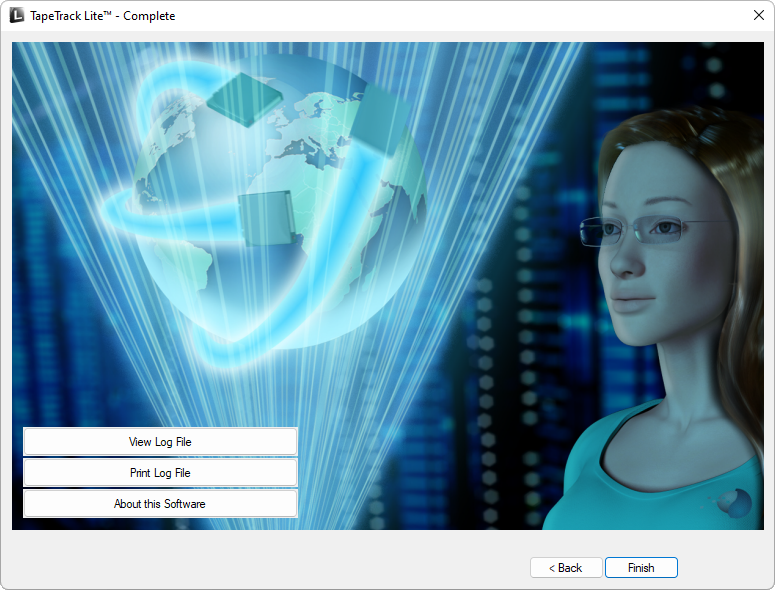
This will bring up the Complete window, from here you can:
- Click
View Log Fileto view the log file of the last completed process.. - Click
Print Log Fileto save a PDF of the log file to print from your PDF viewer. - Click
About this Softwareto view product and support (email, phone & website) information. - Click
Backbutton to return to start menu and select another task. - Click
Finishbutton orXat the top right of the window to exit TapeTrack Lite.

